Archives

Simple Roast Veg


Print Recipe
Simple Roast Veg
You will need: chopping board & knife; baking tray; large pan; pot; cooking utensils NOTE: The smaller you cut you veg, the quicker they will cook.
Prep Time 15 minutes
Cook Time 0
Passive Time 30 minutes (while baking)
Servings
servings
Ingredients
Prep Time 15 minutes
Cook Time 0
Passive Time 30 minutes (while baking)
Servings
servings
Ingredients
Instructions
  1. Preheat oven to 180°C / 350°F
  2. Note: I usually leave the skin on all veggies for cooking/baking - you can eat most of them or can be easily removed once on someone’s plate. Most veggies have a concentration of nutrients in or just beneath the skin. Leaving skins on also cuts down on prep time!
  3. Wash & chop Sweet Potatoes and Potatoes into ½ inch cubes. Add ½ the Oil to the baking tray (be sure to mix and coat the veg with oil) and bake until soft (approx. 15 min)
  4. Wash & chop Pumpkin/Butternut Squash, Onion, Capsicums / Bell Peppers into ½ inch cubes, add to the tray with the remaining ingredients (be sure to mix everything together well) and cook for a further 15min until veg is cooked through and potatoes are a little crispy.
Recipe Notes

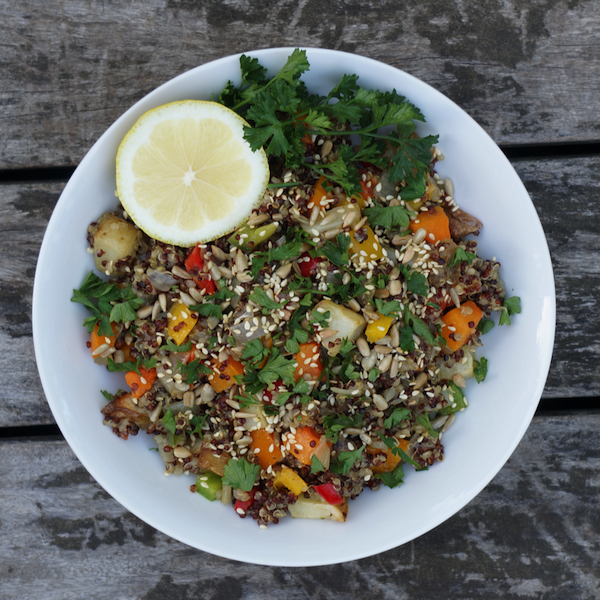
*Top with a squeeze of fresh Lemon / Lime, a drizzle of cold-pressed Olive Oil or Coconut Oil, and toasted Nuts & Seeds.

*Add shaved Broccoli flowers (use a knife to shave these from the head of a Broccoli), fresh Avocado and a little crumbed Goat Cheese Feta.

* I usually like to serve as a complete meal with an addition of slices of Avocado and a side of raw Sauerkraut!

Clean Eating Tips to remember:
*Stainless Steel and Ceramic or Glass Cookware are the safest materials to cook in with the least amount of leaching into food when heat is applied. A high quality set of cookware is essential and will last a lifetime - and a longer lifetime at that because of it. 

*Stainless Steel, Food-grade Silicon or Wooden Cooking Utensils are the safest materials to cook with with the least amount of leaching into food when heat is applied. 

*My ½ Toasted / ½ Raw Philosophy for Nuts & Seeds:
Toasted - for flavour
Raw - for nutritional value

*Olive Oil - it’s best not to cook with Olive Oil, always consume raw. Best to drizzle Olive Oil over food just before serving. It’s better to avoid cooking with Olive Oil as it is a delicate oil and is damaged and becomes harmful to ingest when heated.

*Better oils for cooking with have a higher smoke point/less free radical forming when heated— Coconut Oil, Macadamia Oil and Grapeseed Oil

Sesame & Cashew Nut Stir-Fry


Print Recipe
Sesame & Cashew Nut Stir-Fry
You will need: chopping board & knife; blender; stainless steel wok or flying pan; ceramic/glass mixing bowl; ceramic/glass container or jar w/ lid for storing.
Prep Time 15 - 20 minutes
Cook Time 5 minutes
Passive Time 0
Servings
servings
Ingredients
Stir-fry Sauce Thickener
Your choice of Stir-Fry Veg
Toppings
Prep Time 15 - 20 minutes
Cook Time 5 minutes
Passive Time 0
Servings
servings
Ingredients
Stir-fry Sauce Thickener
Your choice of Stir-Fry Veg
Toppings
Instructions
  1. Grate Ginger and finely chop Garlic and Chillies and then combine with the Coconut Aminos / Tamari (Soy Sauce alternative), Vinegar, and Rice Malt Syrup. Blend until smooth. Pour into a sealable glass jar and set aside.
  2. Mix the Veggie Stock and Potato Starch together and set aside.
  3. Chop the Cashew Nuts, then slightly dry toast half of the Sesame Seeds & Cashew Nuts in a pan. Allow to cool before adding back in with the un-toasted nuts. Set aside.
  4. Chop the Spring Onions and Red Onion and add half the Sesame Seeds & Cashew Nuts mix in a pan, and cook together for 2-3 minutes with a little Grapeseed Oil until onions are slightly browned. Set aside.
  5. Chop the remainder of the stir-fry veggies of your choice and combine/mix up together in a large mixing bowl.
  6. Stir-fry Sauce portion per person - mix 2 tbsp of the Stir-Fry sauce together with 1 tbsp of Veggie Stock (with Potato Flour/Starch).
  7. Cooking - If you don’t have a large wok, for best results, I prefer to cook each person’s dish separately in a stainless steel pan to cook veg quick while still keeping them crispy.
Add a little oil to the wok/pan on high heat and wait until it heats up (1-2 min). Then quickly add Stir-fry Veg, cooked Onion and Stir-fry Sauce, stirring/flipping in the pan often. Cook for 2-3 minutes. Remove from heat before veg starts to get soft.
  8. Serve and drizzle with Sesame Seed Oil and top with the remaining Seed & Nut mix. Top with your choice of toppings.
Recipe Notes

* I make big batches of the Stir-fry sauce at a time. It keeps well for weeks in a sealed jar in the fridge. Basically you can use any veggies, and cook with the sauce to quickly whip up an easy Stir Fry dinner on those busy weekdays. 

*Soy Sauce alternatives - soy is best avoided for many reasons. Most soy is GMO. Even organic soy can cause issues. Also, many soy products have wheat/gluten which adds to the list of reasons to avoid it if you can. 1st best choice is Coconut Aminos if you can get it. 2nd best choice would be Liquid Aminos or Tamari which are wheat-free/gluten-free soy sauces.

*Sesame Seed Oil - buy good quality oil and store in the fridge. It is a fragile oil and can rancid quite quickly. For this reason it is best never to cook with fragile oils like Sesame Seed Oil as the heat quickly produces free-radicals and reduces the benefits of the oil. Use it as a topping just before serving to give a lovely subtle Sesame flavour to your stir-fry.

Clean Eating Tips to remember:
*Stainless Steel and Ceramic or Glass Cookware are the safest materials to cook in with the least amount of leaching into food when heat is applied. A high quality set of cookware is essential and will last a lifetime - and a longer lifetime at that because of it. 

*Stainless Steel, Food-grade Silicon or Wooden Cooking Utensils are the safest materials to cook with with the least amount of leaching into food when heat is applied. 

*My ½ Toasted / ½ Raw Philosophy for Nuts & Seeds:
Toasted - for flavour
Raw - for nutritional value

*Olive Oil - it’s best not to cook with Olive Oil, always consume raw. Best to drizzle Olive Oil over food just before serving. It’s better to avoid cooking with Olive Oil as it is a delicate oil and is damaged and becomes harmful to ingest when heated.

*Better oils for cooking with have a higher smoke point/less free radical forming when heated— Coconut Oil, Macadamia Oil and Grapeseed Oil

Thai Basil & Chilli Veg Stir-Fry


Print Recipe
Thai Basil & Chilli Veg Stir-Fry
You will need: chopping board & knife; blender; stainless steel wok or flying pan; ceramic/glass mixing bowl; ceramic/glass container or jar w/ lid for storing.
Prep Time 15 - 20 minutes
Cook Time 5 minutes
Passive Time 0
Servings
servings
Ingredients
Stir-fry Sauce Thickener
Your choice of Stir-Fry Veg
Toppings
Prep Time 15 - 20 minutes
Cook Time 5 minutes
Passive Time 0
Servings
servings
Ingredients
Stir-fry Sauce Thickener
Your choice of Stir-Fry Veg
Toppings
Instructions
  1. Grate Ginger and finely chop Garlic and Chillies and then combine with the Coconut Aminos / Tamari (Soy Sauce alternative), Oil and Coconut Sugar. Blend until smooth. Pour into a sealable glass jar and set aside. [Keep the fresh Thai Basil separate from sauce]
  2. Mix the Veggie Stock and Potato Starch together and set aside.
  3. Chop the Cashew Nuts and slightly dry toast half of the Nuts in a pan. Allow to cool before adding back in with the un-toasted nuts. Set aside.
  4. Chop the Spring Onions and Red Onion and add half the Cashew Nuts in a pan, and cook together for 2-3 minutes with a little Grapeseed Oil until onions are slightly browned. Set aside.
  5. Chop the remainder of the stir-fry veggies of your choice and combine/mix up together in a large mixing bowl.
  6. Stir-fry Sauce portion per person - mix 2 tbsp of the Stir-Fry sauce together with 1 tbsp of Veggie Stock (with Potato Flour/Starch). Plus, ¼ portion of the fresh chopped Thai Basil leaves.
  7. Cooking - If you don’t have a large wok, for best results, I prefer to cook each person’s dish separately in a stainless steel pan to cook veg quick while still keeping them crispy.
Add a little Grapeseed or Coconut Oil to the wok/pan on high heat and wait until it heats up (1-2 min). Then quickly add Stir-fry Veg, cooked Onion and Stir-fry Sauce portion, stirring/flipping in the pan often. Cook for 2-3 minutes. Remove from heat before veg starts to get soft
  8. Serve and drizzle with the remaining Nuts and top with your choice of toppings.
Recipe Notes

* I make big batches of the Stir-fry sauce at a time. It keeps well for weeks in a sealed jar in the fridge. Basically you can use any veggies, and cook with the sauce to quickly whip up an easy Stir Fry dinner on those busy weekdays. 

*Soy Sauce alternatives - soy is best avoided for many reasons. Most soy is GMO. Even organic soy can cause issues. Also, many soy products have wheat/gluten which adds to the list of reasons to avoid it if you can. 1st best choice is Coconut Aminos if you can get it. 2nd best choice would be Liquid Aminos or Tamari which are wheat-free/gluten-free soy sauces.

Clean Eating Tips to remember:
*Stainless Steel and Ceramic or Glass Cookware are the safest materials to cook in with the least amount of leaching into food when heat is applied. A high quality set of cookware is essential and will last a lifetime - and a longer lifetime at that because of it. 

*Stainless Steel, Food-grade Silicon or Wooden Cooking Utensils are the safest materials to cook with with the least amount of leaching into food when heat is applied. 

*My ½ Toasted / ½ Raw Philosophy for Nuts & Seeds:
Toasted - for flavour
Raw - for nutritional value

*Olive Oil - it’s best not to cook with Olive Oil, always consume raw. Best to drizzle Olive Oil over food just before serving. It’s better to avoid cooking with Olive Oil as it is a delicate oil and is damaged and becomes harmful to ingest when heated.

*Better oils for cooking with have a higher smoke point/less free radical forming when heated— Coconut Oil, Macadamia Oil and Grapeseed Oil

Veg Lettuce Cups with Thai Dipping Sauces


Print Recipe
Veg Lettuce Cups with Thai Dipping Sauces
You will need: chopping board & knife; blender; ceramic/glass containers or jars w/ lid for storing. NOTE: Recipe time is if you are only making one sauce. Please allow 5 - 10 minutes to make each additional sauce.
Prep Time 15 minutes
Cook Time 0
Passive Time 0
Servings
servings
Ingredients
Thai Dipping Sauce
Peanut Dipping Sauce
Ginger & Coriander Sauce
Thai Crystal / Nahm Jeem Gratiem Sauce
Sweet Chilli Sauce
Prep Time 15 minutes
Cook Time 0
Passive Time 0
Servings
servings
Ingredients
Thai Dipping Sauce
Peanut Dipping Sauce
Ginger & Coriander Sauce
Thai Crystal / Nahm Jeem Gratiem Sauce
Sweet Chilli Sauce
Instructions
  1. Chop your choice of veg into thin julienne slices.
  2. Thai Dipping Sauce: Blend everything together except chopped Spring Onion / Scallion - add them last. Set aside.
  3. Peanut Dipping Sauce: Blend everything together. Set aside.
  4. Ginger & Coriander Sauce: Blend everything together. Set aside.
  5. Thai Crystal Sauce: Blend everything together except the Chilli Flakes - add them last. Set aside.
  6. Sweet Chilli Sauce: Blend everything together except the Chilli Flakes - add them last. Set aside.
  7. Add water to one of your large round plates and submerge a rice paper roll sheet. Once soft, remove from water and lay out on the other plate.
  8. Add your choice of veg to the Lettuce Cups and serve with dipping sauces on the side.
Recipe Notes

* I make big batches of the sauces. They keep well for weeks in a sealed jar in the fridge. Basically you can use any veggies, and easily and quickly whip up rice paper rolls and serve with either or  both of the dipping sauces.

*Soy Sauce alternatives - soy is best avoided for many reasons. Most soy is GMO. Even organic soy can cause issues. Also, many soy products have wheat/gluten which adds to the list of reasons to avoid it if you can. 1st best choice is Coconut Aminos if you can get it. 2nd best choice would be Liquid Aminos or Tamari which are wheat-free/gluten-free soy sauces.

*Sesame Seed Oil - buy good quality oil and store in the fridge. It is a fragile oil and can rancid quite quickly. For this reason it is best never to cook with fragile oils like Sesame Seed Oil as the heat quickly produces free-radicals and reduces the benefits of the oil. Use it as a topping just before serving to give a lovely subtle Sesame flavour to your stir-fry.

Clean Eating Tips to remember:

*My ½ Toasted / ½ Raw Philosophy for Nuts & Seeds:
Toasted - for flavour
Raw - for nutritional value

Veg Rice Paper Rolls with Thai & Peanut Dipping Sauces


Print Recipe
Veg Rice Paper Rolls with Thai & Peanut Dipping Sauces
You will need: chopping board & knife; blender; 2 large round plates; ceramic/glass containers or jars w/ lid for storing;
Prep Time 15 minutes
Cook Time 0
Passive Time 0
Servings
servings
Ingredients
Thai Dipping Sauce
Peanut Dipping Sauce
Prep Time 15 minutes
Cook Time 0
Passive Time 0
Servings
servings
Ingredients
Thai Dipping Sauce
Peanut Dipping Sauce
Instructions
  1. Chop your choice of veg into thin julienne slices.
  2. Thai Dipping Sauce: Blend everything together except chopped Spring Onion / Scallion - add them last. Set aside.
  3. Peanut Dipping Sauce: Blend everything together.
  4. Add water to one of your large round plates and submerge a rice paper roll sheet. Once soft, remove from water and lay out on the other plate.
  5. Add your choice of veg to one edge of the rice paper roll. Fold sides in and roll from veg filled side to the other. Serve with dipping sauces on the side.
Recipe Notes

* I make big batches of the sauces. They keep well for weeks in a sealed jar in the fridge. Basically you can use any veggies, and easily and quickly whip up rice paper rolls and serve with either or  both of the dipping sauces.

*Soy Sauce alternatives - soy is best avoided for many reasons. Most soy is GMO. Even organic soy can cause issues. Also, many soy products have wheat/gluten which adds to the list of reasons to avoid it if you can. 1st best choice is Coconut Aminos if you can get it. 2nd best choice would be Liquid Aminos or Tamari which are wheat-free/gluten-free soy sauces.

*Sesame Seed Oil - buy good quality oil and store in the fridge. It is a fragile oil and can rancid quite quickly. For this reason it is best never to cook with fragile oils like Sesame Seed Oil as the heat quickly produces free-radicals and reduces the benefits of the oil. Use it as a topping just before serving to give a lovely subtle Sesame flavour to your stir-fry.

Clean Eating Tips to remember:

*My ½ Toasted / ½ Raw Philosophy for Nuts & Seeds:
Toasted - for flavour
Raw - for nutritional value

Veggie Chilli Bowl

Wheat-free; Gluten-free; Dairy-free; refined Sugar-free; Vegetarian; Vegan; Paleo/Banting

Print Recipe
Veggie Chilli Bowl
You will need: chopping board & knife; blender; stainless steel pots; glass jars w/ lid for storing;
Prep Time 15 minutes
Cook Time 30 minutes
Passive Time 0
Servings
servings
Ingredients
Veggie Chilli Bowl
Mexican Seasoning Spice Mix
Prep Time 15 minutes
Cook Time 30 minutes
Passive Time 0
Servings
servings
Ingredients
Veggie Chilli Bowl
Mexican Seasoning Spice Mix
Instructions
  1. Mexican Seasoning Spice Mix: Blend all spices together and set aside.
  2. Add Coconut Oil to a large pot on high heat. Roughly chop Onion, add to the pot and cook until soft.
  3. Finely chop Chilli with the seeds and stir into the pot.
  4. Roughly chop the Capsicums / Bell Peppers and stir into the pot.
  5. Finely chop the Mushroom and grate the Carrot and stir into the pot.
  6. Finely chop the Garlic and add this, plus 2 ½ tbsp of Mexican Seasoning Spice Mix and stir into the pot.
  7. Add the Tomato Passata, Vegetable Stock and Coconut Sugar.
  8. Chop the Squash into small cubes, wash and drain the Beans and add to the pot.
  9. Slice the Zucchini and add to the pot to cook for 5 minutes before serving.
Recipe Notes

*Serve with Tomato Salsa, Guacamole in a bowl or in Lettuce leaf cups.

Clean Eating Tips to remember:

*Stainless Steel and Ceramic or Glass Cookware are the safest materials to cook in with the least amount of leaching into food when heat is applied. A high quality set of cookware is essential and will last a lifetime - and a longer lifetime at that because of it. 

*Stainless Steel, Food-grade Silicon or Wooden Cooking Utensils are the safest materials to cook with with the least amount of leaching into food when heat is applied. 

*Olive Oil - it’s best not to cook with Olive Oil, always consume raw. Best to drizzle Olive Oil over food just before serving. It’s better to avoid cooking with Olive Oil as it is a delicate oil and is damaged and becomes harmful to ingest when heated.

*Better oils for cooking with have a higher smoke point/less free radical forming when heated— Coconut Oil, Macadamia Oil and Grapeseed Oil

Falafel Salad Plate

This is one of those awesome make-in-bulk-and-freeze kinda recipes. This is something I make big batches of, portion and then store sealed in smaller containers in the freezer for those all too familiar week day evenings when you are stretched for time or don’t feel like preparing something from scratch. There are so many ways to enjoy this Falafel mix. Make into balls or smaller ‘bites’ and serve with a dip or sauce for lunch boxes, social get togethers, or as a healthy filling little snack in between meals. You can create burger size patties and serve with salad or on toasted Clean Multiseed Bread. Perhaps you prefer to serve them between lettuce leaves instead of a burger bun. Or in between sliced and toasted Coconut Buckwheat Flatbreads, (or your choice of locally sourced gluten-free buns).

This recipe is: Gluten-free (GF), Wheat-free (WF), Dairy-free (DF), refined Sugar-free (SF), Plant-based/Vegan (PB), Vegetarian (V)

Print Recipe
Falafel Salad Plate
You will need: food processor or blender NOTE: You can pre-make this mixture a day or few hours before using, for flavours and dough to 'develop' - this is not necessary though of course. If making homemade Hummus, this recipe will take 15 minutes longer to make.
Prep Time 15 minutes
Cook Time 10-15 minutes
Passive Time 0
Servings
servings
Ingredients
Falafel Mix
Creamy Hummus
Salad (per person portion)
Prep Time 15 minutes
Cook Time 10-15 minutes
Passive Time 0
Servings
servings
Ingredients
Falafel Mix
Creamy Hummus
Salad (per person portion)
Instructions
  1. Preheat oven to 350°F or 180°C. You can skip this and cook on stove top in a pan.
  2. Falafel Patties: Combine everything except Chickpea Flour and Baking Powder in a food processor.
  3. Falafel Patties: Pulse to create a rough, but well combined mixture - don't pulse/blend for too long or else you will make a puree/paste.
  4. Falafel Patties: Pulse in the Baking Powder and half the Chickpea Flour. Only add enough flour to make dough slightly firm to press into shapes.
  5. Falafel Patties: Line a baking tray (or cooking pan) with non-toxic parchment paper or silicon baking mats.
  6. Falafel Patties: Shape the mixture into your choice of either bites, balls or patties and space them out onto the baking tray (or cooking pan).
  7. Falafel Patties: Bake for 10-15 minutes on one side, turn over and bake for a further 10-15 minutes, or until golden brown. If cooking with a pan, cook on low heat for the same amount of time.
  8. Falafel Patties: Optional - You can brown the patties up in a little heated Coconut Oil in the pan to finish them off.
  9. Creamy Hummus: Blend Tahini and Lemon Juice together until smooth, fluffy and creamy - continually scrape sides using a spatula to combine well.
  10. Creamy Hummus: Add Garlic, Cumin, Salt, Olive Oil. Blend well.
  11. Creamy Hummus: Slowly add Chickpeas to the mix, blending in between.
  12. Creamy Hummus: Only add Water if need be to reach desired consistency.
  13. Combine your choice of Salad Ingredients on a plate, add 2-3 tablespoons of Hummus and add the patties to the Salad plate.
Recipe Notes

*Avoid baking/cooking on aluminium and non-stick surfaces - they will bake/leach toxic substances into your food. Cook with stainless steel and ceramic where possible. Or use bleach-free, non-toxic baking paper and food-grade silicon mats to line baking trays or pots and pans when baking, and cooking on stove top. Use a little Coconut Oil in a stainless steel pan if you prefer not to bake.

*As mentioned, this recipe can be made in bulk, portioned into smaller containers, sealed and stored in the fridge or freezer.

*If you can, choose organic Chickpeas canned in BPA-free cans. I use an organic brand called Eden (available in Australia & USA). Haven't yet found a brand in South Africa - please share in our Fresh Life Community Facebook page if you do find one.

*See Creamy Hummus Dip recipe to see how to activate and prepare Chickpeas from scratch.

Serving suggestions:

* Make Falafel burgers, by putting them between two sides of a toasted Coconut Buckwheat Flatbread, served with Hummus and salad ingredients.

* Made into balls they are great for lunch boxes or served with a dip as a pre-dinner snack

Sunflower & Sesame Warm Quinoa Salad


Print Recipe
Sunflower & Sesame Warm Quinoa Salad
You will need: Baking tray; large pan; pot; cooking utensils
Prep Time 10-15 minutes
Cook Time 30 minutes
Passive Time 0
Servings
servings
Ingredients
Optional
Prep Time 10-15 minutes
Cook Time 30 minutes
Passive Time 0
Servings
servings
Ingredients
Optional
Instructions
  1. Preheat oven to 180°C / 350°F
  2. Chop Potatoes into 1 inch cubes. Add 1 tbsp of Oil to baking tray and bake until soft (approx. 15-20 min)
  3. Chop Butternut Squash into 1 inch cubes, add to the tray and cook for a further 10-15min until squats is soft and potatoes are a little crispy.
  4. While veg are baking, add Quinoa and water to a pot and bring to a boil. Stir frequently until all water is absorbed and Quinoa has expanded and has a translucent middle. Add stock and cook on medium heat, stirring frequently until all moisture is absorbed.
  5. Chop Onion and add to a pan with 1 tbsp of Oil on high heat. Stir frequently and cook until onions are browned. Remove from heat.
  6. Chop and add the Zucchini and Capsicums/Bell Peppers to the pan and cook on medium heat for 2-3 minutes (keep veggies crunchy).
  7. Add the Quinoa and Garlic to the pan and cook on medium heat for 1-2 minutes.
  8. Serve Quinoa dish with roasted veggies on the side or mixed through.
  9. Top with a squeeze of fresh Lemon / Lime, chopped Parsley and toasted Nuts & Seeds.
  10. Optional - add shavings of Broccoli flowers and a little crumbed Goat Cheese Feta.
Recipe Notes

Clean Eating Tips to remember:

*Stainless Steel and Ceramic or Glass Cookware are the safest materials to cook in with the least amount of leaching into food when heat is applied. A high quality set of cookware is essential and will last a lifetime - and a longer lifetime at that because of it.

*Stainless Steel, Food-grade Silicon or Wooden Cooking Utensils are the safest materials to cook with with the least amount of leaching into food when heat is applied.

*My ½ Toasted / ½ Raw Philosophy for Nuts & Seeds:
Toasted - for flavour
Raw - for nutritional value

*Olive Oil - it’s best not to cook with Olive Oil, always consume raw. Best to drizzle Olive Oil over food just before serving. It’s better to avoid cooking with Olive Oil as it is a delicate oil and is damaged and becomes harmful to ingest when heated.

*Better oils for cooking with have a higher smoke point/less free radical forming when heated— Coconut Oil, Macadamia Oil and Grapeseed Oil

Refresh this Beet Juice


Print Recipe
Refresh this Beet Juice
Prep Time 5-10 minutes
Cook Time 0
Passive Time 0
Servings
servings
Ingredients
Prep Time 5-10 minutes
Cook Time 0
Passive Time 0
Servings
servings
Ingredients
Instructions
  1. Any juicer will do: Juice everything together and enjoy as fresh as possible!
Recipe Notes

*Always make fresh where possible - you get the most benefits and cleansing/detoxing effects from freshly juiced juice.

*If need be, prepare juice the night before - add citrus such as oranges, lemon and lime to your juice as it acts as a natural preservative and will keep your juice fresher for longer.

*Seal with a lid in a glass bottle  - never in plastic. Plastic will leach into your juice and plastic adds to the bio-accumulation of chemicals in the body (chemical body burden), contributing to The Toxic Fat Effect! (see Module 2)


Quick Link to FLIMJ Program resources for Fresh Life Juicing:

Module 2 - refresh on information about The Toxic Fat Effect and how bioaccumulation of toxins in our bodies can lead to weight gain (that’s hard to lose), brain fog, low energy and many more poor health symptoms.

Module 4 - Awesome Everyday cheat sheet to print off and put up on the fridge so you can make great juices from scratch with my Fresh Life Juicing Formula with what you already have in your kitchen.

Module 4 - FLIMJ Ultimate Juicing Guide, your detailed guide to all the best info on juicing (summarised and based on 5+ years of research)

Module 4 - To get you into the swing of things, redo our 7 Day Just Add Juicing Challenge - you’re always supported in our Fresh Life Community, no matter when you decide to do any of the 7 Day Challenges.
You’ll find your Recipe Book: 7 Days of Just Add Juicing and Shopping List print off to guide you through the challenge.


My thoughts on having a Fresh Life Juicing Habit:

Fresh juicing is so important on your Fresh Life Internal Makeover Journey. It is a quick and delicious way to get live enzymes - which can only be obtained from raw plants/veggies and fruits - plus vital nutrients into your body for your cells to function optimally.

It is also one of the most powerful, gentle, safe, daily cleansing rituals you can do consistently to help your body to move xeno-toxins (which cause The Toxic Fat Effect - Module 2) from the body every day.

Gone are the days of getting away with occasionally doing a cleanse, or doing a detox a few times a year. The influx and exposure of toxins we have on a daily basis is now too much and too varied for our bodies to handle on its own.

These daily toxins bio-accumulate in our bodies (refer to Module 2 work) and most won’t move out of the body without specific assistance.

We have to be proactive to get the results we want. 

We have to, as I like to say, “ABC - always be cleansing…”

If you want to Live Your Best Fresh Life, juicing needs to be a regular part of your days.

During the initial stage of my journey I was drinking a lot of freshly made juices. It’s a big part of the reason I was able to lose so much toxic fat/excess weight so quickly. And in a healthy way.

I was drinking at least 300ml-900ml per day of fresh juice along with eating clean and doing as many gentle and regular cleansing practises as possible.

I lost the weight effortlessly, and have been able to effortlessly keep it off for these past 6+ years. Why? Juicing is time-tested, and proven to work.

Which is why it is an integral part of my Fresh Life Formula. Fresh juices keeps flooding those powerhouse nutrients through the body, and keeps flushing daily toxic exposures out of the body, every single day.

I always try to have at least 1x fresh juice per day or more.

Prep Tip: You can always make juice the night before if you’re going to be rushed the next day.

Storing Tip: Just seal in a glass jar with a lid in the fridge so it’s ready to go in the morning.

Storing Tip: Adding citrus to your juice will act as a natural preserver, so if you are going to make the night before, be sure to add oranges, lemon and/or lime. It makes your juices taste even more delicious anyway.

The darker the green colour of a plant, the more chlorophyll the plant contains. And chlorophyll helps to push toxins from our cells and bind and remove them from our blood stream and gut.

Over and above everything, if I can only do one thing in a day, it will be to ensure I have at least one raw juice or smoothie a day - preferably a Green one!

Alternating colours is also a good idea to ensure your body is receiving a full spectrum of nutrients - eating/drinking the whole rainbow of colours we find in vegetables and fruits will achieve this without you even having to think about what your body needs.

To refresh on all the best information I’ve researched, go back to Module 4 to go over your Just Add Juicing Module content.

Got questions for me? Or want some friendly support and accountability to help you on your FLIMJourney?

Our Fresh Life Community is the place to be!

See you over there!

Big Hugs,
xx Sam

Citrus Beet Juice


Print Recipe
Citrus Beet Juice
Prep Time 5-10 minutes
Cook Time 0
Passive Time 0
Servings
servings
Ingredients
Prep Time 5-10 minutes
Cook Time 0
Passive Time 0
Servings
servings
Ingredients
Instructions
  1. Any juicer will do: Juice everything together and enjoy as fresh as possible!
Recipe Notes

*Always make fresh where possible - you get the most benefits and cleansing/detoxing effects from freshly juiced juice.

*If need be, prepare juice the night before - add citrus such as oranges, lemon and lime to your juice as it acts as a natural preservative and will keep your juice fresher for longer.

*Seal with a lid in a glass bottle  - never in plastic. Plastic will leach into your juice and plastic adds to the bio-accumulation of chemicals in the body (chemical body burden), contributing to The Toxic Fat Effect! (see Module 2)


Quick Link to FLIMJ Program resources for Fresh Life Juicing:

Module 2 - refresh on information about The Toxic Fat Effect and how bioaccumulation of toxins in our bodies can lead to weight gain (that’s hard to lose), brain fog, low energy and many more poor health symptoms.

Module 4 - Awesome Everyday cheat sheet to print off and put up on the fridge so you can make great juices from scratch with my Fresh Life Juicing Formula with what you already have in your kitchen.

Module 4 - FLIMJ Ultimate Juicing Guide, your detailed guide to all the best info on juicing (summarised and based on 5+ years of research)

Module 4 - To get you into the swing of things, redo our 7 Day Just Add Juicing Challenge - you’re always supported in our Fresh Life Community, no matter when you decide to do any of the 7 Day Challenges.
You’ll find your Recipe Book: 7 Days of Just Add Juicing and Shopping List print off to guide you through the challenge.


My thoughts on having a Fresh Life Juicing Habit:

Fresh juicing is so important on your Fresh Life Internal Makeover Journey. It is a quick and delicious way to get live enzymes - which can only be obtained from raw plants/veggies and fruits - plus vital nutrients into your body for your cells to function optimally.

It is also one of the most powerful, gentle, safe, daily cleansing rituals you can do consistently to help your body to move xeno-toxins (which cause The Toxic Fat Effect - Module 2) from the body every day.

Gone are the days of getting away with occasionally doing a cleanse, or doing a detox a few times a year. The influx and exposure of toxins we have on a daily basis is now too much and too varied for our bodies to handle on its own.

These daily toxins bio-accumulate in our bodies (refer to Module 2 work) and most won’t move out of the body without specific assistance.

We have to be proactive to get the results we want. 

We have to, as I like to say, “ABC - always be cleansing…”

If you want to Live Your Best Fresh Life, juicing needs to be a regular part of your days.

During the initial stage of my journey I was drinking a lot of freshly made juices. It’s a big part of the reason I was able to lose so much toxic fat/excess weight so quickly. And in a healthy way.

I was drinking at least 300ml-900ml per day of fresh juice along with eating clean and doing as many gentle and regular cleansing practises as possible.

I lost the weight effortlessly, and have been able to effortlessly keep it off for these past 6+ years. Why? Juicing is time-tested, and proven to work.

Which is why it is an integral part of my Fresh Life Formula. Fresh juices keeps flooding those powerhouse nutrients through the body, and keeps flushing daily toxic exposures out of the body, every single day.

I always try to have at least 1x fresh juice per day or more.

Prep Tip: You can always make juice the night before if you’re going to be rushed the next day.

Storing Tip: Just seal in a glass jar with a lid in the fridge so it’s ready to go in the morning.

Storing Tip: Adding citrus to your juice will act as a natural preserver, so if you are going to make the night before, be sure to add oranges, lemon and/or lime. It makes your juices taste even more delicious anyway.

The darker the green colour of a plant, the more chlorophyll the plant contains. And chlorophyll helps to push toxins from our cells and bind and remove them from our blood stream and gut.

Over and above everything, if I can only do one thing in a day, it will be to ensure I have at least one raw juice or smoothie a day - preferably a Green one!

Alternating colours is also a good idea to ensure your body is receiving a full spectrum of nutrients - eating/drinking the whole rainbow of colours we find in vegetables and fruits will achieve this without you even having to think about what your body needs.

To refresh on all the best information I’ve researched, go back to Module 4 to go over your Just Add Juicing Module content.

Got questions for me? Or want some friendly support and accountability to help you on your FLIMJourney?

Our Fresh Life Community is the place to be!

See you over there!

Big Hugs,
xx Sam