Archives

Sesame & Cashew Nut Stir-Fry


Print Recipe
Sesame & Cashew Nut Stir-Fry
You will need: chopping board & knife; blender; stainless steel wok or flying pan; ceramic/glass mixing bowl; ceramic/glass container or jar w/ lid for storing.
Prep Time 15 - 20 minutes
Cook Time 5 minutes
Passive Time 0
Servings
servings
Ingredients
Stir-fry Sauce Thickener
Your choice of Stir-Fry Veg
Toppings
Prep Time 15 - 20 minutes
Cook Time 5 minutes
Passive Time 0
Servings
servings
Ingredients
Stir-fry Sauce Thickener
Your choice of Stir-Fry Veg
Toppings
Instructions
  1. Grate Ginger and finely chop Garlic and Chillies and then combine with the Coconut Aminos / Tamari (Soy Sauce alternative), Vinegar, and Rice Malt Syrup. Blend until smooth. Pour into a sealable glass jar and set aside.
  2. Mix the Veggie Stock and Potato Starch together and set aside.
  3. Chop the Cashew Nuts, then slightly dry toast half of the Sesame Seeds & Cashew Nuts in a pan. Allow to cool before adding back in with the un-toasted nuts. Set aside.
  4. Chop the Spring Onions and Red Onion and add half the Sesame Seeds & Cashew Nuts mix in a pan, and cook together for 2-3 minutes with a little Grapeseed Oil until onions are slightly browned. Set aside.
  5. Chop the remainder of the stir-fry veggies of your choice and combine/mix up together in a large mixing bowl.
  6. Stir-fry Sauce portion per person - mix 2 tbsp of the Stir-Fry sauce together with 1 tbsp of Veggie Stock (with Potato Flour/Starch).
  7. Cooking - If you don’t have a large wok, for best results, I prefer to cook each person’s dish separately in a stainless steel pan to cook veg quick while still keeping them crispy.
Add a little oil to the wok/pan on high heat and wait until it heats up (1-2 min). Then quickly add Stir-fry Veg, cooked Onion and Stir-fry Sauce, stirring/flipping in the pan often. Cook for 2-3 minutes. Remove from heat before veg starts to get soft.
  8. Serve and drizzle with Sesame Seed Oil and top with the remaining Seed & Nut mix. Top with your choice of toppings.
Recipe Notes

* I make big batches of the Stir-fry sauce at a time. It keeps well for weeks in a sealed jar in the fridge. Basically you can use any veggies, and cook with the sauce to quickly whip up an easy Stir Fry dinner on those busy weekdays. 

*Soy Sauce alternatives - soy is best avoided for many reasons. Most soy is GMO. Even organic soy can cause issues. Also, many soy products have wheat/gluten which adds to the list of reasons to avoid it if you can. 1st best choice is Coconut Aminos if you can get it. 2nd best choice would be Liquid Aminos or Tamari which are wheat-free/gluten-free soy sauces.

*Sesame Seed Oil - buy good quality oil and store in the fridge. It is a fragile oil and can rancid quite quickly. For this reason it is best never to cook with fragile oils like Sesame Seed Oil as the heat quickly produces free-radicals and reduces the benefits of the oil. Use it as a topping just before serving to give a lovely subtle Sesame flavour to your stir-fry.

Clean Eating Tips to remember:
*Stainless Steel and Ceramic or Glass Cookware are the safest materials to cook in with the least amount of leaching into food when heat is applied. A high quality set of cookware is essential and will last a lifetime - and a longer lifetime at that because of it. 

*Stainless Steel, Food-grade Silicon or Wooden Cooking Utensils are the safest materials to cook with with the least amount of leaching into food when heat is applied. 

*My ½ Toasted / ½ Raw Philosophy for Nuts & Seeds:
Toasted - for flavour
Raw - for nutritional value

*Olive Oil - it’s best not to cook with Olive Oil, always consume raw. Best to drizzle Olive Oil over food just before serving. It’s better to avoid cooking with Olive Oil as it is a delicate oil and is damaged and becomes harmful to ingest when heated.

*Better oils for cooking with have a higher smoke point/less free radical forming when heated— Coconut Oil, Macadamia Oil and Grapeseed Oil

Thai Basil & Chilli Veg Stir-Fry


Print Recipe
Thai Basil & Chilli Veg Stir-Fry
You will need: chopping board & knife; blender; stainless steel wok or flying pan; ceramic/glass mixing bowl; ceramic/glass container or jar w/ lid for storing.
Prep Time 15 - 20 minutes
Cook Time 5 minutes
Passive Time 0
Servings
servings
Ingredients
Stir-fry Sauce Thickener
Your choice of Stir-Fry Veg
Toppings
Prep Time 15 - 20 minutes
Cook Time 5 minutes
Passive Time 0
Servings
servings
Ingredients
Stir-fry Sauce Thickener
Your choice of Stir-Fry Veg
Toppings
Instructions
  1. Grate Ginger and finely chop Garlic and Chillies and then combine with the Coconut Aminos / Tamari (Soy Sauce alternative), Oil and Coconut Sugar. Blend until smooth. Pour into a sealable glass jar and set aside. [Keep the fresh Thai Basil separate from sauce]
  2. Mix the Veggie Stock and Potato Starch together and set aside.
  3. Chop the Cashew Nuts and slightly dry toast half of the Nuts in a pan. Allow to cool before adding back in with the un-toasted nuts. Set aside.
  4. Chop the Spring Onions and Red Onion and add half the Cashew Nuts in a pan, and cook together for 2-3 minutes with a little Grapeseed Oil until onions are slightly browned. Set aside.
  5. Chop the remainder of the stir-fry veggies of your choice and combine/mix up together in a large mixing bowl.
  6. Stir-fry Sauce portion per person - mix 2 tbsp of the Stir-Fry sauce together with 1 tbsp of Veggie Stock (with Potato Flour/Starch). Plus, ¼ portion of the fresh chopped Thai Basil leaves.
  7. Cooking - If you don’t have a large wok, for best results, I prefer to cook each person’s dish separately in a stainless steel pan to cook veg quick while still keeping them crispy.
Add a little Grapeseed or Coconut Oil to the wok/pan on high heat and wait until it heats up (1-2 min). Then quickly add Stir-fry Veg, cooked Onion and Stir-fry Sauce portion, stirring/flipping in the pan often. Cook for 2-3 minutes. Remove from heat before veg starts to get soft
  8. Serve and drizzle with the remaining Nuts and top with your choice of toppings.
Recipe Notes

* I make big batches of the Stir-fry sauce at a time. It keeps well for weeks in a sealed jar in the fridge. Basically you can use any veggies, and cook with the sauce to quickly whip up an easy Stir Fry dinner on those busy weekdays. 

*Soy Sauce alternatives - soy is best avoided for many reasons. Most soy is GMO. Even organic soy can cause issues. Also, many soy products have wheat/gluten which adds to the list of reasons to avoid it if you can. 1st best choice is Coconut Aminos if you can get it. 2nd best choice would be Liquid Aminos or Tamari which are wheat-free/gluten-free soy sauces.

Clean Eating Tips to remember:
*Stainless Steel and Ceramic or Glass Cookware are the safest materials to cook in with the least amount of leaching into food when heat is applied. A high quality set of cookware is essential and will last a lifetime - and a longer lifetime at that because of it. 

*Stainless Steel, Food-grade Silicon or Wooden Cooking Utensils are the safest materials to cook with with the least amount of leaching into food when heat is applied. 

*My ½ Toasted / ½ Raw Philosophy for Nuts & Seeds:
Toasted - for flavour
Raw - for nutritional value

*Olive Oil - it’s best not to cook with Olive Oil, always consume raw. Best to drizzle Olive Oil over food just before serving. It’s better to avoid cooking with Olive Oil as it is a delicate oil and is damaged and becomes harmful to ingest when heated.

*Better oils for cooking with have a higher smoke point/less free radical forming when heated— Coconut Oil, Macadamia Oil and Grapeseed Oil
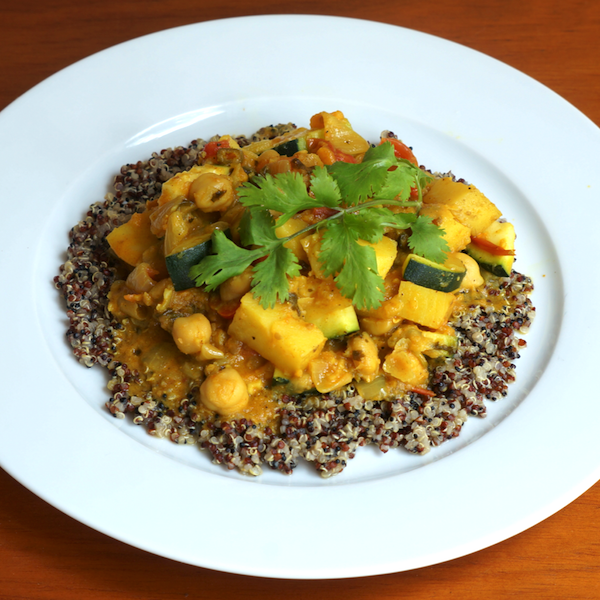
Yellow Indian Curry Dish


Print Recipe
Yellow Indian Curry Dish
You will need: chopping board & knife; blender; stainless steel pots; glass jars w/ lid for storing; NOTES: Great 'make in BULK & freeze' meal idea If making the homemade Yellow Indian Curry Powder, add 5 minutes to recipe time (see recipe notes). If making the homemade Yellow Indian Curry Paste, add 45 minutes to recipe time (see recipe notes).
Prep Time 15 minutes
Cook Time 30 - 40 minutes
Passive Time 30 - 40 minutes (while baking)
Servings
servings
Ingredients
Yellow Indian Curry Dish
Quinoa
Toppings
Prep Time 15 minutes
Cook Time 30 - 40 minutes
Passive Time 30 - 40 minutes (while baking)
Servings
servings
Ingredients
Yellow Indian Curry Dish
Quinoa
Toppings
Instructions
  1. Roughly chop Onions, add to a large pot with 2 tbsp Coconut Oil and cook until soft.
  2. Finely grate/chop the Ginger, Garlic, Chillies and Coriander. Add all this, plus the Curry Paste to the pot and cook for 2-3 minutes.
  3. Wash and cut the Sweet Potato and Potatoes into 1 inch cubes (approx.), rinse and drain the Chickpeas and blend/puree the Tomatoes. Add to the pot.
  4. Add the rest of the ingredients except the Zucchini. Top up with Spring Water if there is not enough liquid to cover the veg. Bring to a boil and then turn down to mid-low heat and allow to simmer for 30-40 min until water evaporates and potatoes are cooked through.
  5. While Curry is cooking, in a separate pot, bring the Quinoa and Spring Water to the boil. Strain the Quinoa - keep the water. Put the Quinoa in a stainless steel strainer on top of a pot, with the left over water in the bottom of the same pot and simmer the water to steam the Quinoa for 10 - 15 minutes (cover with a lid to keep moisture in).
  6. 5 min before serving, slice the Zucchini and stir in to allow it to cook for a few minutes before serving (adding in last prevents Zucchini from being overcooked).
  7. Serve the Curry on cooked Quinoa with a selection of Toppings.
Recipe Notes

*You can basically use any veggies you have in your pantry or fridge, and cook with the Yellow Indian Curry Paste to cook up a hearty Curry Dish.

*I make bulk batches of this Curry Dish and portion and freeze for future quick and easy meals.  

*Make your own Nut Milk: Grind ¼ cup nuts, then blend with 1 cup Water.

*You can make your own homemade Yellow Indian Curry Paste - I also make this curry paste in bulk batches and portion and freeze for future use.

*Check out this Yellow Indian Curry Dip made with the same Yellow Indian Curry Paste.

*Choose BPA-free tins when buying pre-cooked Chickpeas if possible or even better, see below recipe for cooking your own Chickpeas from scratch (it’s not as difficult as it seems, just allow a couple days before to prepare and cook them).

Serving Suggestions:

* Serve with cooked Rice or Quinoa

* Make a Fresh Mango Salsa for a topping - 10 minutes to make
If no Mango, still delicious without.
1/2 Mango (large)
1/2 Red Onion
1/2 cup Tomatoes
1/2 cup Cucumber
1/2 bunch Coriander (fresh)
Chop into small pieces and mix together and serve fresh as a topping with any Curry Dish.

Clean Eating Tips to remember:

*Stainless Steel and Ceramic or Glass Cookware are the safest materials to cook in with the least amount of leaching into food when heat is applied. A high quality set of cookware is essential and will last a lifetime - and a longer lifetime at that because of it. 

*Stainless Steel, Food-grade Silicon or Wooden Cooking Utensils are the safest materials to cook with with the least amount of leaching into food when heat is applied. 

*Olive Oil - it’s best not to cook with Olive Oil, always consume raw. Best to drizzle Olive Oil over food just before serving. It’s better to avoid cooking with Olive Oil as it is a delicate oil and is damaged and becomes harmful to ingest when heated.

*Better oils for cooking with have a higher smoke point/less free radical forming when heated— Coconut Oil, Macadamia Oil and Grapeseed Oil
 

How to cook your own Chickpeas from scratch:
NOTE: Start this 2 days before you want to use Chickpeas in a recipe.

1 cup dry chickpeas = approx. 2 - 2 1/2 cups cooked chickpeas

Day 1 - evening
1 cup dry Chickpeas
3-4 cups Spring Water (water should be double higher than chickpeas in dish)
1 tsp Salt
1. Put ingredients in a large ceramic or glass bowl - the Chickpeas will swell to 2-3x their dry size.

Day 2 - morning
Drain Chickpeas and change the salted water.

Day 2 - evening
Put Chickpeas in large pot of Spring Water
Cook for approximately 1 hour+ until chickpeas are soft.
Drain, let cool and refrigerate in sealed glass container.

Day 3 - Recipe day
Chickpeas are ready and waiting to made into your recipe of choice!

Nut Mince Lettuce Wraps w/ Gaucamole & Cashew Sour Cream


Print Recipe
Spicy Nut Mince Lettuce Wraps w/ Gaucamole & Cashew Sour Cream
You will need: chopping board & knife; blender and/or food processor; glass jars w/ lids for storing NOTE: If making fresh Guacamole & Cashew Nut Cream to add to this recipe, it will take 15min longer to prepare this dish.
Prep Time 15 - 30 minutes
Cook Time 0
Passive Time 0
Servings
servings
Ingredients
Nut Mince
Guacamole
Cashew Sour Cream
Wraps & Toppings
  • 4 large Cos Lettuce leaves (or gluten-free wraps - be sure to choose a gluten-free wrap free from soy, corn or other GMO ingredients unless certified organic)
  • 1 small handful Coriander leaves
Instructions
  1. Nut Mince: Pulse Walnuts roughly in a blender or food processor. Add Sun-dried Tomatoes and pulse again until combined.
  2. Nut Mince: Finely chop/mash Garlic, and finely chop the Brown Onion and add this along with the remaining ingredients and pulse/process until combined.
  3. Guacamole: Mash Avocados and add the juice of the Lemons / Limes and mix through.
  4. Guacamole: Chop Tomatoes, Red Onion, Chillies, Coriander and finely chopped Garlic and mix together.
  5. Guacamole: Add Sea Salt and Lemons / Limes juice to taste (add more if needed).
  6. Cashew Sour Cream: Grind the Cashew Nuts into a flour-like consistency, using a blender (with grinder attachment - see description above).
  7. Cashew Sour Cream: Add the remaining ingredients and blend until smooth. You can add a little more Nut Milk for a thinner consistency.
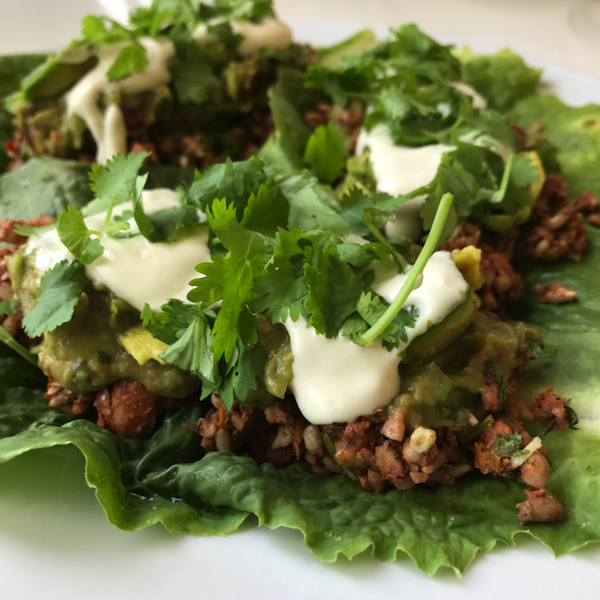
  8. To make Wraps: Layer Nut Mince, Guacamole and Cashew Sour Cream onto Cos Lettuce leaves. Optional - top with fresh chopped Coriander.
Recipe Notes

*Choose Sun-dried Tomatoes that don’t have preservatives or additives and which come jarred in clean oils like Sunflower Seed Oil, good quality cold-pressed Olive Oil etc - avoid Canola Oil which is GMO.

Making your own Sun-dried Tomatoes is actually not as difficult as it seems, you only need good time management in terms of planning ahead and making them at least a few days before you need them in a recipe. I make a big batch and store them in oil in a sealed glass jar in the fridge and they last over a month! Find the recipe here

*You can use a few regular tomatoes instead of baby tomatoes in the Guacamole - I just love the sweetness of baby tomatoes. The redder the tomatoes, the better they taste.

*Tomatoes are on the EWG - Environmental Working Group’s ‘Dirty Dozen’ list which makes them highly sprayed with pesticides. Use organic/spray-free Tomatoes or if you really can’t find any, give the Tomatoes a bath in White Vinegar water (¼ cup White Vinegar mixed with 2-3 cups of water) to help remove as much pesticide residue as possible.

*Store left over Nut Mince, Guacamole and Cashew Sour Cream in a sealed glass jar in the fridge. Eat within 1-2 days.

Serving Suggestions:

*Another nice addition to these lettuce wraps as a topping is the Mexican Tomato Salsa 

Veggie Chilli Bowl

Wheat-free; Gluten-free; Dairy-free; refined Sugar-free; Vegetarian; Vegan; Paleo/Banting

Print Recipe
Veggie Chilli Bowl
You will need: chopping board & knife; blender; stainless steel pots; glass jars w/ lid for storing;
Prep Time 15 minutes
Cook Time 30 minutes
Passive Time 0
Servings
servings
Ingredients
Veggie Chilli Bowl
Mexican Seasoning Spice Mix
Prep Time 15 minutes
Cook Time 30 minutes
Passive Time 0
Servings
servings
Ingredients
Veggie Chilli Bowl
Mexican Seasoning Spice Mix
Instructions
  1. Mexican Seasoning Spice Mix: Blend all spices together and set aside.
  2. Add Coconut Oil to a large pot on high heat. Roughly chop Onion, add to the pot and cook until soft.
  3. Finely chop Chilli with the seeds and stir into the pot.
  4. Roughly chop the Capsicums / Bell Peppers and stir into the pot.
  5. Finely chop the Mushroom and grate the Carrot and stir into the pot.
  6. Finely chop the Garlic and add this, plus 2 ½ tbsp of Mexican Seasoning Spice Mix and stir into the pot.
  7. Add the Tomato Passata, Vegetable Stock and Coconut Sugar.
  8. Chop the Squash into small cubes, wash and drain the Beans and add to the pot.
  9. Slice the Zucchini and add to the pot to cook for 5 minutes before serving.
Recipe Notes

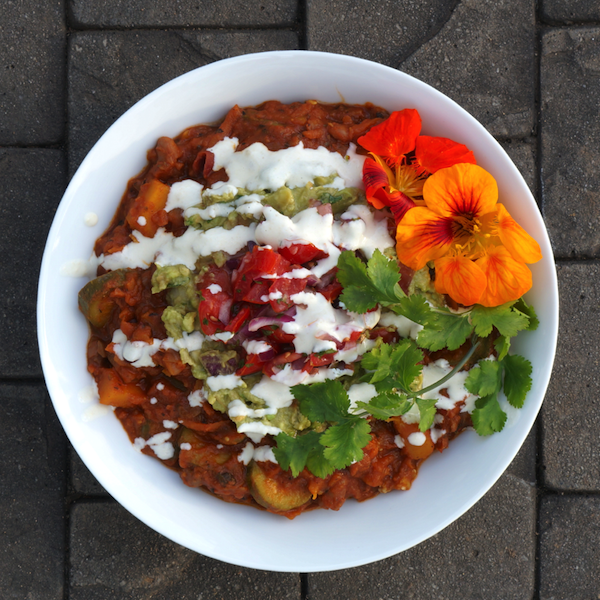
*Serve with Tomato Salsa, Guacamole in a bowl or in Lettuce leaf cups.

Clean Eating Tips to remember:

*Stainless Steel and Ceramic or Glass Cookware are the safest materials to cook in with the least amount of leaching into food when heat is applied. A high quality set of cookware is essential and will last a lifetime - and a longer lifetime at that because of it. 

*Stainless Steel, Food-grade Silicon or Wooden Cooking Utensils are the safest materials to cook with with the least amount of leaching into food when heat is applied. 

*Olive Oil - it’s best not to cook with Olive Oil, always consume raw. Best to drizzle Olive Oil over food just before serving. It’s better to avoid cooking with Olive Oil as it is a delicate oil and is damaged and becomes harmful to ingest when heated.

*Better oils for cooking with have a higher smoke point/less free radical forming when heated— Coconut Oil, Macadamia Oil and Grapeseed Oil
Mexican Tomato Salsa

Wheat-free; Gluten-free; Dairy-free; refined Sugar-free; Vegetarian; Vegan; Paleo/Banting 

Print Recipe
Mexican Tomato Salsa
You will need: chopping board & knife; glass/ceramic bowls; glass jars w/ lid for storing;
Prep Time 10 - 15 minutes
Cook Time 0
Passive Time 0
Servings
servings
Ingredients
Prep Time 10 - 15 minutes
Cook Time 0
Passive Time 0
Servings
servings
Ingredients
Instructions
  1. Chop Baby Tomatoes and Red Onion into desired size chunks.
  2. Finely chop/mash Garlic, Chillie and Coriander and mix in.
  3. Add Lemon / Lime juice, Salt & Sugar and stir.
  4. Extra Tip: Set aside for 5 - 10 minutes to allow flavour to develop before serving.
Recipe Notes

*Serve as a dip alongside Guacamole with either Organic Corn Chips (organic because most corn is GMO) or Gluten-free/wheat-free Crackers. Also good with veggie dippers like Carrot and Cucumber pieces.

*For a fresh fruity salsa, replace the Tomatoes for Mango to make a Mango Salsa.

*Tomatoes are on the EWG - Environmental Working Group’s ‘Dirty Dozen’ list which makes them highly sprayed with pesticides. Use organic/spray-free Tomatoes or if you really can’t find any, give the Tomatoes a bath in White Vinegar water (¼ cup White Vinegar mixed with 2-3 cups of water) to help remove as much pesticide residue as possible.

Gaucamole Dip

Wheat-free; Gluten-free; Dairy-free; refined Sugar-free; Vegetarian; Vegan; Paleo/Banting

Print Recipe
Gaucamole Dip
You will need: chopping board & knife; fork and low rimmed ceramic/glass bowl to mash avo; larger ceramic/glass bowl for mixing; ceramic/glass container or jar w/ lid for storing;
Prep Time 10-15 minutes
Cook Time 0
Passive Time 0
Servings
servings
Ingredients
Prep Time 10-15 minutes
Cook Time 0
Passive Time 0
Servings
servings
Ingredients
Instructions
  1. Mash Avocados and add the juice of the Lemons / Limes and mix through.
  2. Chop Tomatoes, Red Onion, Chillies, Coriander and finely chopped Garlic and mix together.
  3. Add Sea Salt and Lemons / Limes juice to taste (add more if needed).
Recipe Notes

*Store in a glass jar in the fridge. Eat within 1-2 days.

*You can use a few regular tomatoes instead of baby tomatoes - I just love the sweetness of baby tomatoes. The redder the tomatoes, the better they taste.