| Prep Time | 15 - 20 minutes |
| Cook Time | 5 minutes |
| Passive Time | 0 |
| Servings |
servings
|
- 1 cup Tamari (organic wheat-free soy sauce) (or use soy-free Coconut Aminos)
- ½ cup Apple Cider Vinegar
- 3 tbsp Rice Malt Syrup (or Coconut Blossom/Maple Syrup or Raw Honey)
- 2 tbsp Grapeseed Oil
- 3 nobs Ginger (1 inch/ 2 cm nobs)
- 2 small cloves Garlic
- 1 large Red / Green Chillies (with seeds = spicy, without seeds = less spicy)
- ½ cup Vegetable Stock
- 2 tsp Potato Flour (or 1 tsp Potato Starch)
- 4 Spring Onions (save the green part of the leaves for fresh garnish topping)
- ½ small Red Onion
- 1 large Carrot
- 1 cup Red Cabbage
- ¼ Red Capsicum / Bell Pepper
- ¼ Yellow Capsicum / Bell Pepper
- ¼ Green Capsicum / Bell Pepper
- ¼ head Broccoli
- 6 Snap Peas
- 2 small Zucchini
- ¼ cup Sesame Seeds (½ toasted, ½ raw)
- ¼ cup Cashew Nuts (½ toasted, ½ raw)
- ¼ cup Sesame Seed Oil (½ toasted, ½ raw)
- ¼ cup Coriander (fresh, roughly chopped)
- ¼ head Broccoli Flowers (raw Broccoli flowers shaved from Broccoli head)
Ingredients
Stir-fry Sauce Thickener
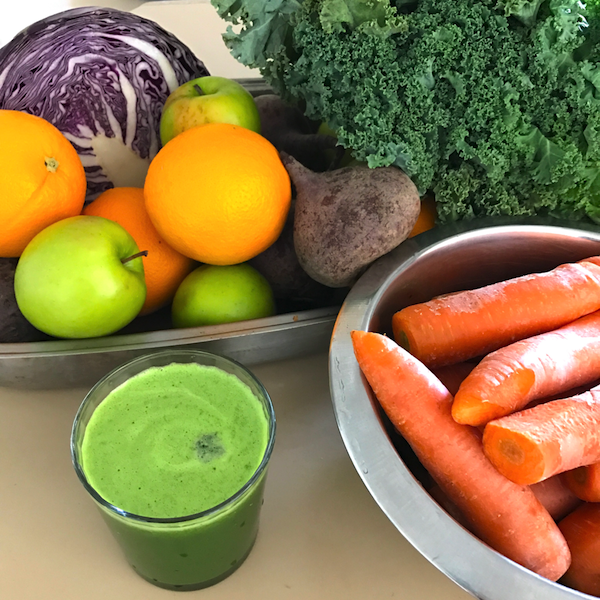
Your choice of Stir-Fry Veg
Toppings
|
|
- Grate Ginger and finely chop Garlic and Chillies and then combine with the Coconut Aminos / Tamari (Soy Sauce alternative), Vinegar, and Rice Malt Syrup. Blend until smooth. Pour into a sealable glass jar and set aside.
- Mix the Veggie Stock and Potato Starch together and set aside.
- Chop the Cashew Nuts, then slightly dry toast half of the Sesame Seeds & Cashew Nuts in a pan. Allow to cool before adding back in with the un-toasted nuts. Set aside.
- Chop the Spring Onions and Red Onion and add half the Sesame Seeds & Cashew Nuts mix in a pan, and cook together for 2-3 minutes with a little Grapeseed Oil until onions are slightly browned. Set aside.
- Chop the remainder of the stir-fry veggies of your choice and combine/mix up together in a large mixing bowl.
- Stir-fry Sauce portion per person - mix 2 tbsp of the Stir-Fry sauce together with 1 tbsp of Veggie Stock (with Potato Flour/Starch).
- Cooking - If you don’t have a large wok, for best results, I prefer to cook each person’s dish separately in a stainless steel pan to cook veg quick while still keeping them crispy. Add a little oil to the wok/pan on high heat and wait until it heats up (1-2 min). Then quickly add Stir-fry Veg, cooked Onion and Stir-fry Sauce, stirring/flipping in the pan often. Cook for 2-3 minutes. Remove from heat before veg starts to get soft.
- Serve and drizzle with Sesame Seed Oil and top with the remaining Seed & Nut mix. Top with your choice of toppings.
* I make big batches of the Stir-fry sauce at a time. It keeps well for weeks in a sealed jar in the fridge. Basically you can use any veggies, and cook with the sauce to quickly whip up an easy Stir Fry dinner on those busy weekdays.
*Soy Sauce alternatives - soy is best avoided for many reasons. Most soy is GMO. Even organic soy can cause issues. Also, many soy products have wheat/gluten which adds to the list of reasons to avoid it if you can. 1st best choice is Coconut Aminos if you can get it. 2nd best choice would be Liquid Aminos or Tamari which are wheat-free/gluten-free soy sauces.
*Sesame Seed Oil - buy good quality oil and store in the fridge. It is a fragile oil and can rancid quite quickly. For this reason it is best never to cook with fragile oils like Sesame Seed Oil as the heat quickly produces free-radicals and reduces the benefits of the oil. Use it as a topping just before serving to give a lovely subtle Sesame flavour to your stir-fry.
Clean Eating Tips to remember:
*Stainless Steel and Ceramic or Glass Cookware are the safest materials to cook in with the least amount of leaching into food when heat is applied. A high quality set of cookware is essential and will last a lifetime - and a longer lifetime at that because of it.
*Stainless Steel, Food-grade Silicon or Wooden Cooking Utensils are the safest materials to cook with with the least amount of leaching into food when heat is applied.
*My ½ Toasted / ½ Raw Philosophy for Nuts & Seeds:
Toasted - for flavour
Raw - for nutritional value
*Olive Oil - it’s best not to cook with Olive Oil, always consume raw. Best to drizzle Olive Oil over food just before serving. It’s better to avoid cooking with Olive Oil as it is a delicate oil and is damaged and becomes harmful to ingest when heated.
*Better oils for cooking with have a higher smoke point/less free radical forming when heated— Coconut Oil, Macadamia Oil and Grapeseed Oil