Archives

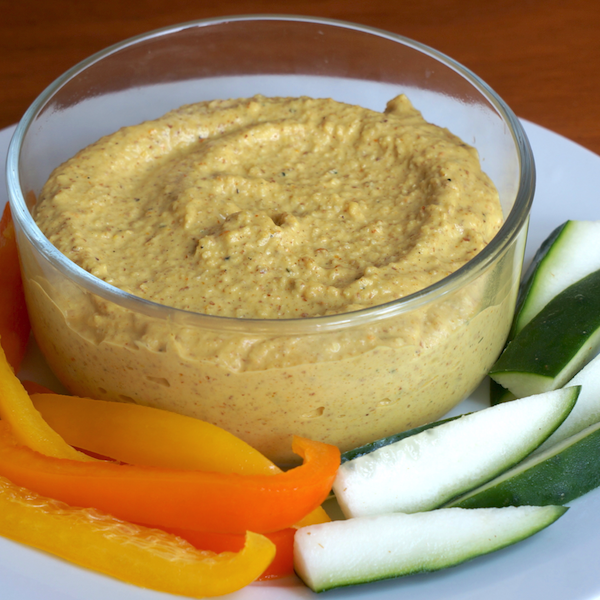
Yellow Curry Cashew Nut Dip

This creamy, rich curry flavoured dip is a party favourite – a Clean Eating party that is! If you keep a little curry paste always on hand in the fridge, this dip can literally be whipped up in seconds. I always have a couple fresh dips made up and sitting in the fridge for clean, guilt-free snacking in between meals. 

This recipe is: Gluten-free (GF), Wheat-free (WF), Dairy-free (DF), refined Sugar-free (SF), Plant-based/Vegan (PB), Vegetarian (V)

Print Recipe
Yellow Curry Cashew Nut Dip
You will need: Blender - one which has grinder blades where at least 2 blades lie flat. *A coffee grinder can also be used; ceramic/glass container or jar w/ lid for storing;
Prep Time 10-15 minutes
Cook Time 0
Passive Time 0
Servings
servings
Ingredients
Prep Time 10-15 minutes
Cook Time 0
Passive Time 0
Servings
servings
Ingredients
Instructions
  1. Grind the nuts into a flour-like consistency. Set aside.
  2. Put remaining ingredients together in a blender and blend until smooth.
  3. Add ground nuts to the blended mixture and blend until well combined. Or combine and mix in a food processor.
Recipe Notes

*If you have a powerful blender you can just throw all the ingredients together and then blend until smooth.

*To make your own nut milk: grind ¼ cup of nuts, add 1 cup water & blend until smooth.

*Yellow Curry Paste - the best, 'cleanest' option is to make and use your own homemade curry paste. Check out my Yellow Indian Curry Paste recipe. If  you are going to use store-bought, opt for one from a health store which usually will have the least amount of preservatives, flavourings, and other additives, as possible.

Broccoli & Potato Soup

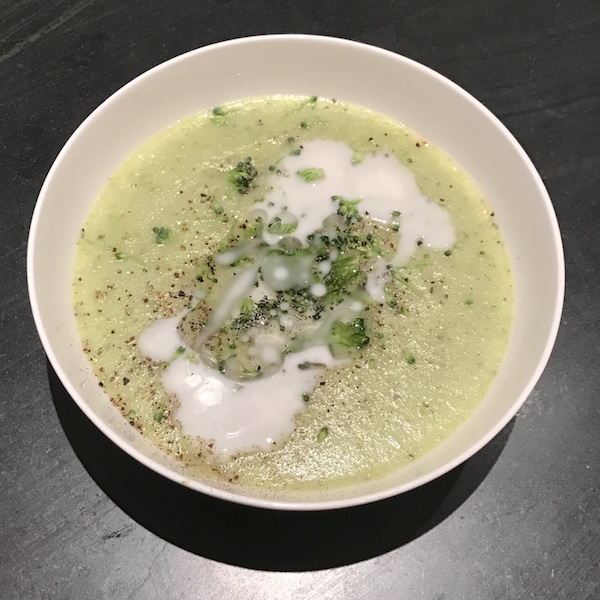
Nothing like a warm soup on those cool winter days, or just to enjoy when you feel like having something warm and comforting. Broccoli and potato are a winning combo – broccoli giving us green goodness, and potatoes packing a high potassium punch. This is a super quick and easy soup to make, and dare I say, a great way to get fussy eaters in the family to consume broccoli!

This recipe is: Gluten-free (GF), Wheat-free (WF), Dairy-free (DF), refined Sugar-free (SF), Plant-based/Vegan (PB), Vegetarian (V)

Print Recipe
Broccoli & Potato Soup
You will need: large stainless steel or ceramic pot; cutting board and knife; immersion blender (to blend soup smooth right in the pot) NOTE: The smaller you cut you veg, the quicker they will cook.
Course Meals - Soups
Cuisine Clean Eating
Prep Time 10 - 15 minutes
Cook Time 20 - 30 minutes
Passive Time 20 - 30 minutes
Servings
servings
Ingredients
Course Meals - Soups
Cuisine Clean Eating
Prep Time 10 - 15 minutes
Cook Time 20 - 30 minutes
Passive Time 20 - 30 minutes
Servings
servings
Ingredients
Instructions
  1. Add Coconut Oil and Onion to a large pot and cook until soft.
  2. Add the rest of the ingredients except Coconut Cream / Milk, top up with enough water to just cover everything, and bring to a boil. Then reduce heat and cook until potatoes are soft.
  3. Using an immersion blender (hand-held blender), blend everything in the pot until soup is smooth.
  4. Stir in Coconut Cream / Milk just before serving - leave a little aside to ‘decorate’ the soup at the end. Add more Salt & Pepper to taste.
  5. Add a drizzle of Coconut Cream / Milk and a little sprinkle of Pepper, Paprika or Cayenne Pepper along with some raw, shaved Broccoli flowers to serve.
Recipe Notes

* Double the ingredient amounts to make in bulk and freeze in portions for a quick and easy mid week meal.

*You can make your own Homemade Veggie Stock if you like - I make in a big batch ahead of time, portion and keep in the freezer for future use.

* Add Coconut Oil and Coconut Cream, Sea Salt and Black Pepper to each bowl, and serve with toasted Clean Multiseed Bread (also topped with Coconut Oil).

*Shaved Broccoli Flowers is one of my favourite #ToxicFatBusting tricks: I always shave the Broccoli Flowers off the heads of Broccoli and keep them raw and use as toppings for soups, salads, and spuds/baked potatoes. Even in sandwiches too. Pretty much anything else you like.

Keep them sealed in a glass jar in the fridge and use within 1 - 2 days. 

I also put them into my Green smoothies, blending and drinking as soon as possible after making, to get the most benefit from the Broccoli Flower's potent detoxifying effect. 

We’ve always been told that broccoli is one of the best veggies to consume. Now you know exactly why! This is why cruciferous vegetables are touted as such amazing veggies. They help the body get rid of The Toxic Fat Effect... 

Chewing on raw Broccoli Flowers produces a compound called sulforaphane. Sulforaphane increases activity of the whole glutathione system which is essential for our body's ability to detoxify optimally.

There are now plenty of scientific studies that show that sulforaphane vastly increases the glutathione levels in our bodies which is supremely important in phase II of the natural detoxification process that happens in our bodies.

Glutathione is the key to making our liver detox properly and most efficiently. Due to our chemical body burden (The Toxic Fat Effect - bioaccumulation of toxins in the body), our bodies become less effective at doing it's normal detoxing job. 

Therefore, proactively doing things that will help boost glutathione levels is a big part of helping the liver to function optimally again.

[One of the reasons I have been doing coffee enemas almost every day since I began my journey some 6+ years ago now is for this very reason. As well as immediately, gently, and safely flushing toxic build up in the liver (Read, 'Healing the Gerson Way' or 'The Gerson Therapy'), coffee enemas massively boost glutathione levels, helping to SPEED up the rate at which we can move toxins out of the body.]

So think of creative ways to add those raw broccoli flowers to as many of your meals as possible. If you chop them fine enough, and mix them into food you can even get fussy kids and loved ones benefitting from this power veggie's potent detoxing punch without them even knowing it!

Clean Eating Tips to remember:
*Stainless Steel and Ceramic or Glass Cookware are the safest materials to cook in with the least amount of leaching into food when heat is applied. A high quality set of cookware is essential and will last a lifetime - and a longer lifetime at that because of it. 

*Stainless Steel, Food-grade Silicon or Wooden Cooking Utensils are the safest materials to cook with with the least amount of leaching into food when heat is applied. 

*Olive Oil - it’s best not to cook with Olive Oil, always consume raw. Best to drizzle Olive Oil over food just before serving. It’s better to avoid cooking with Olive Oil as it is a delicate oil and is damaged and becomes harmful to ingest when heated.

*Better oils for cooking with have a higher smoke point/less free radical forming when heated— Coconut Oil, Macadamia Oil and Grapeseed Oil
Turmeric Golden Milk Latte

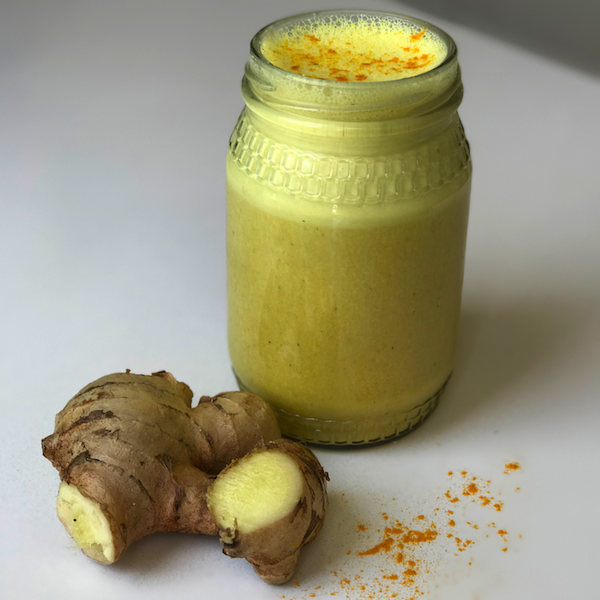
This is such a delicious, healing drink that and one that I turn to often, especially if feeling a little under the weather. Turmeric is a powerhouse anti-inflammatory, plus the addition of Ginger and other spices all enhance the immunity boosting benefits of this yummy drink, especially when they are warmed together. Try not to heat beyond 40 °C / 104 °F in order to keep all the beneficial nutrients effective. Enjoy warm or cold!

This recipe is: Gluten-free (GF), Wheat-free (WF), Dairy-free (DF), refined Sugar-free (SF), Plant-based/Vegan (PB), Vegetarian (V)

Print Recipe
Turmeric Golden Milk Latte
You will need: blender with grinder blades (at least 2 blades lie flat), or use a coffee grinder - to grind nuts for nut milk. To make nut milk: grind 1 small handful (¼ cup) nuts and then blend with 1 cup water.
Prep Time 5-10 minutes
Servings
servings
Ingredients
Prep Time 5-10 minutes
Servings
servings
Ingredients
Instructions
  1. Blend everything until smooth.
  2. If making a warm/hot Turmeric Latte combine in a stainless steel or ceramic pot to a higher temperature on the stove.
  3. If making a cold/iced Turmeric Golden Milk, serve in a glass with ice blocks (or blend with ice).
Recipe Notes
  • If using ground powder spices, be sure to source non-irradiated spices - most spices are radiated before sold commercially, destroying everything beneficial about them.
  • To make your own nut milk: grind ¼ cup of nuts, add 1 cup water & blend until smooth.

Mocha Bullet Coffee

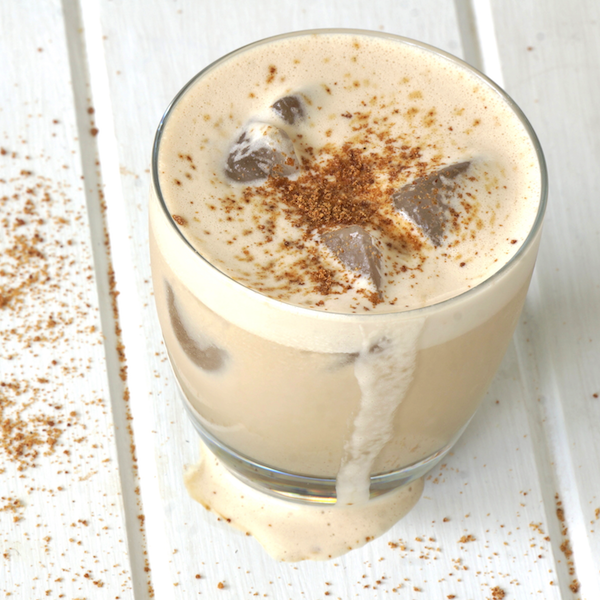
A superfood, but more importantly, chocolate spin on enjoying a clean cuppa Joe… I have always loved mochas, which is why I had to develop a clean mocha recipe so I could continue to enjoy this much loved warmed drink. A nice variation of my favourite Clean Creamy Bullet Coffee is the addition of some raw cacao powder to make this delicious Mocha Bullet Coffee.

As long as you don’t heat your coffee beyond 40 °C / 104 °F then you will keep all the beneficial nutrients in the cacao powder, raw and alive for your body to benefit from such as magnesium, chromium, copper, zinc, iron, flavonoids and healthy saturate and monounsaturated oils.The addition of virgin, cold-pressed coconut oil slows the absorption of caffeine and whatever healthy sweetener you use, plus is an amazing detoxifier and brain boosting food. The combination of raw coconut oil and raw cacao powder, makes this a super healthy drink.

This recipe is: Gluten-free (GF), Wheat-free (WF), Dairy-free (DF), refined Sugar-free (SF), Plant-based/Vegan (PB), Vegetarian (V)

Print Recipe
Mocha Bullet Coffee
You will need: Blender. One which has grinder blades where at least 2 blades lie flat, to grind nuts and seeds. *A coffee grinder can also be used to grind nuts and seeds. Small stainless steel pot.
Prep Time 5-10 minutes
Cook Time 0
Passive Time 0
Servings
servings
Ingredients
Optional
Prep Time 5-10 minutes
Cook Time 0
Passive Time 0
Servings
servings
Ingredients
Optional
Instructions
  1. First grind nuts/seeds together using the grinder attachment on your blender (for smoother end consistency). *A coffee grinder can be used to grind nuts/seeds.
  2. Blend nuts/seeds and water together until smooth. Optional - strain through a nut milk bag or cheesecloth to remove bits/create smoother consistency.
  3. Add the rest of the ingredients and blend again.
  4. Warm on low heat in a stainless steel pot.
  5. If making a warm/hot Coffee - warm on low heat in a stainless steel pot
  6. If making a cold/iced Coffee, serve in a glass with ice blocks or blend with ice to make a Smoothie.
Instructions to make Coffee concentrate
  1. Boil ground coffee in a stainless steel or ceramic pot for 5-20 minutes, depending on your preference of strength/taste. and strain using a nut milk bag or cheese cloth once cooled down. I make a large batch and keep in the fridge for quick ease of use.
Recipe Notes

Clean Eating Tips to remember:
*Coffee can be contaminated with pesticides and other chemicals we need to avoid which is why choosing organic coffee is important. Also be aware that decaf coffee, even if it is organic, has to undergo processing which exposes it to chemicals in order to de-caffeinate the coffee! Best to avoid decaf.

*Commercial dairy milk is produced in a way that can contribute to The Toxic Fat Effect (Module 2 - content covered in the Masterclass slides/videos, live workshop videos and Video #3 - Milk of the 3 part video series '3 Secretly-'evil' ingredients hiding in your kitchen?'), therefore milk alternatives are a cleaner option. Especially if you can avoid store bought - which also can contain questionable stabilisers, thickeners and other additives which contribute to our Chemical Body Burden (Module 2) which also contributes to The Toxic Fat Effect.

* Milk alternatives include my favourite: Coconut Cream/Milk which can be made by blending water with dried organic preservative-free dried Coconut Flakes (grind dry 1st, before blending), or with fresh coconut meat.

* Other milk alternatives, made by blending ¼ cup ingredients (grind dry 1st, before blending with liquid) per 1 cup of water, include: Cashew Nuts, Almonds, Macadamia Nuts, Brasil Nuts, Hemp Seeds, Sunflower Seeds, Sesame Seeds or any other nut or seed you like! (See Video #3 - Milk for more alternatives)

* Sweetened coffee can still be enjoyed with natural sweeteners - see Video #2 - Sugars in Module 2. One of my favourite whole food sweeteners are dates. I keep a cup of dates soaking in water in a sealed jar in the fridge and blend it with my coffee in a blender to break up the dates and make my coffee frothy and creamy. You can also blend soaked dates with the water they have been soaking in to make date paste and use that instead.

Clean Creamy Bullet Coffee

Who said you have to give up the things you love to be healthy? You just gotta turn them clean is what I always say. I love a cuppa just as much as most busy entrepreneurs – I know what’s it’s like, when you’re working hard on a project or launch and you just need a little something to keep you going. And what about just the pure enjoyment and taste of a coffee every now and again? I totally get it, that’s why I wanted to share with you my favourite way to enjoy a clean coffee. Enjoy warm or cold!

This recipe is: Gluten-free (GF), Wheat-free (WF), Dairy-free (DF), refined Sugar-free (SF), Plant-based/Vegan (PB), Vegetarian (V)

Print Recipe
Clean Creamy Bullet Coffee
You will need: Blender with grinder blades where at least 2 blades lie flat, to grind nuts and seeds. *A coffee grinder can also be used to grind nuts and seeds. Small stainless steel pot.
Prep Time 5-10 minutes
Cook Time 0
Passive Time 0
Servings
servings
Ingredients
Optional:
Prep Time 5-10 minutes
Cook Time 0
Passive Time 0
Servings
servings
Ingredients
Optional:
Instructions
  1. First grind nuts/seeds together using the grinder attachment on your blender (for smoother end consistency). *A coffee grinder can be used to grind nuts/seeds.
  2. Blend nuts/seeds and water together until smooth. Optional - strain through a nut milk bag or cheesecloth to remove bits/create smoother consistency.
  3. Add the rest of the ingredients and blend again.
  4. If making a warm/hot Coffee - warm on low heat in a stainless steel pot
  5. If making a cold/iced Coffee, serve in a glass with ice blocks or blend with ice to make a Smoothie.
Instructions to make Coffee concentrate
  1. Boil ground coffee in a stainless steel or ceramic pot for 5-20 minutes, depending on your preference of strength/taste. and strain using a nut milk bag or cheese cloth once cooled down. I make a large batch and keep in the fridge for quick ease of use.
Recipe Notes

Clean Eating Tips to remember:
*Coffee can be contaminated with pesticides and other chemicals we need to avoid which is why choosing organic coffee is important. Also be aware that decaf coffee, even if it is organic, has to undergo processing which exposes it to chemicals in order to de-caffeinate the coffee! Best to avoid decaf.

*Commercial dairy milk is produced in a way that can contribute to The Toxic Fat Effect (Module 2 - content covered in the Masterclass slides/videos, live workshop videos and Video #3 - Milk of the 3 part video series '3 Secretly-'evil' ingredients hiding in your kitchen?'), therefore milk alternatives are a cleaner option. Especially if you can avoid store bought - which also can contain questionable stabilisers, thickeners and other additives which contribute to our Chemical Body Burden (Module 2) which also contributes to The Toxic Fat Effect.

* Milk alternatives include my favourite: Coconut Cream/Milk which can be made by blending water with dried organic preservative-free dried Coconut Flakes (grind dry 1st, before blending), or with fresh coconut meat.

* Other milk alternatives, made by blending ¼ cup ingredients (grind dry 1st, before blending) per 1 cup of water, include: Cashew Nuts, Almonds, Macadamia Nuts, Brasil Nuts, Hemp Seeds, Sunflower Seeds, Sesame Seeds or any other nut or seed you like! (See Video #3 - Milk for more alternatives)

* Sweetened coffee can still be enjoyed with natural sweeteners - see Video #2 - Sugars in Module 2. One of my favourite whole food sweeteners are dates. I keep a cup of dates soaking in water in a sealed jar in the fridge and blend it with my coffee in a blender to break up the dates and make my coffee frothy and creamy. You can also blend soaked dates with the water they have been soaking in to make date paste and use that instead.

Coconut Buckwheat Flatbreads

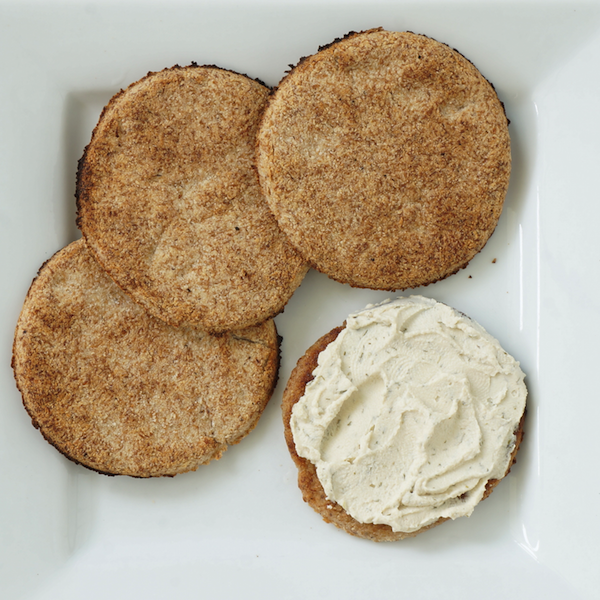
These quick and easy to make flatbreads are great for a quick snack. You can toast them up, add some coconut oil, and serve them up with some nut butter or cashew nut cream cheese. They have a slightly sweet taste and get a little crunch when they are toasted, which makes them yummy replacements for burger buns. You can make a whole batch and keep them in the fridge or freezer, and use when needed.

This recipe is: Gluten-free (GF), Wheat-free (WF), Dairy-free (DF), refined Sugar-free (SF), Plant-based/Vegan (PB), Vegetarian (V)

Print Recipe
Coconut Buckwheat Flatbreads
You will need: 1 large mixing bowl; wooden spoon/silicon spatula; measuring cups & spoons; food-grade silicon baking sheet or non-toxic parchment/ baking paper lined baking tray (please avoid flatbreads coming into contact with toxic non-stick coatings); small bowl for 'cutting out' flatbread shapes; bleach-free paper towel and air-tight container or large ziplock bag to store in fridge/freezer.
Prep Time 5 - 10 minutes
Cook Time 30 minutes
Passive Time 30 minutes (baking)
Servings
flatbreads
Ingredients
Prep Time 5 - 10 minutes
Cook Time 30 minutes
Passive Time 30 minutes (baking)
Servings
flatbreads
Ingredients
Instructions
  1. Preheat oven to 160°C / 320°F.
  2. Mix all dry ingredients together in large mixing bowl.
  3. Add Coconut Oil and Water and mix well.
  4. Spread dough (1cm / ½ inch thick), use a small bowl to ‘cut’ out round flatbread shapes.
  5. Place on baking tray lined with non-toxic/unbleached parchment/baking paper.
  6. Bake for approx. 10-15 min each side or until golden.
Recipe Notes
  • If you can't find Buckwheat Flour, as with most nut and seed flours and meals, you can easily make your own - which I often do myself - by purchasing the whole food ingredient i.e. Buckwheat seeds, and using a blender with grinder blades (at least 2 blades lie flat), or use a coffee grinder to grind the nuts/seeds into a flour/meal.
  • You can also substitute Almond Meal (ground Almonds) in place of Buckwheat.
  • Wait until cool, and then wrap in bleach-free/non-toxic paper towel in an airtight container or large ziplock bag.
  • It is best to store your bread in the fridge or freezer - it will also last longer.