| Prep Time | 10 - 15 minutes |
| Cook Time | 20 - 30 minutes |
| Passive Time | 0 |
| Servings |
servings
|
- 2 tbsp Coconut Oil
- 1 medium Yellow / Brown Onion (roughly chopped)
- ½ tsp Ginger (fresh, grated)
- ½ tsp Cinnamon
- ½ tsp Paprika
- 2 medium Carrots (sliced)
- 1 medium Butternut Squash (skin removed, cut into ½ inch cubes)
- 2 small Potatoes
- 2 cups Vegetable Stock (look for gluten-free)
- ¼ cups Coconut Cream / Milk (or Nut Milk)
- ½ tsp Sea Salt
- ½ tsp Black Pepper
Ingredients
|
|
- Add Coconut Oil and Onion to a large pot and cook until soft.
- Add Ginger, Cinnamon & Paprika - stir in for 1 min.
- Add the rest of the ingredients except the Coconut Cream / Milk, top up with enough water to just cover everything, and bring to a boil. Then reduce heat and cook until veg are soft.
- Using an immersion blender (hand-held blender), blend everything in the pot until soup is smooth.
- Stir in Coconut Cream / Milk just before serving - leave a little aside to ‘decorate’ the soup at the end. Add more Salt & Pepper to taste.
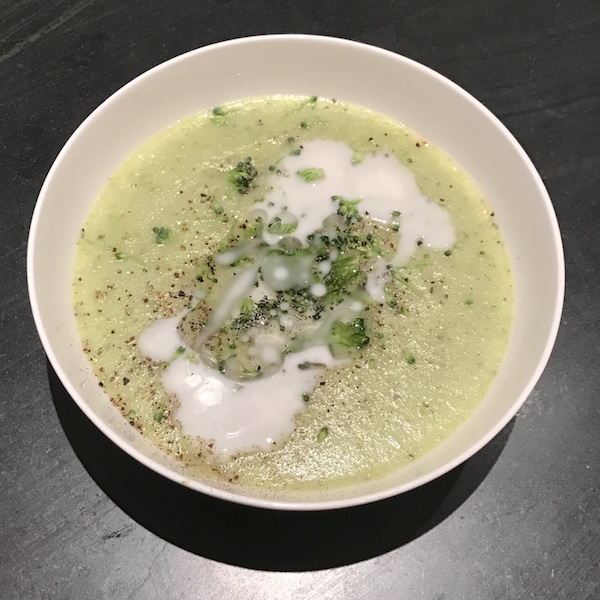
- Add a drizzle of Coconut Cream / Milk and a little sprinkle of Pepper, Paprika or Cayenne Pepper to serve.
* Double the ingredient amounts to make in bulk and freeze in portions for a quick and easy mid week meal.
*You can make your own Homemade Veggie Stock if you like - I make in a big batch ahead of time, portion and keep in the freezer for future use.
* Add Coconut Oil and Coconut Cream, Sea Salt and Black Pepper to each bowl, and serve with toasted Clean Multiseed Bread (also topped with Coconut Oil).
*Optional topping: Add shaved Broccoli Flowers (see below)
*Shaved Broccoli Flowers is one of my favourite #ToxicFatBusting tricks: I always shave the Broccoli Flowers off the heads of Broccoli and keep them raw and use as toppings for soups, salads, and spuds/baked potatoes. Even in sandwiches too. Pretty much anything else you like.
Keep them sealed in a glass jar in the fridge and use within 1 - 2 days.
I also put them into my Green smoothies, blending and drinking as soon as possible after making, to get the most benefit from the Broccoli Flower's potent detoxifying effect.
We’ve always been told that broccoli is one of the best veggies to consume. Now you know exactly why! This is why cruciferous vegetables are touted as such amazing veggies. They help the body get rid of The Toxic Fat Effect...
Chewing on raw Broccoli Flowers produces a compound called sulforaphane. Sulforaphane increases activity of the whole glutathione system which is essential for our body's ability to detoxify optimally.
There are now plenty of scientific studies that show that sulforaphane vastly increases the glutathione levels in our bodies which is supremely important in phase II of the natural detoxification process that happens in our bodies.
Glutathione is the key to making our liver detox properly and most efficiently. Due to our chemical body burden (The Toxic Fat Effect - bioaccumulation of toxins in the body), our bodies become less effective at doing it's normal detoxing job.
Therefore, proactively doing things that will help boost glutathione levels is a big part of helping the liver to function optimally again.
[One of the reasons I have been doing coffee enemas almost every day since I began my journey some 6+ years ago now is for this very reason. As well as immediately, gently, and safely flushing toxic build up in the liver (Read, 'Healing the Gerson Way' or 'The Gerson Therapy'), coffee enemas massively boost glutathione levels, helping to SPEED up the rate at which we can move toxins out of the body.]
So think of creative ways to add those raw broccoli flowers to as many of your meals as possible. If you chop them fine enough, and mix them into food you can even get fussy kids and loved ones benefitting from this power veggie's potent detoxing punch without them even knowing it!
Clean Eating Tips to remember:
*Stainless Steel and Ceramic or Glass Cookware are the safest materials to cook in with the least amount of leaching into food when heat is applied. A high quality set of cookware is essential and will last a lifetime - and a longer lifetime at that because of it.
*Stainless Steel, Food-grade Silicon or Wooden Cooking Utensils are the safest materials to cook with with the least amount of leaching into food when heat is applied.
*Olive Oil - it’s best not to cook with Olive Oil, always consume raw. Best to drizzle Olive Oil over food just before serving. It’s better to avoid cooking with Olive Oil as it is a delicate oil and is damaged and becomes harmful to ingest when heated.
*Better oils for cooking with have a higher smoke point/less free radical forming when heated— Coconut Oil, Macadamia Oil and Grapeseed Oil