You will need: Blender. Medium size glass jar (with lid). Note: Use Rice Vermicelli or very thin wheat-free/gluten-free pasta for quicker cooking time. If using thicker pasta it will take more than 15min to cook the pasta.
Boil some water and place the Rice Vermicelli Pasta in a pot with the hot water and boil for a few minutes while you prepare the Pesto sauce.
Pesto Sauce: Crush or chop the garlic finely.
Pesto Sauce: Put all the ingredients together except the tomatoes and bread in a blender, and pulse well enough, while still leaving a little 'coarseness' to the Basil leaves (otherwise Pesto becomes a puree/paste which is not as nice).
Cook the Capers in a little oil on high heat until they just ‘pop’.
Chop the Baby Tomatoes and cook in a little oil until soft.
Boil some water and place the Rice Vermicelli Pasta in a pot with the hot water and boil for a few minutes. Once cooked through (doesn’t take long - don’t overcook), drain and set aside.
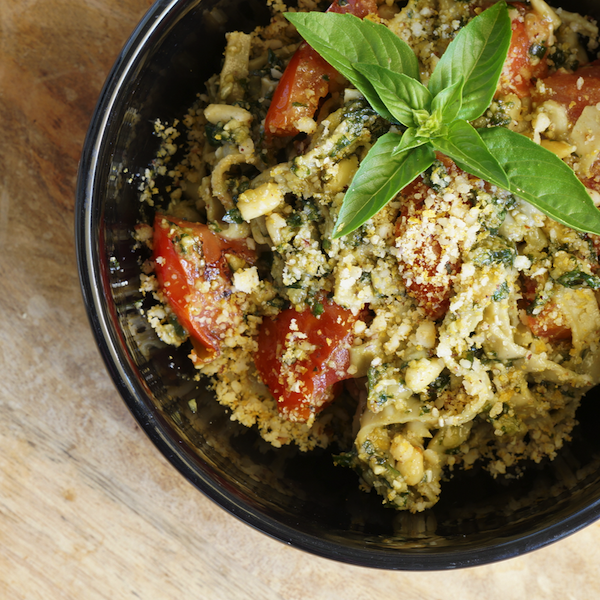
Add the pasta to a large mixing bowl with the cooked Tomatoes and capers. Add 2 tablespoons of Pesto Sauce per serving and use a little Olive Oil to help everything mix together.
Serve with the Hemp Seeds sprinkled over with a splash of Olive Oil, and Sea Salt & Pepper on top.
Recipe Notes
*AWESOME additions to the above recipe:
1) Add some cooked onion (Jay’s favourite!). 2) Or add cooked Onion and Shitake Mushrooms (Marlene’s favourite!)
*You can use a large mouthed jar and an immersion blender, and pulse the Pesto sauce quickly right in the jar.
*Storing tip: use a glass jar with lid just big enough to hold the Pesto sauce (too much air makes sauce go off faster). Use a little Olive Oil to coat the entire inside of jar before adding the Pesto Sauce, then cover the top with a thin layer of Olive Oil before sealing with a lid.
Always top again with Olive Oil when you've used some out of the jar each time. The oil will naturally 'preserve' the Pesto by preventing the sauce from being exposed to air which helps keep the Pesto Sauce for up to a week (if you keep air out and keep a layer of oil on the top). The oil will also help to prevent molds/moulds from growing too soon on top!
You will need: Blender. Medium size glass jar (with lid). Note: Use Rice Vermicelli or very thin wheat-free/gluten-free pasta for quicker cooking time. If using thicker pasta it will take more than 15min to cook the pasta.
Pesto Sauce: Put all the ingredients together except the tomatoes and bread in a blender, and pulse well enough, while still leaving a little 'coarseness' to the Basil leaves (otherwise Pesto becomes a puree/paste which is not as nice).
Chop the Baby Tomatoes and cook in a little oil until soft.
Boil some water and place the Gluten-free Rice Pasta in a pot with the hot water and boil for a few minutes. Once cooked through (doesn’t take long - don’t overcook), drain and set aside.
Add the pasta to a large mixing bowl with the cooked Tomatoes. Add 2 tablespoons of Pesto Sauce per serving and use a little Olive Oil to help everything mix together.
Serve with a splash of Olive Oil, and Sea Salt & Pepper on top.
Recipe Notes
*AWESOME additions to the above recipe:
1) Add some cooked onion (Jay’s favourite!). 2) Or add cooked Onion and Shitake Mushrooms (Marlene’s favourite!)
*You can use a large mouthed jar and an immersion blender, and pulse the Pesto sauce quickly right in the jar.
*Storing tip: use a glass jar with lid just big enough to hold the Pesto sauce (too much air makes sauce go off faster). Use a little Olive Oil to coat the entire inside of jar before adding the Pesto Sauce, then cover the top with a thin layer of Olive Oil before sealing with a lid.
Gluten-free pasta: Be sure to check your labels. Not all gluten-free pasta is healthy. Avoid soy and corn flour ingredients (most are GMO’s unless certified organic) - even then, soy should rather be avoided (studies are raising questions about soy).
Always top again with Olive Oil when you've used some out of the jar each time. The oil will naturally 'preserve' the Pesto by preventing the sauce from being exposed to air which helps keep the Pesto Sauce for up to a week (if you keep air out and keep a layer of oil on the top). The oil will also help to prevent molds/moulds from growing too soon on top!
*Tomatoes are on the EWG - Environmental Working Group’s ‘Dirty Dozen’ list which makes them highly sprayed with pesticides. Use organic/spray-free Tomatoes or if you really can’t find any, give the Tomatoes a bath in White Vinegar water (¼ cup White Vinegar mixed with 2-3 cups of water) to help remove as much pesticide residue as possible.
You will need: blender; chopping board & knife; medium size glass jar (with lid). NOTE: Pinenuts have become extremely expensive in recent years, and can often be difficult to find. I have been making my Pesto with a mix of Cashew Nuts & Sunflower Seeds (sometimes other nuts/seeds) for quite some time and I actually prefer the taste. Experiment and see which ones/combination you like.
4slicesClean Multi-seed Bread(or your choice of wheat-free/gluten-free bread)(see recipe notes)
Instructions
Crush or chop the garlic finely.
Put all the ingredients together except the tomatoes and bread in a blender, and pulse well enough, while still leaving a little 'coarseness' to the Basil leaves (otherwise Pesto becomes a puree/paste which is not as nice).
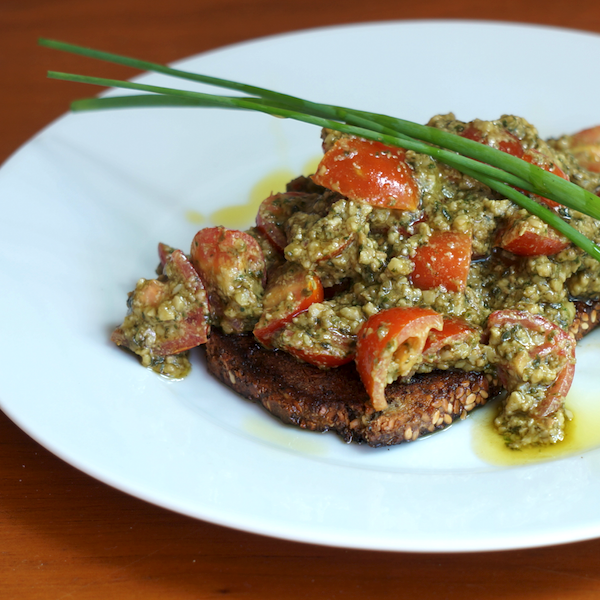
Chop the Baby Tomatoes and mix in a couple tablespoons of the Pesto Sauce. Add a little Olive Oil to help it mix together.
Toast the bread. Optional - use an extra clove of Garlic to rub onto the surface of the toasted bread.
Add a little Olive Oil onto the toasted bread before generously spooning the Tomato Pesto mixture onto the top of the bread. Serve with a splash of Olive Oil, and Sea Salt & Pepper on top.
*You can use a large mouthed jar and an immersion blender, and pulse this sauce quickly right in the jar.
*Storing tip: use a glass jar with lid just big enough to hold the Pesto sauce (too much air makes sauce go off faster). Use a little Olive Oil to coat the entire inside of jar before adding the Pesto Sauce, then cover the top with a thin layer of Olive Oil before sealing with a lid.
Always top again with Olive Oil when you've used some out of the jar each time. The oil will naturally 'preserve' the Pesto by preventing the sauce from being exposed to air which helps keep the Pesto Sauce for up to a week (if you keep air out and keep a layer of oil on the top). The oil will also help to prevent molds/moulds from growing too soon on top!
*Store sealed in the fridge.
*Tomatoes are on the EWG - Environmental Working Group’s ‘Dirty Dozen’ list which makes them highly sprayed with pesticides. Use organic/spray-free Tomatoes or if you really can’t find any, give the Tomatoes a bath in White Vinegar water (¼ cup White Vinegar mixed with 2-3 cups of water) to help remove as much pesticide residue as possible.
This is one of those awesome make-in-bulk-and-freeze kinda recipes. This is something I make big batches of, portion and then store sealed in smaller containers in the freezer for those all too familiar week day evenings when you are stretched for time or don’t feel like preparing something from scratch. There are so many ways to enjoy this Falafel mix. Make into balls or smaller ‘bites’ and serve with a dip or sauce for lunch boxes, social get togethers, or as a healthy filling little snack in between meals. You can create burger size patties and serve with salad or on toasted Clean Multiseed Bread. Perhaps you prefer to serve them between lettuce leaves instead of a burger bun. Or in between sliced and toasted Coconut Buckwheat Flatbreads, (or your choice of locally sourced gluten-free buns).
This recipe is: Gluten-free (GF), Wheat-free (WF), Dairy-free (DF), refined Sugar-free (SF), Plant-based/Vegan (PB), Vegetarian (V)
Print Recipe
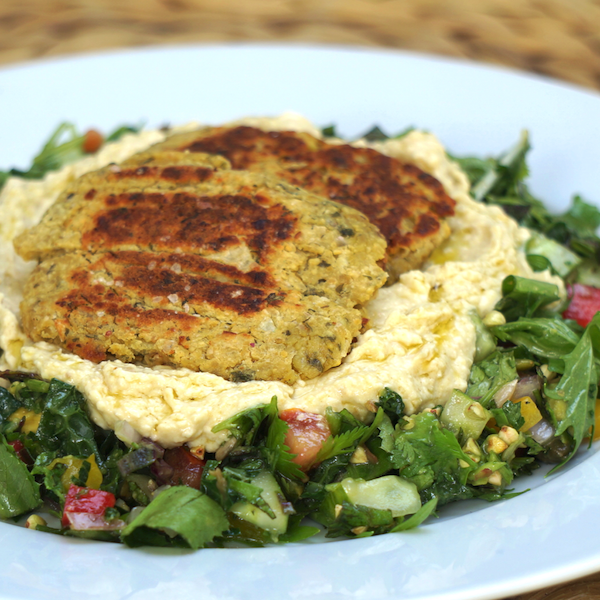
Falafel Salad Plate
You will need: food processor or blender NOTE: You can pre-make this mixture a day or few hours before using, for flavours and dough to 'develop' - this is not necessary though of course. If making homemade Hummus, this recipe will take 15 minutes longer to make.
Preheat oven to 350°F or 180°C. You can skip this and cook on stove top in a pan.
Falafel Patties: Combine everything except Chickpea Flour and Baking Powder in a food processor.
Falafel Patties: Pulse to create a rough, but well combined mixture - don't pulse/blend for too long or else you will make a puree/paste.
Falafel Patties: Pulse in the Baking Powder and half the Chickpea Flour. Only add enough flour to make dough slightly firm to press into shapes.
Falafel Patties: Line a baking tray (or cooking pan) with non-toxic parchment paper or silicon baking mats.
Falafel Patties: Shape the mixture into your choice of either bites, balls or patties and space them out onto the baking tray (or cooking pan).
Falafel Patties: Bake for 10-15 minutes on one side, turn over and bake for a further 10-15 minutes, or until golden brown. If cooking with a pan, cook on low heat for the same amount of time.
Falafel Patties: Optional - You can brown the patties up in a little heated Coconut Oil in the pan to finish them off.
Creamy Hummus: Blend Tahini and Lemon Juice together until smooth, fluffy and creamy - continually scrape sides using a spatula to combine well.
Creamy Hummus: Slowly add Chickpeas to the mix, blending in between.
Creamy Hummus: Only add Water if need be to reach desired consistency.
Combine your choice of Salad Ingredients on a plate, add 2-3 tablespoons of Hummus and add the patties to the Salad plate.
Recipe Notes
*Avoid baking/cooking on aluminium and non-stick surfaces - they will bake/leach toxic substances into your food. Cook with stainless steel and ceramic where possible. Or use bleach-free, non-toxic baking paper and food-grade silicon mats to line baking trays or pots and pans when baking, and cooking on stove top. Use a little Coconut Oil in a stainless steel pan if you prefer not to bake.
*As mentioned, this recipe can be made in bulk, portioned into smaller containers, sealed and stored in the fridge or freezer.
*If you can, choose organic Chickpeas canned in BPA-free cans. I use an organic brand called Eden (available in Australia & USA). Haven't yet found a brand in South Africa - please share in our Fresh Life Community Facebook page if you do find one.
*See Creamy Hummus Dip recipe to see how to activate and prepare Chickpeas from scratch.
Serving suggestions:
* Make Falafel burgers, by putting them between two sides of a toasted Coconut Buckwheat Flatbread, served with Hummus and salad ingredients.
* Made into balls they are great for lunch boxes or served with a dip as a pre-dinner snack
Chop Baby Tomatoes and Red Onion into desired size chunks.
Finely chop/mash Garlic, Chillie and Coriander and mix in.
Add Lemon / Lime juice, Salt & Sugar and stir.
Extra Tip: Set aside for 5 - 10 minutes to allow flavour to develop before serving.
Recipe Notes
*Serve as a dip alongside Guacamole with either Organic Corn Chips (organic because most corn is GMO) or Gluten-free/wheat-free Crackers. Also good with veggie dippers like Carrot and Cucumber pieces.
*For a fresh fruity salsa, replace the Tomatoes for Mango to make a Mango Salsa.
*Tomatoes are on the EWG - Environmental Working Group’s ‘Dirty Dozen’ list which makes them highly sprayed with pesticides. Use organic/spray-free Tomatoes or if you really can’t find any, give the Tomatoes a bath in White Vinegar water (¼ cup White Vinegar mixed with 2-3 cups of water) to help remove as much pesticide residue as possible.
You will need: chopping board & knife; fork and low rimmed ceramic/glass bowl to mash avo; larger ceramic/glass bowl for mixing; ceramic/glass container or jar w/ lid for storing;
Mash Avocados and add the juice of the Lemons / Limes and mix through.
Chop Tomatoes, Red Onion, Chillies, Coriander and finely chopped Garlic and mix together.
Add Sea Salt and Lemons / Limes juice to taste (add more if needed).
Recipe Notes
*Store in a glass jar in the fridge. Eat within 1-2 days.
*You can use a few regular tomatoes instead of baby tomatoes - I just love the sweetness of baby tomatoes. The redder the tomatoes, the better they taste.