Archives

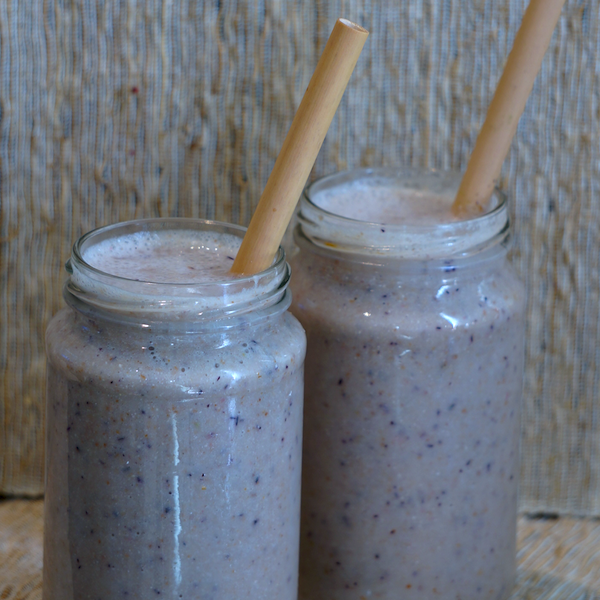
Berry Bananza Smoothie


Print Recipe
Berry Bananza Smoothie
You will need: Blender that can blend ice. One which has grinder blades where at least 2 blades lie flat, to grind nuts and seeds. *A coffee grinder can also be used to grind nuts and seeds.
Prep Time 5-10 minutes
Cook Time 0
Passive Time 0
Servings
servings
Ingredients
Optional
Prep Time 5-10 minutes
Cook Time 0
Passive Time 0
Servings
servings
Ingredients
Optional
Instructions
  1. First grind nuts/seeds together using the grinder attachment on your blender (for smoother end consistency). *A coffee grinder can be used to grind nuts/seeds.
  2. Blend all ingredients except ice, until smooth. Add ice and blend again.
Recipe Notes

*Always make fresh and consume immediately, where possible - you get the most benefits and cleansing/detoxing and nourishing effects from freshly made smoothies.

*If need be, prepare the ingredients you’ll need for your smoothie the night before. Put dry ingredients together in a container, add fresh ingredients to a container and put it ready in the fridge, portion frozen ingredients in with the ice you’ll need in a freezer bag and have that ready in the freezer for the morning.

*Seal your smoothie in with a lid in a glass bottle or stainless steel container - never in plastic. Plastic will leach into your smoothie and plastic adds to the bio-accumulation of chemicals in the body (chemical body burden), contributing to The Toxic Fat Effect! (see Module 2). A great idea is a flask which helps keep your smoothie cold and fresher for longer when you are out and about.

*When traveling, take your personal blender with you. Take portions of nuts and superfood powders. It’s easy to pick up a banana or some fresh berries or other fruit to sweeten and freshen up your smoothies. I travel with my Tribest Personal Blender everywhere I go (weight 4.4 lbs / 2 kg).


*Choose the cleanest ingredients possible:

-Choose spray-free/organic fresh produce where possible, and if buying conventional, rinse produce in diluted white vinegar water.

-Choose dry ingredients (i.e. nuts, seeds, dried fruits ) that are spray-fee/organic where possible, and which don’t have preservatives such as sulphur dioxide

- Choose virgin, cold-pressed Coconut Oil in glass where possible. It should be pure white in colour. Do not choose cheaper, deodorised/neutral flavoured coconut oils that are off-white.

-Choose Coconut Cream and Coconut Milk that is clean/free from additives, preservatives and E numbers. Plain Coconut Cream/Milk is better than the ones with added guar gum as this changes the consistency of recipes. You can use Nut Milk as an alternative.

-Choose to homemade Nut Milk instead of buying. Most store bought ones have additives and stabilisers. Quick Tip: It’s easy to make your own: just grind ¼ cup nuts, then blend with 1 cup water.

-Choose whole fruits over optional sweeteners if you need to add more sweetness. My preferred choice is Date Paste (pre-soaked Dates). Quick Tip: Keep a jar filled with Dates covered with water, in the fridge ready to go and use as is (instead of actually blending to make Date Paste).


Quick Link to FLIMJ Program resources for Fresh Life Smoothies:

Module 2 - refresh on information about The Toxic Fat Effect and how bioaccumulation of toxins in our bodies can lead to weight gain (that’s hard to lose), brain fog, low energy and many more poor health symptoms.

Module 5 - Become a Smoothie Master cheat sheet to print off and put up on the fridge so you can make awesome smoothies from scratch with my Fresh Life Smoothie Formula with what you already have in your kitchen.

Module 5 - To get you into the swing of things, redo our 7 Day Smoothies Save the Day Challenge - you’re always supported in our Fresh Life Community, no matter when you decide to do any of the 7 Day Challenges.

You’ll find your Recipe Book: 7 Days of Smoothies Save the Day and Shopping List print off's to guide you through the challenge.


My thoughts on having a Fresh Life Smoothie Habit:

Drinking fresh smoothies is a very important, wonderfully quick and convenient, key to your Fresh Life Internal Makeover Journey. Just like fresh juicing, it is a fast, delicious way to get live enzymes - which can only be obtained from raw plants/veggies and fruits - plus vital nutrients into your body for your cells to function optimally.

It is also one of the best ways to provide your body with enough soft bulk (plant fibre) which our bodies need for proper gut function. Good quality plant fibre is what the good bacteria in our gut feeds on! Plus it helps the body to move xeno-toxins (which cause The Toxic Fat Effect - Module 2) from the body every day.

Gone are the days of getting away with occasionally doing a cleanse, or doing a detox a few times a year. The influx and exposure of toxins we have on a daily basis is now too much and too varied for our bodies to handle on its own.

These daily toxins bio-accumulate in our bodies (refer to Module 2 work) and most won’t move out of the body without specific assistance.

We have to be proactive to get the results we want.

We have to, as I like to say, “ABC - always be cleansing…”

You also need to “ABN - always be nourishing…” And smoothies really are an amazing way to jam a whole lot of good quality, clean nutrient-dense ingredients and healthy fats and oils into one tasty drink.

If you want to Live Your Best Fresh Life, smoothies need to be a regular part of your days.

During the initial stage of my journey I was drinking a lot of freshly made juices, especially first thing in the mornings.

Essential during periods of healing as lots of fresh juicing gives the body highly concentrated amounts of nutrients that it really needs without fibre and fats/oils.

This means juices are easier to digest and the body is able to assimilate and utelise those nutrients, faster. Which is why I was able to lose so much toxic fat/excess weight so quickly. And in a healthy way.

Smoothies became a huge hit for me as a way to compliment what I was achieving with juicing and other cleansing rituals.

Firstly, because they are so quick and easy to make, they became my go to for lunch or as a on-the-go breakfast if I was really pressed for time in the mornings. I also used smoothies to answer late afternoon cravings and after dinner sweet tooth cravings.

Remember, cravings are our bodies way of asking for the nutrients it needs. But it’s confusing because we crave foods that aren’t good for us and won’t actually give our bodies what it needs.

A fresh juice or a smoothie is able to help give our body the nutrients it’s really after.

A Fresh Life Habit I use myself is to meet cravings with a juice or smoothie first, and then go after what I thought I was craving.

I find that l either don’t want that thing I was craving in the first place, or at the very least I’ll eat a lot less of it. A win win situation. More baby-steps to help us get to where we ant to be and a great Fresh Life Habit to cultivate.

Secondly, smoothies offer a delicious way to give the body whole food ingredients along with their beneficial plant fibre, healthy fats/oils and is also a great way to add nutrient-dense superfoods. After juicing, smoothies are the next best, easiest food for our bodies to digest as the ingredients have been blended, helping the body with the digestive process.

After cleansing and flushing the body with easy to digest juices, smoothies can nourish and make our tummies feel full and satiated.

One beautiful smoothie a day became a way of saving time - often a smoothie is enough to fill me at lunchtime, and help abolish cravings by packing in the nutrients the body loves. This is why smoothies are an integral part of my Fresh Life Formula.

Fresh smoothies nourishes, and helps the body bind and push toxins out of the body, every single day.

Prep Tip: You can always prep your smoothie ingredients the night before if you’re going to be rushed the next day. As mentioned in the Recipe Notes, you can put dry ingredients together in a container, add fresh ingredients to a container and put it ready in the fridge, portion frozen ingredients in with the ice you’ll need in a freezer bag and have ready in the freezer for the morning.

Storing Tip: Just seal in a glass jar with a lid or stainless steel container in the fridge so it’s ready to go in the morning. A great idea is a flask which helps keep your smoothie cold and fresher for longer when you are out and about.

Blender Tip: When traveling or working away from home, take your personal blender with you. Take portions of nuts and superfood powders. It's easy to pick up a banana or some fresh berries or other fruit to be able to sweeten and freshen up your smoothies. I travel with my Tribest Personal Blender everywhere I go (weight 4.4 lbs / 2 kg).

The darker the green colour of a plant, the more chlorophyll the plant contains. And chlorophyll helps to push toxins from our cells and bind and remove them from our blood stream and gut.

Over and above everything, if I can only do one thing in a day, it will be to ensure I have at least one raw juice or smoothie a day - preferably a Green one!

Alternating colours is also a good idea to ensure your body is receiving a full spectrum of nutrients - eating/drinking the whole rainbow of colours we find in vegetables and fruits will achieve this without you even having to think about what your body needs.

Got questions for me? Or want some friendly support and accountability to help you on your FLIMJourney?

Our Fresh Life Community is the place to be!

See you over there!

Big Hugs,
xx Sam

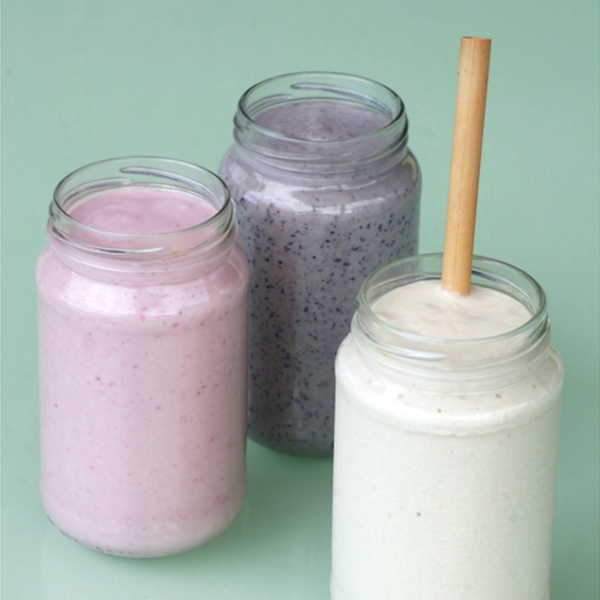
Basic Fruit Smoothies


Print Recipe
Basic Fruit Smoothies
You will need: Blender that can blend ice. One which has grinder blades where at least 2 blades lie flat, to grind nuts and seeds. *A coffee grinder can also be used to grind nuts and seeds.
Prep Time 5-10 minutes
Cook Time 0
Passive Time 0
Servings
servings
Ingredients
Optional
Prep Time 5-10 minutes
Cook Time 0
Passive Time 0
Servings
servings
Ingredients
Optional
Instructions
  1. First grind nuts/seeds together using the grinder attachment on your blender (for smoother end consistency). *A coffee grinder can be used to grind nuts/seeds.
  2. Blend all ingredients except ice, until smooth. Add ice and blend again.
Recipe Notes

*Always make fresh and consume immediately, where possible - you get the most benefits and cleansing/detoxing and nourishing effects from freshly made smoothies.

*If need be, prepare the ingredients you’ll need for your smoothie the night before. Put dry ingredients together in a container, add fresh ingredients to a container and put it ready in the fridge, portion frozen ingredients in with the ice you’ll need in a freezer bag and have that ready in the freezer for the morning.

*Seal your smoothie in with a lid in a glass bottle or stainless steel container - never in plastic. Plastic will leach into your smoothie and plastic adds to the bio-accumulation of chemicals in the body (chemical body burden), contributing to The Toxic Fat Effect! (see Module 2). A great idea is a flask which helps keep your smoothie cold and fresher for longer when you are out and about.

*When traveling, take your personal blender with you. Take portions of nuts and superfood powders. It’s easy to pick up a banana or some fresh berries or other fruit to sweeten and freshen up your smoothies. I travel with my Tribest Personal Blender everywhere I go (weight 4.4 lbs / 2 kg).


*Choose the cleanest ingredients possible:

-Choose spray-free/organic fresh produce where possible, and if buying conventional, rinse produce in diluted white vinegar water.

-Choose dry ingredients (i.e. nuts, seeds, dried fruits ) that are spray-fee/organic where possible, and which don’t have preservatives such as sulphur dioxide

- Choose virgin, cold-pressed Coconut Oil in glass where possible. It should be pure white in colour. Do not choose cheaper, deodorised/neutral flavoured coconut oils that are off-white.

-Choose Coconut Cream and Coconut Milk that is clean/free from additives, preservatives and E numbers. Plain Coconut Cream/Milk is better than the ones with added guar gum as this changes the consistency of recipes. You can use Nut Milk as an alternative.

-Choose to homemade Nut Milk instead of buying. Most store bought ones have additives and stabilisers. Quick Tip: It’s easy to make your own: just grind ¼ cup nuts, then blend with 1 cup water.

-Choose whole fruits over optional sweeteners if you need to add more sweetness. My preferred choice is Date Paste (pre-soaked Dates). Quick Tip: Keep a jar filled with Dates covered with water, in the fridge ready to go and use as is (instead of actually blending to make Date Paste).


Quick Link to FLIMJ Program resources for Fresh Life Smoothies:

Module 2 - refresh on information about The Toxic Fat Effect and how bioaccumulation of toxins in our bodies can lead to weight gain (that’s hard to lose), brain fog, low energy and many more poor health symptoms.

Module 5 - Become a Smoothie Master cheat sheet to print off and put up on the fridge so you can make awesome smoothies from scratch with my Fresh Life Smoothie Formula with what you already have in your kitchen.

Module 5 - To get you into the swing of things, redo our 7 Day Smoothies Save the Day Challenge - you’re always supported in our Fresh Life Community, no matter when you decide to do any of the 7 Day Challenges.

You’ll find your Recipe Book: 7 Days of Smoothies Save the Day and Shopping List print off's to guide you through the challenge.


My thoughts on having a Fresh Life Smoothie Habit:

Drinking fresh smoothies is a very important, wonderfully quick and convenient, key to your Fresh Life Internal Makeover Journey. Just like fresh juicing, it is a fast, delicious way to get live enzymes - which can only be obtained from raw plants/veggies and fruits - plus vital nutrients into your body for your cells to function optimally.

It is also one of the best ways to provide your body with enough soft bulk (plant fibre) which our bodies need for proper gut function. Good quality plant fibre is what the good bacteria in our gut feeds on! Plus it helps the body to move xeno-toxins (which cause The Toxic Fat Effect - Module 2) from the body every day.

Gone are the days of getting away with occasionally doing a cleanse, or doing a detox a few times a year. The influx and exposure of toxins we have on a daily basis is now too much and too varied for our bodies to handle on its own.

These daily toxins bio-accumulate in our bodies (refer to Module 2 work) and most won’t move out of the body without specific assistance.

We have to be proactive to get the results we want.

We have to, as I like to say, “ABC - always be cleansing…”

You also need to “ABN - always be nourishing…” And smoothies really are an amazing way to jam a whole lot of good quality, clean nutrient-dense ingredients and healthy fats and oils into one tasty drink.

If you want to Live Your Best Fresh Life, smoothies need to be a regular part of your days.

During the initial stage of my journey I was drinking a lot of freshly made juices, especially first thing in the mornings.

Essential during periods of healing as lots of fresh juicing gives the body highly concentrated amounts of nutrients that it really needs without fibre and fats/oils.

This means juices are easier to digest and the body is able to assimilate and utelise those nutrients, faster. Which is why I was able to lose so much toxic fat/excess weight so quickly. And in a healthy way.

Smoothies became a huge hit for me as a way to compliment what I was achieving with juicing and other cleansing rituals.

Firstly, because they are so quick and easy to make, they became my go to for lunch or as a on-the-go breakfast if I was really pressed for time in the mornings. I also used smoothies to answer late afternoon cravings and after dinner sweet tooth cravings.

Remember, cravings are our bodies way of asking for the nutrients it needs. But it’s confusing because we crave foods that aren’t good for us and won’t actually give our bodies what it needs.

A fresh juice or a smoothie is able to help give our body the nutrients it’s really after.

A Fresh Life Habit I use myself is to meet cravings with a juice or smoothie first, and then go after what I thought I was craving.

I find that l either don’t want that thing I was craving in the first place, or at the very least I’ll eat a lot less of it. A win win situation. More baby-steps to help us get to where we ant to be and a great Fresh Life Habit to cultivate.

Secondly, smoothies offer a delicious way to give the body whole food ingredients along with their beneficial plant fibre, healthy fats/oils and is also a great way to add nutrient-dense superfoods. After juicing, smoothies are the next best, easiest food for our bodies to digest as the ingredients have been blended, helping the body with the digestive process.

After cleansing and flushing the body with easy to digest juices, smoothies can nourish and make our tummies feel full and satiated.

One beautiful smoothie a day became a way of saving time -  often a smoothie is enough to fill me at lunchtime,  and help abolish cravings by packing in the nutrients the body loves. This is why smoothies are an integral part of my Fresh Life Formula.

Fresh smoothies nourishes, and helps the body bind and push toxins out of the body, every single day.

Prep Tip: You can always prep your smoothie ingredients the night before if you’re going to be rushed the next day. As mentioned in the Recipe Notes, you can put dry ingredients together in a container, add fresh ingredients to a container and put it ready in the fridge, portion frozen ingredients in with the ice you’ll need in a freezer bag and have ready in the freezer for the morning.

Storing Tip: Just seal in a glass jar with a lid or stainless steel container in the fridge so it’s ready to go in the morning. A great idea is a flask which helps keep your smoothie cold and fresher for longer when you are out and about.

Blender Tip: When traveling or working away from home, take your personal blender with you. Take portions of nuts and superfood powders. It’s easy to pick up a banana or some fresh berries or other fruit to be able to sweeten and freshen up your smoothies. I travel with my Tribest Personal Blender everywhere I go (weight 4.4 lbs / 2 kg).

The darker the green colour of a plant, the more chlorophyll the plant contains. And chlorophyll helps to push toxins from our cells and bind and remove them from our blood stream and gut.

Over and above everything, if I can only do one thing in a day, it will be to ensure I have at least one raw juice or smoothie a day - preferably a Green one!

Alternating colours is also a good idea to ensure your body is receiving a full spectrum of nutrients - eating/drinking the whole rainbow of colours we find in vegetables and fruits will achieve this without you even having to think about what your body needs.

Got questions for me? Or want some friendly support and accountability to help you on your FLIMJourney?

Our Fresh Life Community is the place to be!

See you over there!

Big Hugs,
xx Sam
Creamy Hummus Dip


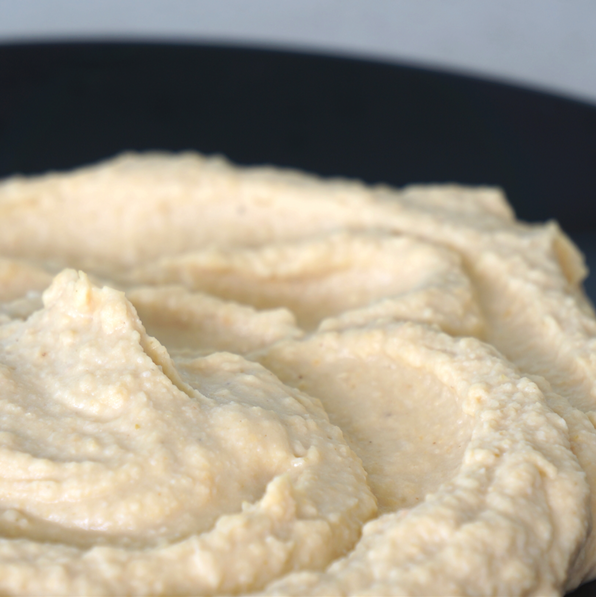
You’ll love the creaminess of this Hummus, and there is a trick you’ll learn in this recipe that ensures it comes out with a beautiful smooth consistency. A good Hummus is hard to beat, and can be added to salads, sandwiches and wraps or be enjoyed straight out of the jar. I regularly make and keep a jar of Hummus on hand in our fridge for every kind of occasion.
This recipe is: Gluten-free (GF), Wheat-free (WF), Dairy-free (DF), refined Sugar-free (SF), Plant-based/Vegan (PB), Vegetarian (V)

Print Recipe
Creamy Hummus Dip
You will need: food processor or blender
Prep Time 10-15 minutes
Servings
servings
Ingredients
Prep Time 10-15 minutes
Servings
servings
Ingredients
Instructions
  1. Blend Tahini and Lemon Juice together until smooth, fluffy and creamy - continually scrape sides using a spatula to combine well.
  2. Add Garlic, Cumin, Salt, Olive Oil. Blend well.
  3. Slowly add Chickpeas to the mix, blending in between.
  4. Only add Water if need be to reach desired consistency.
Recipe Notes

Serving suggestion:

* Garnish with a few Kalamata Olives, a drizzle of Olive Oil and a sprinkle of Paprika.

* Serve with fresh slices of Carrot, Cucumber, Capsicum/Bell Peppers or any other veg you like, or Flaxseed Crackers or any preferred choice of gluten-free crackers.

Other Notes:

*If you can, choose organic Chickpeas canned in BPA-free cans. I use an organic brand called Eden (available in Australia & USA). Haven't yet found a brand in South Africa - please share in our Fresh Life Community Facebook page if you do find one.

*I like the above mentioned brand because they prepare their beans with Kombu seaweed, which helps break down the oligosaccharides in beans which can hinder or upset the digestion process (acting as an enzyme inhibitor).

This is good if you don't usually do very well with beans and legumes. Bean’s and Legume’s enzyme inhibitors can cause slightly upset tummies which is why they are joked about as ‘causing gas’. 

You can buy your own Kombu seaweed from an Asian supermarket and activate/remove enzyme inhibitors by boiling store bought Chickpeas for 15-20 minutes with hot water and Kombu Seaweed,

*Or you can make your own Chickpeas from scratch:
It's not as hard as it seems, I've recently been doing this and it just takes a little planning/time management.

Day 1 PM - Soak Chickpeas in water (add few extra inches water above Chickpeas - keep covered), with 1 tsp of Sea Salt per litre/gallon.

Day 2 AM - Change water (using same formula as above).

Day 2 PM - Boil Chickpeas until soft. This usually takes a couple hours, so plan to do this while you’re watching a documentary in the evening. Drain and let cool. Store in fridge before bed.

Day 3 anytime - follow recipe above to make your from-scratch Hummus!

Mocha Bullet Coffee

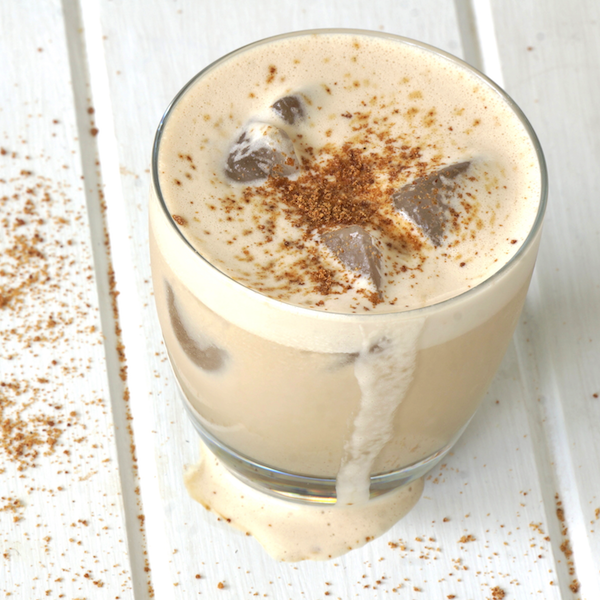
A superfood, but more importantly, chocolate spin on enjoying a clean cuppa Joe… I have always loved mochas, which is why I had to develop a clean mocha recipe so I could continue to enjoy this much loved warmed drink. A nice variation of my favourite Clean Creamy Bullet Coffee is the addition of some raw cacao powder to make this delicious Mocha Bullet Coffee.

As long as you don’t heat your coffee beyond 40 °C / 104 °F then you will keep all the beneficial nutrients in the cacao powder, raw and alive for your body to benefit from such as magnesium, chromium, copper, zinc, iron, flavonoids and healthy saturate and monounsaturated oils.The addition of virgin, cold-pressed coconut oil slows the absorption of caffeine and whatever healthy sweetener you use, plus is an amazing detoxifier and brain boosting food. The combination of raw coconut oil and raw cacao powder, makes this a super healthy drink.

This recipe is: Gluten-free (GF), Wheat-free (WF), Dairy-free (DF), refined Sugar-free (SF), Plant-based/Vegan (PB), Vegetarian (V)

Print Recipe
Mocha Bullet Coffee
You will need: Blender. One which has grinder blades where at least 2 blades lie flat, to grind nuts and seeds. *A coffee grinder can also be used to grind nuts and seeds. Small stainless steel pot.
Prep Time 5-10 minutes
Cook Time 0
Passive Time 0
Servings
servings
Ingredients
Optional
Prep Time 5-10 minutes
Cook Time 0
Passive Time 0
Servings
servings
Ingredients
Optional
Instructions
  1. First grind nuts/seeds together using the grinder attachment on your blender (for smoother end consistency). *A coffee grinder can be used to grind nuts/seeds.
  2. Blend nuts/seeds and water together until smooth. Optional - strain through a nut milk bag or cheesecloth to remove bits/create smoother consistency.
  3. Add the rest of the ingredients and blend again.
  4. Warm on low heat in a stainless steel pot.
  5. If making a warm/hot Coffee - warm on low heat in a stainless steel pot
  6. If making a cold/iced Coffee, serve in a glass with ice blocks or blend with ice to make a Smoothie.
Instructions to make Coffee concentrate
  1. Boil ground coffee in a stainless steel or ceramic pot for 5-20 minutes, depending on your preference of strength/taste. and strain using a nut milk bag or cheese cloth once cooled down. I make a large batch and keep in the fridge for quick ease of use.
Recipe Notes

Clean Eating Tips to remember:
*Coffee can be contaminated with pesticides and other chemicals we need to avoid which is why choosing organic coffee is important. Also be aware that decaf coffee, even if it is organic, has to undergo processing which exposes it to chemicals in order to de-caffeinate the coffee! Best to avoid decaf.

*Commercial dairy milk is produced in a way that can contribute to The Toxic Fat Effect (Module 2 - content covered in the Masterclass slides/videos, live workshop videos and Video #3 - Milk of the 3 part video series '3 Secretly-'evil' ingredients hiding in your kitchen?'), therefore milk alternatives are a cleaner option. Especially if you can avoid store bought - which also can contain questionable stabilisers, thickeners and other additives which contribute to our Chemical Body Burden (Module 2) which also contributes to The Toxic Fat Effect.

* Milk alternatives include my favourite: Coconut Cream/Milk which can be made by blending water with dried organic preservative-free dried Coconut Flakes (grind dry 1st, before blending), or with fresh coconut meat.

* Other milk alternatives, made by blending ¼ cup ingredients (grind dry 1st, before blending with liquid) per 1 cup of water, include: Cashew Nuts, Almonds, Macadamia Nuts, Brasil Nuts, Hemp Seeds, Sunflower Seeds, Sesame Seeds or any other nut or seed you like! (See Video #3 - Milk for more alternatives)

* Sweetened coffee can still be enjoyed with natural sweeteners - see Video #2 - Sugars in Module 2. One of my favourite whole food sweeteners are dates. I keep a cup of dates soaking in water in a sealed jar in the fridge and blend it with my coffee in a blender to break up the dates and make my coffee frothy and creamy. You can also blend soaked dates with the water they have been soaking in to make date paste and use that instead.

Clean Creamy Bullet Coffee

Who said you have to give up the things you love to be healthy? You just gotta turn them clean is what I always say. I love a cuppa just as much as most busy entrepreneurs – I know what’s it’s like, when you’re working hard on a project or launch and you just need a little something to keep you going. And what about just the pure enjoyment and taste of a coffee every now and again? I totally get it, that’s why I wanted to share with you my favourite way to enjoy a clean coffee. Enjoy warm or cold!

This recipe is: Gluten-free (GF), Wheat-free (WF), Dairy-free (DF), refined Sugar-free (SF), Plant-based/Vegan (PB), Vegetarian (V)

Print Recipe
Clean Creamy Bullet Coffee
You will need: Blender with grinder blades where at least 2 blades lie flat, to grind nuts and seeds. *A coffee grinder can also be used to grind nuts and seeds. Small stainless steel pot.
Prep Time 5-10 minutes
Cook Time 0
Passive Time 0
Servings
servings
Ingredients
Optional:
Prep Time 5-10 minutes
Cook Time 0
Passive Time 0
Servings
servings
Ingredients
Optional:
Instructions
  1. First grind nuts/seeds together using the grinder attachment on your blender (for smoother end consistency). *A coffee grinder can be used to grind nuts/seeds.
  2. Blend nuts/seeds and water together until smooth. Optional - strain through a nut milk bag or cheesecloth to remove bits/create smoother consistency.
  3. Add the rest of the ingredients and blend again.
  4. If making a warm/hot Coffee - warm on low heat in a stainless steel pot
  5. If making a cold/iced Coffee, serve in a glass with ice blocks or blend with ice to make a Smoothie.
Instructions to make Coffee concentrate
  1. Boil ground coffee in a stainless steel or ceramic pot for 5-20 minutes, depending on your preference of strength/taste. and strain using a nut milk bag or cheese cloth once cooled down. I make a large batch and keep in the fridge for quick ease of use.
Recipe Notes

Clean Eating Tips to remember:
*Coffee can be contaminated with pesticides and other chemicals we need to avoid which is why choosing organic coffee is important. Also be aware that decaf coffee, even if it is organic, has to undergo processing which exposes it to chemicals in order to de-caffeinate the coffee! Best to avoid decaf.

*Commercial dairy milk is produced in a way that can contribute to The Toxic Fat Effect (Module 2 - content covered in the Masterclass slides/videos, live workshop videos and Video #3 - Milk of the 3 part video series '3 Secretly-'evil' ingredients hiding in your kitchen?'), therefore milk alternatives are a cleaner option. Especially if you can avoid store bought - which also can contain questionable stabilisers, thickeners and other additives which contribute to our Chemical Body Burden (Module 2) which also contributes to The Toxic Fat Effect.

* Milk alternatives include my favourite: Coconut Cream/Milk which can be made by blending water with dried organic preservative-free dried Coconut Flakes (grind dry 1st, before blending), or with fresh coconut meat.

* Other milk alternatives, made by blending ¼ cup ingredients (grind dry 1st, before blending) per 1 cup of water, include: Cashew Nuts, Almonds, Macadamia Nuts, Brasil Nuts, Hemp Seeds, Sunflower Seeds, Sesame Seeds or any other nut or seed you like! (See Video #3 - Milk for more alternatives)

* Sweetened coffee can still be enjoyed with natural sweeteners - see Video #2 - Sugars in Module 2. One of my favourite whole food sweeteners are dates. I keep a cup of dates soaking in water in a sealed jar in the fridge and blend it with my coffee in a blender to break up the dates and make my coffee frothy and creamy. You can also blend soaked dates with the water they have been soaking in to make date paste and use that instead.

Coconut Buckwheat Flatbreads

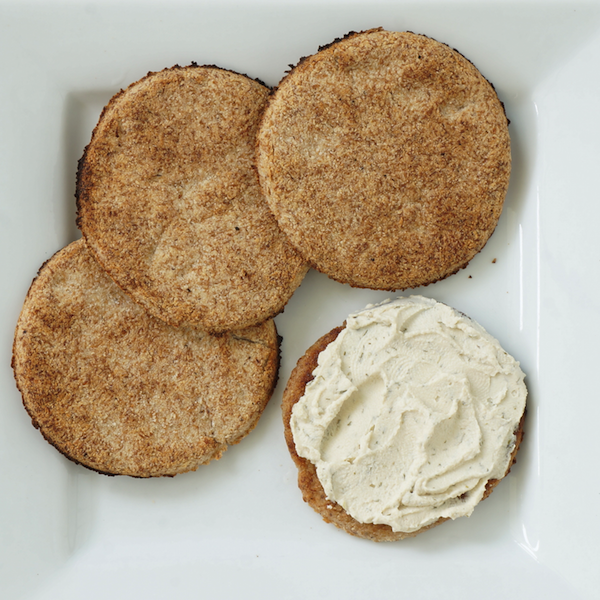
These quick and easy to make flatbreads are great for a quick snack. You can toast them up, add some coconut oil, and serve them up with some nut butter or cashew nut cream cheese. They have a slightly sweet taste and get a little crunch when they are toasted, which makes them yummy replacements for burger buns. You can make a whole batch and keep them in the fridge or freezer, and use when needed.

This recipe is: Gluten-free (GF), Wheat-free (WF), Dairy-free (DF), refined Sugar-free (SF), Plant-based/Vegan (PB), Vegetarian (V)

Print Recipe
Coconut Buckwheat Flatbreads
You will need: 1 large mixing bowl; wooden spoon/silicon spatula; measuring cups & spoons; food-grade silicon baking sheet or non-toxic parchment/ baking paper lined baking tray (please avoid flatbreads coming into contact with toxic non-stick coatings); small bowl for 'cutting out' flatbread shapes; bleach-free paper towel and air-tight container or large ziplock bag to store in fridge/freezer.
Prep Time 5 - 10 minutes
Cook Time 30 minutes
Passive Time 30 minutes (baking)
Servings
flatbreads
Ingredients
Prep Time 5 - 10 minutes
Cook Time 30 minutes
Passive Time 30 minutes (baking)
Servings
flatbreads
Ingredients
Instructions
  1. Preheat oven to 160°C / 320°F.
  2. Mix all dry ingredients together in large mixing bowl.
  3. Add Coconut Oil and Water and mix well.
  4. Spread dough (1cm / ½ inch thick), use a small bowl to ‘cut’ out round flatbread shapes.
  5. Place on baking tray lined with non-toxic/unbleached parchment/baking paper.
  6. Bake for approx. 10-15 min each side or until golden.
Recipe Notes
  • If you can't find Buckwheat Flour, as with most nut and seed flours and meals, you can easily make your own - which I often do myself - by purchasing the whole food ingredient i.e. Buckwheat seeds, and using a blender with grinder blades (at least 2 blades lie flat), or use a coffee grinder to grind the nuts/seeds into a flour/meal.
  • You can also substitute Almond Meal (ground Almonds) in place of Buckwheat.
  • Wait until cool, and then wrap in bleach-free/non-toxic paper towel in an airtight container or large ziplock bag.
  • It is best to store your bread in the fridge or freezer - it will also last longer.

‘Clean’ Multiseed Bread (Gluten-free / Wheat-free)

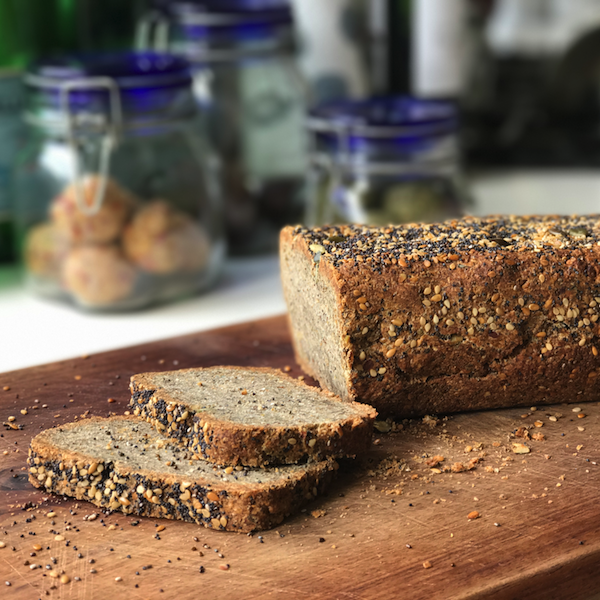
This bread is amazing. I actually prefer it to any of the gluten-free breads I have bought and tried over the years. Probably a year’s worth of recipe developing to get this gem just right, and I couldn’t be happier with the result. It’s delicious straight out of the oven, and even better sliced and toasted before adding toppings. We eat this for breakfast, lunches and sometimes dinners. I travel with my food-grade, non-toxic silicon bread pan so I can make this bread for us no matter where we are in the world!

This recipe is: Gluten-free (GF), Wheat-free (WF), Dairy-free (DF), refined Sugar-free (SF), Plant-based/Vegan (PB), Vegetarian (V)


Print Recipe
'Clean' Multiseed Bread (Gluten-free/Wheat-free)
You will need: blender with grinder blades (at least 2 blades lie flat), or use a coffee grinder - to grind nuts & seeds; 2 mixing bowls (1 large); whisk; wooden spoon/silicon spatula; measuring cups & spoons; food-grade silicon bread pan or non-toxic parchment/ baking paper lined bread tin (please avoid bread coming into contact with toxic non-stick coatings); drying/wire rack for baked bread to cool off on before cutting; bleach-free paper towel and air-tight container or large ziplock bag to store in fridge/freezer.
Prep Time 10-15 minutes
Cook Time 1 hour
Passive Time 1 hour (baking)
Servings
slices
Ingredients
Dry Ingredients
Dry Ingredients - Seed Mix
Wet Ingredients - 'Egg replacer'
Wet Ingredients
  • ¾ cup Cashew Nut Milk (or any preferred milk alternative) [To make your own: grind 1 small handful (¼ cup) nuts and then blend with 1 cup water]
  • cup Macadamia Oil (or Almond Oil or warmed/melted Coconut Oil)
  • 1 tbsp Rice Malt Syrup (or Raw Honey, Coconut Blossom Sugar/Syrup)
  • 1 tbsp Apple Cider Vinegar (unpasteurised/raw vinegar)
Bread Topping
Instructions
  1. Preheat oven to 350°F / 180°C
  2. Dry Ingredients: Grind Almonds & Flaxseeds down to a flour-like consistency, using a blender (with grinder attachment - see description above).
  3. Dry Ingredients: Combine all dry ingredients in a large mixing bowl and set aside.
  4. Dry Ingredients - Seed Mix: Combine all Seed Mix ingredients together. Pulse into a course consistency and add to the rest of the dry ingredients.
  5. 'Egg replacer': Separately, combine Spring Water and ground Chia Seeds well using a fork and allow to stand for a few minutes before using.
  6. Wet Ingredients: Add the rest of the wet ingredients to the ‘Egg replacer’, and mix well using a fork.
  7. Add the wet ingredients mixture to the dry ingredients and mix well using a spatula or wooden spoon - I prefer a silicon spatula.
  8. Line an 8” x 4” bread pan with non-toxic parchment/ baking paper or use a food-grade, silicon bread pan instead - best to avoid bread pans with toxic non-stick coatings.
  9. Spread the mixture into the bread pan. Add the bread topping and spread and press the seeds into the surface of the bread.
  10. Bake for 60 min or until golden - use a knife to check middle of bread, if comes out clean/dry, bread is done.
  11. Remove and let sit for 2 minutes in the bread pan before removing. Then remove and let cool on a drying/wire rack - this will allow the base of the bread to breathe/stay dry, and not ‘sweat’.
Recipe Notes
  • Be sure to let your bread cool down completely, then cut into thin slices. Admittedly, this bread's crust can be a little crunchy so it might take a little effort to cut the whole thing into slices. Slicing the whole bread and storing this way makes it easier to use/consume.
  • Wait until cool, and then wrap in bleach-free/non-toxic paper towel in an airtight container or large ziplock bag.
  • It is best to store your bread in the fridge or freezer - it will also last longer.