| Prep Time | 15 minutes |
| Cook Time | 5 minutes |
| Servings |
servings
|
- 3 cups Basil leaves (fresh)
- ½ cups Olive Oil (extra virgin, cold-pressed)
- ½ cups Pine nuts (or Cashews and/or Sunflower Seeds and/or Macadamia Nut and/or Pumpkin Seeds - any nut of choice)
- 2 cloves Garlic
- ½ tsp Sea Salt
- 1 cup Baby Tomatoes
- ¼ cup Capers
- 2 tbsp Hemp Seeds
- 2 cups Rice Vermicelli Pasta (or your choice of wheat-free/gluten-free pasta)
Ingredients
|
|
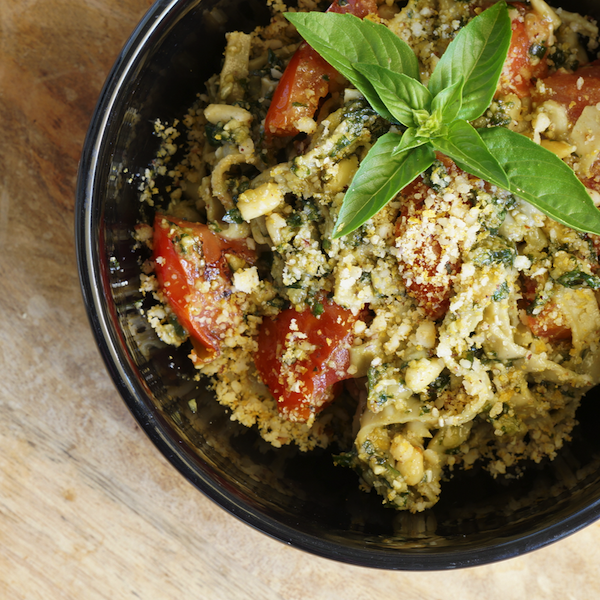
- Boil some water and place the Rice Vermicelli Pasta in a pot with the hot water and boil for a few minutes while you prepare the Pesto sauce.
- Pesto Sauce: Crush or chop the garlic finely.
- Pesto Sauce: Put all the ingredients together except the tomatoes and bread in a blender, and pulse well enough, while still leaving a little 'coarseness' to the Basil leaves (otherwise Pesto becomes a puree/paste which is not as nice).
- Cook the Capers in a little oil on high heat until they just ‘pop’.
- Chop the Baby Tomatoes and cook in a little oil until soft.
- Boil some water and place the Rice Vermicelli Pasta in a pot with the hot water and boil for a few minutes. Once cooked through (doesn’t take long - don’t overcook), drain and set aside.
- Add the pasta to a large mixing bowl with the cooked Tomatoes and capers. Add 2 tablespoons of Pesto Sauce per serving and use a little Olive Oil to help everything mix together.
- Serve with the Hemp Seeds sprinkled over with a splash of Olive Oil, and Sea Salt & Pepper on top.
*AWESOME additions to the above recipe:
1) Add some cooked onion (Jay’s favourite!).
2) Or add cooked Onion and Shitake Mushrooms (Marlene’s favourite!)
*Sprinkle some Vegan Parmesan Cashew Cheese on top to serve.
*You can use a large mouthed jar and an immersion blender, and pulse the Pesto sauce quickly right in the jar.
*Storing tip: use a glass jar with lid just big enough to hold the Pesto sauce (too much air makes sauce go off faster). Use a little Olive Oil to coat the entire inside of jar before adding the Pesto Sauce, then cover the top with a thin layer of Olive Oil before sealing with a lid.
Always top again with Olive Oil when you've used some out of the jar each time. The oil will naturally 'preserve' the Pesto by preventing the sauce from being exposed to air which helps keep the Pesto Sauce for up to a week (if you keep air out and keep a layer of oil on the top). The oil will also help to prevent molds/moulds from growing too soon on top!
*Store sealed in the fridge.