
*Contains Egg. Mayonnaise has always been one of my ‘can’t-live-without’ kinda things. So I’ve been on a mission over the years to learn how to make the quickest, easiest and most deliciously tangy Clean Eating Mayonnaise. It’s taken quite a long time but I am happy to say the effort has paid off. I hope you enjoy this mayo recipe as much as I do.
Print Recipe
Traditional Tangy Mayonnaise
*Contains Egg. You will need: Immersion blender (aka wand/handheld blender). Medium size glass jar (with lid) that is deep enough to hold 1.5 cups of ingredients, with a wide rim to allow the immersion blender head to fit into the jar. NOTE: There are 2 techniques to make quick Mayo. The 1st is using an immersion blender head and a jar (main recipe), the other is using a powered whisk (see recipe notes for 2nd technique instructions).
Instructions
Add the Oil to the glass jar.
Add the Egg to the Oil and allow it to settle to the bottom.
Add the Lemon juice, Mustard & Salt.
Slowly place the immersion blender head in the jar positioning it over the Egg on the bottom. Release any trapped air bubbles. Hold blender head on the bottom and switch blender on (keep holding the blender head at the bottom of the jar). As Mayonnaise starts to form, very slowly pull the blender head towards the surface of the mixture, while still blending, to allow the Mayonnaise to ‘develop’ the whole way through.
Remove blender head and slowly, using a spoon, mix in your preferred amount of Sweetener to give the mayonnaise a lovely tart/tangy flavour.
Seal with a lid and store in the fridge. Use within a few days.
*Storage Tip: Add a little oil to the glass jar you are going to store it in, close the lid and move the jar around so that oil coats the whole surface area of the inside of the jar before adding the mayonnaise to the jar. Oil is a natural preservative and will help keep the mayo from fresh for longer.
Recipe Notes
*Choose eggs from organic/hormone-free (clean), grass fed (no grains = no GMOs = clean), free range/humanely raised (clean) hens
*Make your own Coconut Blossom Syrup: Combine 1 tbsp Coconut Sugar with 1 tsp hot water. Stir until melted.
*’Classic’ technique using a powered whisk:
Note: Use 2 Eggs instead of one for this technique.
All other ingredient measurements are the same as above.
Instructions:
1. Separate Egg yolks from the Egg whites.
2.Put the egg yolks into a large/high sided glass or ceramic bowl, with the Mustard, Lemon Juice, and Salt.
3. Add a little oil, start the power whisk, and slowly pour small amounts of the oil while continually whisking. You’ll need to whisk for a good few minutes to reach desired thick consistency.
4. Gently whisk in (no power this time) your preferred amount of Sweetener to give the mayonnaise a lovely tart/tangy flavour.
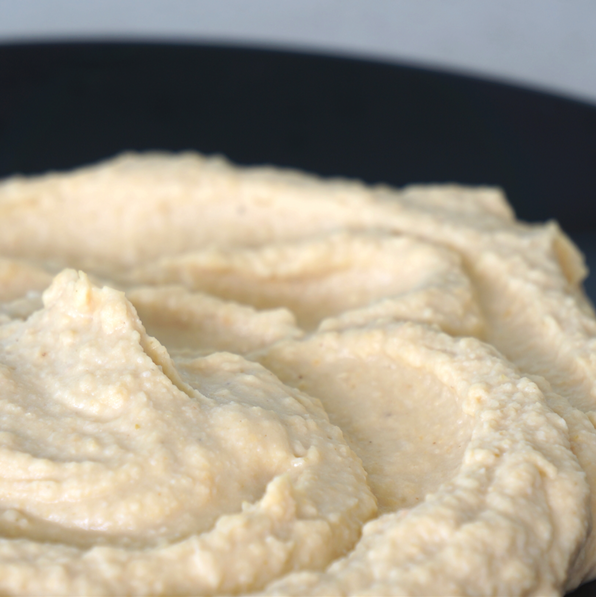 You’ll love the creaminess of this Hummus, and there is a trick you’ll learn in this recipe that ensures it comes out with a beautiful smooth consistency. A good Hummus is hard to beat, and can be added to salads, sandwiches and wraps or be enjoyed straight out of the jar. I regularly make and keep a jar of Hummus on hand in our fridge for every kind of occasion.
This recipe is: Gluten-free (GF), Wheat-free (WF), Dairy-free (DF), refined Sugar-free (SF), Plant-based/Vegan (PB), Vegetarian (V)
Print Recipe
Creamy Hummus Dip
You will need: food processor or blender
Instructions
Blend Tahini and Lemon Juice together until smooth, fluffy and creamy - continually scrape sides using a spatula to combine well.
Add Garlic, Cumin, Salt, Olive Oil. Blend well.
Slowly add Chickpeas to the mix, blending in between.
Only add Water if need be to reach desired consistency.
Recipe Notes
Serving suggestion:
* Garnish with a few Kalamata Olives, a drizzle of Olive Oil and a sprinkle of Paprika.
* Serve with fresh slices of Carrot, Cucumber, Capsicum/Bell Peppers or any other veg you like, or Flaxseed Crackers or any preferred choice of gluten-free crackers.
Other Notes:
*If you can, choose organic Chickpeas canned in BPA-free cans. I use an organic brand called Eden (available in Australia & USA). Haven't yet found a brand in South Africa - please share in our Fresh Life Community Facebook page if you do find one.
*I like the above mentioned brand because they prepare their beans with Kombu seaweed, which helps break down the oligosaccharides in beans which can hinder or upset the digestion process (acting as an enzyme inhibitor).
This is good if you don't usually do very well with beans and legumes. Bean’s and Legume’s enzyme inhibitors can cause slightly upset tummies which is why they are joked about as ‘causing gas’.
You can buy your own Kombu seaweed from an Asian supermarket and activate/remove enzyme inhibitors by boiling store bought Chickpeas for 15-20 minutes with hot water and Kombu Seaweed,
*Or you can make your own Chickpeas from scratch:
It's not as hard as it seems, I've recently been doing this and it just takes a little planning/time management.
Day 1 PM - Soak Chickpeas in water (add few extra inches water above Chickpeas - keep covered), with 1 tsp of Sea Salt per litre/gallon.
Day 2 AM - Change water (using same formula as above).
Day 2 PM - Boil Chickpeas until soft. This usually takes a couple hours, so plan to do this while you’re watching a documentary in the evening. Drain and let cool. Store in fridge before bed.
Day 3 anytime - follow recipe above to make your from-scratch Hummus!
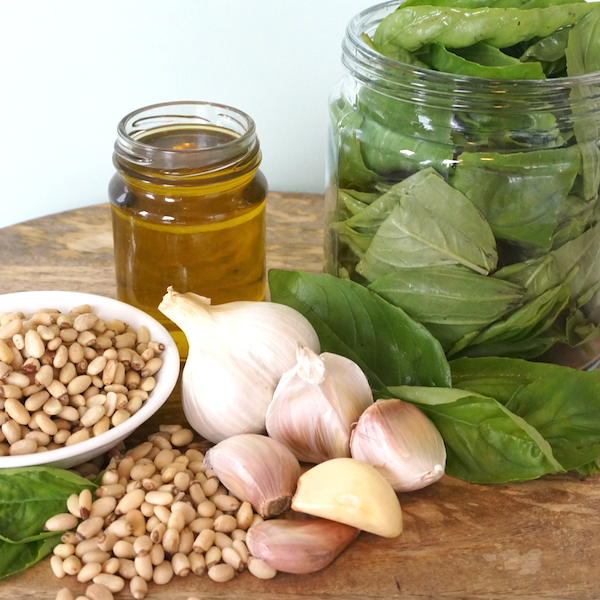
I just love finding ways to enjoy favourite foods, choosing to use only the ‘cleanest’ combinations of ingredients possible. This Plant-based Pesto Sauce still packs a tasty punch. All one really needs to do is leave out the traditionally added parmesan cheese and your Pesto will still taste like, well… Pesto! I make this recipe so often and use Pesto in many delicious ways in my own kitchen.
This recipe is: Gluten-free (GF), Wheat-free (WF), Dairy-free (DF), refined Sugar-free (SF), Plant-based/Vegan (PB), Vegetarian (V)
Print Recipe
Plant-based Pesto Sauce
You will need: food processor or blender
Instructions
Crush or chop the garlic finely.
Put all the ingredients together in a blender, and pulse well enough, while still leaving a little 'coarseness' to the Basil leaves (otherwise sauce becomes a Pesto puree/paste which is not as nice).
Recipe Notes
*You can use a large mouthed jar and an immersion blender, and pulse this sauce quickly right in the jar.
*Storing tip: use a glass jar with lid just big enough to hold sauce (too much air makes sauce go off faster). Use a little Olive Oil to coat the entire inside of jar before adding the Pesto Sauce, then cover the top with a thin layer of Olive Oil before sealing with a lid.
Always top again with Olive Oil when you've used some out of the jar each time. The oil will naturally 'preserve' the Pesto by preventing the sauce from being exposed to air which helps keep the Pesto Sauce for up to a week (if you keep air out and keep a layer of oil on the top). The oil will also help to prevent molds/moulds from growing too soon on top!
*Store sealed in the fridge.
Serving suggestions:
* Thinly shave fresh zucchini using a potato peeler or other peeler/spiraliser, and toss with fresh or sun-dried or cooked tomatoes.
*Mix into cooked Rice Noodles and cooked Tomatoes for a quick Pesto Pasta dish.
* Add a little to mayonnaise to make a Pesto Mayo, or just use as is, and add to sandwiches, wraps and burgers.
* Combine with fresh chopped baby tomatoes to top some freshly toasted Clean Multiseed Bread. Finish with a drizzle of Olive Oil on top.
* Add a layer of Pesto Sauce to freshly toasted bread (as linked above) and add grilled veggies, such as capsicum, eggplant, zucchini to make a delicious Mediterranean stack. Finish with a drizzle of Olive Oil on top.

