Archives

Chocolate Caramel Mini Mud Cakes


Print Recipe
Chocolate Caramel Mini Mud Cakes
You will need: Blender or food processor. *Due to thick consistency of the Caramel layer (almost turns ‘toffee-like’), be careful not to burn out the motor of smaller blenders. In this instance, add small amounts of Spring Water to slightly thin the sauce.
Prep Time 20 - 25 minutes
Cook Time 0
Passive Time 5 minutes (for freezing/setting)
Servings
servings
Ingredients
Mud Cake Layer
Caramel Layer
Chocolate Topping
Prep Time 20 - 25 minutes
Cook Time 0
Passive Time 5 minutes (for freezing/setting)
Servings
servings
Ingredients
Mud Cake Layer
Caramel Layer
Chocolate Topping
Instructions
  1. Mud Cake Layer: Drain the soaked Dates and place all ingredients in a blender or food processor and pulse until mixture gets sticky. Set aside.
  2. Caramel Layer: Drain Dates and blend all ingredients together until smooth. Set aside.
  3. Chocolate Layer: Blend all ingredients together until smooth (include the water the Dates were soaked in). Set aside.
  4. Mix half the Chocolate Layer mixture in with the Chocolate Mud Cake mixture.
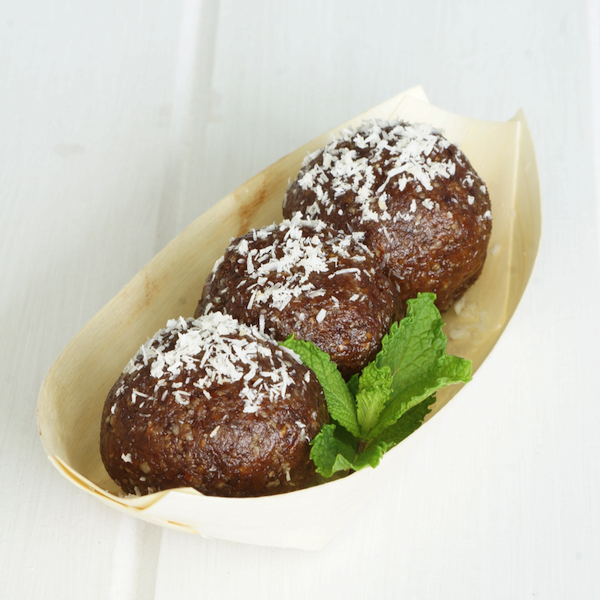
  5. Shape the Chocolate Mud Cake mixture into balls and place in silicon or paper cupcake cups and press slightly into the moulds.
  6. Using a spoon, add a dollop of the Caramel Layer and smooth over the surface using the back of the spoon. *Tip - a little Coconut Oil on the back of the spoon helps prevent the caramel from sticking to the spoon.
  7. Using a spoon, add a dollop of the Chocolate Layer to the top, again using the back of a spoon - this time no Coconut Oil though so you can create a ‘whip’ shape on the top of the little cakes.
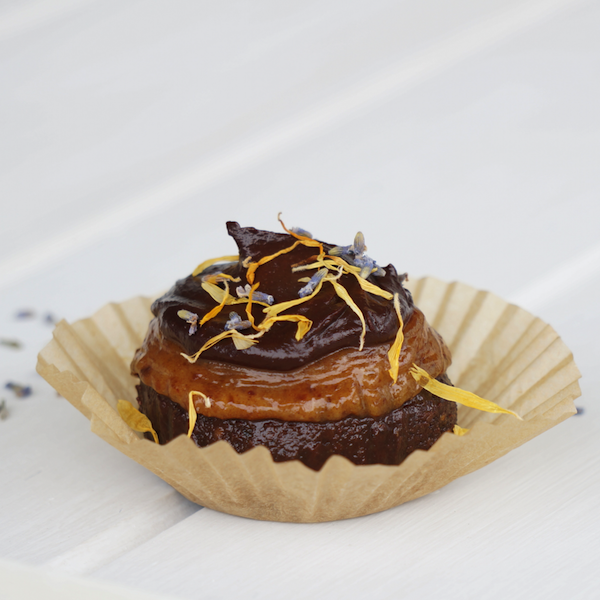
  8. Optional: Place in fridge for 15min+ to allow to set before serving. Sprinkle with Calendula petals and/or Lavender flowers.
Recipe Notes

*You can enjoy straight away or put in the fridge for 15-30 minutes to set.

*Store sealed in a container in the fridge/freezer.

*Choose the cleanest ingredients possible:

-Choose spray-free/organic fresh produce for fresh ingredients where possible, and if buying conventional, rinse in diluted white vinegar water to remove.

-Choose dry ingredients (i.e. nuts, seeds, dried fruits ) that are spray-fee/organic where possible, and which don’t have preservatives such as sulphur dioxide.

- Choose virgin, cold-pressed Coconut Oil in glass where possible. It should be pure white in colour. Do not choose cheaper, deodorised/neutral flavoured coconut oils that are off-white.

-Choose Coconut Cream and Coconut Milk that is clean/free from additives, preservatives and E numbers. Plain Coconut Cream/Milk is better than the ones with added guar gum as this changes the consistency of recipes. You can use Nut Milk as an alternative. 

-Choose to homemade Nut Milk instead of buying. Most store bought ones have additives and stabilisers. Quick Tip: It’s easy to make your own: just grind ¼ cup nuts, then blend with 1 cup water. 

-Choose whole fruits over optional sweeteners if you need to add more sweetness. My preferred choice is Date Paste (pre-soaked Dates). Quick Tip: Keep a jar filled with Dates covered with water, in the fridge ready to go and use as is (instead of actually blending to make Date Paste). 

Quick Link to FLIMJ Program resources for Fresh Life Healthy Sweet Quick Fixes:

Module 2 - refresh on information about The Toxic Fat Effect and how bioaccumulation of toxins in our bodies can lead to weight gain (that’s hard to lose), brain fog, low energy and many more poor health symptoms.

Module 3 - To get you into the swing of things, redo our 7 Day Healthy Sweet Quick Fixes Challenge - you’re always supported in our Fresh Life Tribe (Private Facebook Group), no matter when you decide to do any of the 7 Day Challenges.

You’ll find your Recipe Book: 7 Days of Healthy Sweet Quick Fixes and Shopping List print offs to guide you through the challenge.


Pecan Chocolate Mud Cake with Strawberries


Print Recipe
Pecan Chocolate Mud Cake with Strawberries
You will need: Blender or food processor.
Prep Time 20 - 25 minutes
Cook Time 0
Passive Time 5 minutes
Servings
servings
Ingredients
Chocolate Topping
Pecan base
Topping
Prep Time 20 - 25 minutes
Cook Time 0
Passive Time 5 minutes
Servings
servings
Ingredients
Chocolate Topping
Pecan base
Topping
Instructions
  1. Mud Cake Layer: Drain the soaked Dates and place all ingredients in a blender or food processor and pulse until mixture gets sticky. Set aside.
  2. Chocolate Topping: Blend all ingredients together until smooth (include the water the Dates were soaked in). Set aside.
  3. Mix half the Chocolate Layer mixture in with the Chocolate Mud Cake mixture.
  4. Pecan Base: Pulse all ingredients together into a crumb-like consistency. Press into a 8in x 8in (20cm x 20cm) cake mould.
  5. Spoon the Mud Cake mixture over the top and use the back of a spoon to smooth over.
  6. Spoon the remaining Chocolate Layer mixture over the top and use the back of the spoon to smooth over.
  7. Cut the Strawberries in half and add them to the top of the cake.
  8. Optional: Place in fridge for 15min+ to allow to set before serving. Garnish with fresh Mint leaves.
Recipe Notes

*You can enjoy straight away or put in the fridge for 15-30 minutes to set.

*Store sealed in a container in the fridge/freezer.

*Choose the cleanest ingredients possible:

-Choose spray-free/organic fresh produce for fresh ingredients where possible, and if buying conventional, rinse in diluted white vinegar water to remove.

-Choose dry ingredients (i.e. nuts, seeds, dried fruits ) that are spray-fee/organic where possible, and which don’t have preservatives such as sulphur dioxide.

- Choose virgin, cold-pressed Coconut Oil in glass where possible. It should be pure white in colour. Do not choose cheaper, deodorised/neutral flavoured coconut oils that are off-white.

-Choose Coconut Cream and Coconut Milk that is clean/free from additives, preservatives and E numbers. Plain Coconut Cream/Milk is better than the ones with added guar gum as this changes the consistency of recipes. You can use Nut Milk as an alternative. 

-Choose to homemade Nut Milk instead of buying. Most store bought ones have additives and stabilisers. Quick Tip: It’s easy to make your own: just grind ¼ cup nuts, then blend with 1 cup water. 

-Choose whole fruits over optional sweeteners if you need to add more sweetness. My preferred choice is Date Paste (pre-soaked Dates). Quick Tip: Keep a jar filled with Dates covered with water, in the fridge ready to go and use as is (instead of actually blending to make Date Paste). 

Quick Link to FLIMJ Program resources for Fresh Life Healthy Sweet Quick Fixes:

Module 2 - refresh on information about The Toxic Fat Effect and how bioaccumulation of toxins in our bodies can lead to weight gain (that’s hard to lose), brain fog, low energy and many more poor health symptoms.

Module 3 - To get you into the swing of things, redo our 7 Day Healthy Sweet Quick Fixes Challenge - you’re always supported in our Fresh Life Tribe (Private Facebook Group), no matter when you decide to do any of the 7 Day Challenges.

You’ll find your Recipe Book: 7 Days of Healthy Sweet Quick Fixes and Shopping List print offs to guide you through the challenge.


Chocolate Mud Cake Bliss Balls


Print Recipe
Chocolate Mud Cake Bliss Balls
You will need: Blender. One which has grinder blades where at least 2 blades lie flat. And/or food processor.
Prep Time 10 - 15 minutes
Cook Time 0
Passive Time 0
Servings
servings
Ingredients
Bliss Balls
Chocolate Layer
Optional Toppings
Prep Time 10 - 15 minutes
Cook Time 0
Passive Time 0
Servings
servings
Ingredients
Bliss Balls
Chocolate Layer
Optional Toppings
Instructions
  1. Bliss Balls: Drain the soaked Dates and place all ingredients in a blender or food processor and pulse until mixture gets sticky. Set aside.
  2. Chocolate Layer: Blend all ingredients together until smooth (include the water the Dates were soaked in). Set aside.
  3. Mix half the Chocolate Layer mixture in with the Bliss Balls mixture.
  4. Firmly press and roll small balls of the mixture into Bliss Balls.
  5. Optional: Place in fridge for 15min+ to allow to set before serving. Sprinkle with, or roll in desiccated Coconut.
Recipe Notes

*You can enjoy straight away or put in the fridge for 15-30 minutes to set.

*Store sealed in a container in the fridge/freezer.

*Choose the cleanest ingredients possible:

-Choose spray-free/organic fresh produce for fresh ingredients where possible, and if buying conventional, rinse in diluted white vinegar water to remove.

-Choose dry ingredients (i.e. nuts, seeds, dried fruits ) that are spray-fee/organic where possible, and which don’t have preservatives such as sulphur dioxide.

- Choose virgin, cold-pressed Coconut Oil in glass where possible. It should be pure white in colour. Do not choose cheaper, deodorised/neutral flavoured coconut oils that are off-white.

-Choose Coconut Cream and Coconut Milk that is clean/free from additives, preservatives and E numbers. Plain Coconut Cream/Milk is better than the ones with added guar gum as this changes the consistency of recipes. You can use Nut Milk as an alternative. 

 -Choose to homemade Nut Milk instead of buying. Most store bought ones have additives and stabilisers. Quick Tip: It’s easy to make your own: just grind ¼ cup nuts, then blend with 1 cup water. 

-Choose whole fruits over optional sweeteners if you need to add more sweetness. My preferred choice is Date Paste (pre-soaked Dates). Quick Tip: Keep a jar filled with Dates covered with water, in the fridge ready to go and use as is (instead of actually blending to make Date Paste). 

Quick Link to FLIMJ Program resources for Fresh Life Healthy Sweet Quick Fixes:

Module 2 - refresh on information about The Toxic Fat Effect and how bioaccumulation of toxins in our bodies can lead to weight gain (that’s hard to lose), brain fog, low energy and many more poor health symptoms.

Module 3 - To get you into the swing of things, redo our 7 Day Healthy Sweet Quick Fixes Challenge - you’re always supported in our Fresh Life Tribe (Private Facebook Group), no matter when you decide to do any of the 7 Day Challenges.

You’ll find your Recipe Book: 7 Days of Healthy Sweet Quick Fixes and Shopping List print offs to guide you through the challenge.


Chocolate Cherry Brownie Bites


Print Recipe
Chocolate Cherry Brownie Bites
You will need: High power blender or food processor. One which has grinder blades where at least 2 blades lie flat, to grind nuts and seeds. *A coffee grinder can also be used to grind nuts and seeds.
Prep Time 25 - 30 minutes
Cook Time 0
Passive Time 0
Servings
servings
Ingredients
Prep Time 25 - 30 minutes
Cook Time 0
Passive Time 0
Servings
servings
Ingredients
Instructions
  1. Steam Chestnuts for 10 - 15 min. Use a stainless steel colander or sieve to suspend the Chestnuts in a pot above boiling water (without letting the water touch the nuts).
  2. Let cool, then cut into halves. Scrape the soft nut flesh out using a teaspoon and set aside.
  3. Gently *warm the Chocolate Chips until melted (see recipe notes below for instructions on how to warm Chocolate Chips).
  4. Pulse together the Chestnut flesh, Almonds, Pecan Nuts, Coconut Flakes, Dates, Cacao Powder, Salt.
  5. Combine the mixture with the melted Chocolate Chips and the Cherries and mix well using a wooden spoon or silicon spatula. Use a little warm Spring Water to help with mixing (use only small amounts at a time).
  6. Line a baking tray with non-toxic baking paper/parchment paper and spread the mixture even over the surface. Use a knife to cut the tray into squares. Place in freezer for 5 minutes to allow to set.
Recipe Notes

*Chocolate Chips I buy are simply made from raw organic Cane Sugar, Cacao Butter and Cacao Powder. 

*Can make and use 3x portions of our Chocolate Sundae Sauce as a replacement if you can’t find clean Chocolate Chips.

*To melt Chocolate Chips - I heat some water in a pot, then place a stainless steel bowl in the pot, add a little heated water to the bowl, and then add a glass bowl in which the Chocolate Chips can melt without it getting too hot/burning. We want the Cacao Butter to remain healthy for us, so avoid heating it more than 40 °C / 104 °F.

*Enjoy straight away or allow to set in fridge for 15+ minutes. Store in a sealed container in the fridge or freezer.

*Choose the cleanest ingredients possible:

-Choose spray-free/organic fresh produce for fresh ingredients where possible, and if buying conventional, rinse in diluted white vinegar water to remove.

-Choose dry ingredients (i.e. nuts, seeds, dried fruits ) that are spray-fee/organic where possible, and which don’t have preservatives such as sulphur dioxide.

- Choose virgin, cold-pressed Coconut Oil in glass where possible. It should be pure white in colour. Do not choose cheaper, deodorised/neutral flavoured coconut oils that are off-white.

-Choose Coconut Cream and Coconut Milk that is clean/free from additives, preservatives and E numbers. Plain Coconut Cream/Milk is better than the ones with added guar gum as this changes the consistency of recipes. You can use Nut Milk as an alternative. 

-Choose to homemade Nut Milk instead of buying. Most store bought ones have additives and stabilisers. Quick Tip: It’s easy to make your own: just grind ¼ cup nuts, then blend with 1 cup water. 

-Choose whole fruits over optional sweeteners if you need to add more sweetness. My preferred choice is Date Paste (pre-soaked Dates). Quick Tip: Keep a jar filled with Dates covered with water, in the fridge ready to go and use as is (instead of actually blending to make Date Paste). 

Quick Link to FLIMJ Program resources for Fresh Life Healthy Sweet Quick Fixes:

Module 2 - refresh on information about The Toxic Fat Effect and how bioaccumulation of toxins in our bodies can lead to weight gain (that’s hard to lose), brain fog, low energy and many more poor health symptoms.

Module 3 - To get you into the swing of things, redo our 7 Day Healthy Sweet Quick Fixes Challenge - you’re always supported in our Fresh Life Tribe (Private Facebook Group), no matter when you decide to do any of the 7 Day Challenges.

You’ll find your Recipe Book: 7 Days of Healthy Sweet Quick Fixes and Shopping List print offs to guide you through the challenge.


Chocolate Cranberry Squares

This recipe is: Gluten-free (GF), Wheat-free (WF), Dairy-free (DF), refined Sugar-free (SF), Plant-based/Vegan (PB), Vegetarian (V)

Print Recipe
Chocolate Cranberry Squares
You will need: High power blender or food processor. One which has grinder blades where at least 2 blades lie flat, to grind nuts and seeds. *A coffee grinder can also be used to grind nuts and seeds.
Prep Time 15 minutes
Cook Time 0
Passive Time 0
Servings
servings
Ingredients
Prep Time 15 minutes
Cook Time 0
Passive Time 0
Servings
servings
Ingredients
Instructions
  1. Gently *warm the Chocolate Chips until melted (see recipe notes below for instructions on how to warm Chocolate Chips).
  2. Pulse together the Almonds, Pecan Nuts, Coconut Flakes, Dates, Cacao Powder, Salt.
  3. Combine the mixture with the melted Chocolate Chips and the Cranberries and mix well using a wooden spoon or silicon spatula.
  4. Line a baking tray with non-toxic baking paper/parchment paper and spread the mixture even over the surface. Use a knife to cut the tray into squares. Place in freezer for 5 minutes to allow to set.
Recipe Notes

*Chocolate Chips I buy are simply made from raw organic Cane Sugar, Cacao Butter and Cacao Powder. 

*Can make and use 3x portions of our Chocolate Sundae Sauce as a replacement if you can’t find clean Chocolate Chips.

*To melt Chocolate Chips - I heat some water in a pot, then place a stainless steel bowl in the pot, add a little heated water to the bowl, and then add a glass bowl in which the Chocolate Chips can melt without it getting too hot/burning. We want the Cacao Butter to remain healthy for us, so avoid heating it more than 40 °C / 104 °F.

*Enjoy straight away or allow to set in fridge for 15+ minutes. Store in a sealed container in the fridge or freezer.

*Choose the cleanest ingredients possible:
 

-Choose spray-free/organic fresh produce for fresh ingredients where possible, and if buying conventional, rinse in diluted white vinegar water to remove 

 -Choose dry ingredients (i.e. nuts, seeds, dried fruits ) that are spray-fee/organic where possible, and which don’t have preservatives such as sulphur dioxide


- Choose virgin, cold-pressed Coconut Oil in glass where possible. It should be pure white in colour. Do not choose cheaper, deodorised/neutral flavoured coconut oils that are off-white.

 -Choose Coconut Cream and Coconut Milk that is clean/free from additives, preservatives and E numbers. Plain Coconut Cream/Milk is better than the ones with added guar gum as this changes the consistency of recipes. You can use Nut Milk as an alternative. 


-Choose to homemade Nut Milk instead of buying. Most store bought ones have additives and stabilisers. Quick Tip: It’s easy to make your own: just grind ¼ cup nuts, then blend with 1 cup water. 


-Choose whole fruits over optional sweeteners if you need to add more sweetness. My preferred choice is Date Paste (pre-soaked Dates). Quick Tip: Keep a jar filled with Dates covered with water, in the fridge ready to go and use as is (instead of actually blending to make Date Paste). 

Quick Link to FLIMJ Program resources for Fresh Life Healthy Sweet Quick Fixes:

Module 2 - refresh on information about The Toxic Fat Effect and how bioaccumulation of toxins in our bodies can lead to weight gain (that’s hard to lose), brain fog, low energy and many more poor health symptoms.

Module 3 - To get you into the swing of things, redo our 7 Day Healthy Sweet Quick Fixes Challenge - you’re always supported in our Fresh Life Tribe (Private Facebook Group), no matter when you decide to do any of the 7 Day Challenges.

You’ll find your Recipe Book: 7 Days of Healthy Sweet Quick Fixes and Shopping List print offs to guide you through the challenge.