Archives

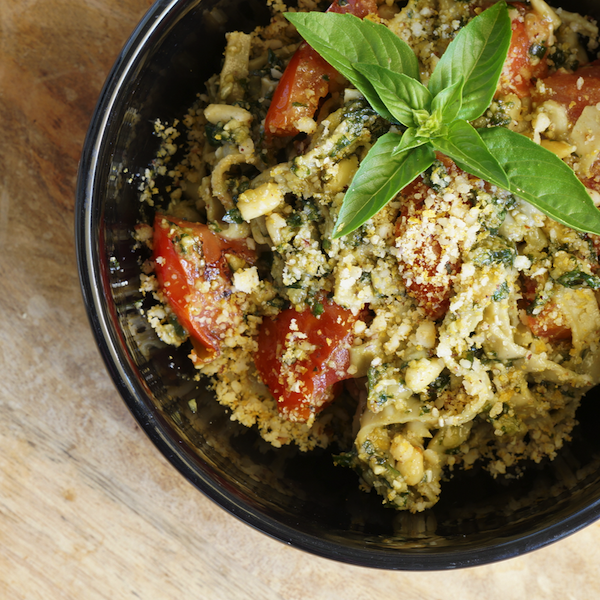
Hemp Seed, Caper & Pesto Rice Vermicelli Pasta


Print Recipe
Hemp Seed, Caper & Pesto Rice Vermicelli Pasta
You will need: Blender. Medium size glass jar (with lid). Note: Use Rice Vermicelli or very thin wheat-free/gluten-free pasta for quicker cooking time. If using thicker pasta it will take more than 15min to cook the pasta.
Prep Time 15 minutes
Cook Time 5 minutes
Servings
servings
Ingredients
Prep Time 15 minutes
Cook Time 5 minutes
Servings
servings
Ingredients
Instructions
  1. Boil some water and place the Rice Vermicelli Pasta in a pot with the hot water and boil for a few minutes while you prepare the Pesto sauce.
  2. Pesto Sauce: Crush or chop the garlic finely.
  3. Pesto Sauce: Put all the ingredients together except the tomatoes and bread in a blender, and pulse well enough, while still leaving a little 'coarseness' to the Basil leaves (otherwise Pesto becomes a puree/paste which is not as nice).
  4. Cook the Capers in a little oil on high heat until they just ‘pop’.
  5. Chop the Baby Tomatoes and cook in a little oil until soft.
  6. Boil some water and place the Rice Vermicelli Pasta in a pot with the hot water and boil for a few minutes. Once cooked through (doesn’t take long - don’t overcook), drain and set aside.
  7. Add the pasta to a large mixing bowl with the cooked Tomatoes and capers. Add 2 tablespoons of Pesto Sauce per serving and use a little Olive Oil to help everything mix together.
  8. Serve with the Hemp Seeds sprinkled over with a splash of Olive Oil, and Sea Salt & Pepper on top.
Recipe Notes

*AWESOME additions to the above recipe:
1) Add some cooked onion (Jay’s favourite!).
2) Or add cooked Onion and Shitake Mushrooms (Marlene’s favourite!)

*Sprinkle some Vegan Parmesan Cashew Cheese on top to serve.

*You can use a large mouthed jar and an immersion blender, and pulse the Pesto sauce quickly right in the jar.

*Storing tip: use a glass jar with lid just big enough to hold the Pesto sauce (too much air makes sauce go off faster). Use a little Olive Oil to coat the entire inside of jar before adding the Pesto Sauce, then cover the top with a thin layer of Olive Oil before sealing with a lid.

Always top again with Olive Oil when you've used some out of the jar each time. The oil will naturally 'preserve' the Pesto by preventing the sauce from being exposed to air which helps keep the Pesto Sauce for up to a week (if you keep air out and keep a layer of oil on the top).  The oil will also help to prevent molds/moulds from growing too soon on top!

*Store sealed in the fridge.

Pesto Tomato Gluten-free Pasta


Print Recipe
Pesto Tomato Gluten-free Pasta
You will need: Blender. Medium size glass jar (with lid). Note: Use Rice Vermicelli or very thin wheat-free/gluten-free pasta for quicker cooking time. If using thicker pasta it will take more than 15min to cook the pasta.
Prep Time 15 minutes
Cook Time 10 - 15 minutes
Passive Time 0
Servings
servings
Ingredients
Prep Time 15 minutes
Cook Time 10 - 15 minutes
Passive Time 0
Servings
servings
Ingredients
Instructions
  1. Pesto Sauce: Crush or chop the garlic finely.
  2. Pesto Sauce: Put all the ingredients together except the tomatoes and bread in a blender, and pulse well enough, while still leaving a little 'coarseness' to the Basil leaves (otherwise Pesto becomes a puree/paste which is not as nice).
  3. Chop the Baby Tomatoes and cook in a little oil until soft.
  4. Boil some water and place the Gluten-free Rice Pasta in a pot with the hot water and boil for a few minutes. Once cooked through (doesn’t take long - don’t overcook), drain and set aside.
  5. Add the pasta to a large mixing bowl with the cooked Tomatoes. Add 2 tablespoons of Pesto Sauce per serving and use a little Olive Oil to help everything mix together.
  6. Serve with a splash of Olive Oil, and Sea Salt & Pepper on top.
Recipe Notes

*AWESOME additions to the above recipe:
1) Add some cooked onion (Jay’s favourite!).
2) Or add cooked Onion and Shitake Mushrooms (Marlene’s favourite!)

*Sprinkle some Vegan Parmesan Cashew Cheese on top to serve.

*You can use a large mouthed jar and an immersion blender, and pulse the Pesto sauce quickly right in the jar.

*Storing tip: use a glass jar with lid just big enough to hold the Pesto sauce (too much air makes sauce go off faster). Use a little Olive Oil to coat the entire inside of jar before adding the Pesto Sauce, then cover the top with a thin layer of Olive Oil before sealing with a lid. 

Gluten-free pasta: Be sure to check your labels. Not all gluten-free pasta is healthy. Avoid soy and corn flour ingredients (most are GMO’s unless certified organic) - even then, soy should rather be avoided (studies are raising questions about soy).

Always top again with Olive Oil when you've used some out of the jar each time. The oil will naturally 'preserve' the Pesto by preventing the sauce from being exposed to air which helps keep the Pesto Sauce for up to a week (if you keep air out and keep a layer of oil on the top).  The oil will also help to prevent molds/moulds from growing too soon on top!

*Tomatoes are on the EWG - Environmental Working Group’s ‘Dirty Dozen’ list which makes them highly sprayed with pesticides. Use organic/spray-free Tomatoes or if you really can’t find any, give the Tomatoes a bath in White Vinegar water (¼ cup White Vinegar mixed with 2-3 cups of water) to help remove as much pesticide residue as possible.

*Store sealed in the fridge.

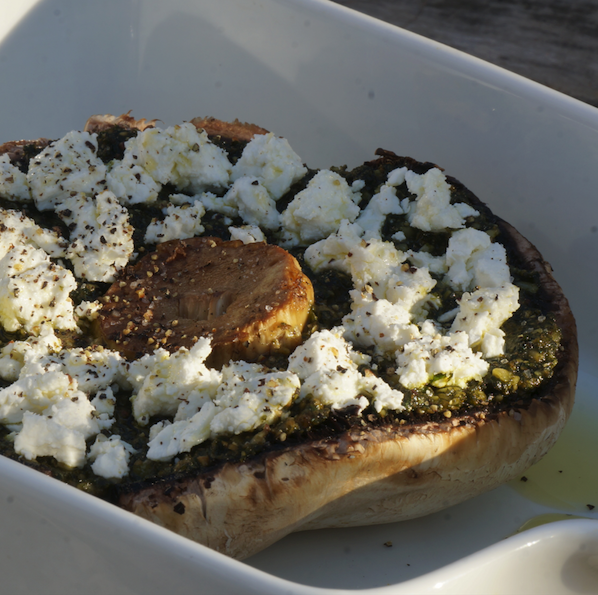
Portobello Mushroom with Pesto & Goats Cheese


Print Recipe
Portobello Mushroom with Pesto & Goats Cheese
You will need: Blender. Medium size glass jar (with lid). Knife & chopping board. Baking Tray (avoid non-stick pans with toxic materials, choose stainless steel instead. Alternatively, use non-toxic/bleach-free baking paper/parchment paper to line your baking tray).
Prep Time 5 - 10 minutes
Cook Time 15 - 20 minutes
Passive Time 15 - 20 minutes (while baking)
Servings
servings
Ingredients
Prep Time 5 - 10 minutes
Cook Time 15 - 20 minutes
Passive Time 15 - 20 minutes (while baking)
Servings
servings
Ingredients
Instructions
  1. Preheat oven to 180°C / 360°F
  2. Pesto Sauce: Crush or chop the garlic finely.
  3. Pesto Sauce: Put all the ingredients together except the tomatoes and bread in a blender, and pulse well enough, while still leaving a little 'coarseness' to the Basil leaves (otherwise Pesto becomes a puree/paste which is not as nice).
  4. Wipe Mushrooms clean using paper towel. Place stalk side up in a baking dish and spoon a generous amount of Pesto sauce onto the mushroom.
  5. Break up the Goats Cheese over the top.
  6. Drizzle a generous amount of Olive Oil, and Sea Salt & Pepper on top.
  7. Bake for 10-15 minutes until Mushroom is soft/cooked all the way through.
Recipe Notes

*Sprinkle some Vegan Parmesan Cashew Cheese on top to serve.

*You can use a large mouthed jar and an immersion blender, and pulse the Pesto sauce quickly right in the jar.

*Storing tip: use a glass jar with lid just big enough to hold the Pesto sauce (too much air makes sauce go off faster). Use a little Olive Oil to coat the entire inside of jar before adding the Pesto Sauce, then cover the top with a thin layer of Olive Oil before sealing with a lid.

Always top again with Olive Oil when you've used some out of the jar each time. The oil will naturally 'preserve' the Pesto by preventing the sauce from being exposed to air which helps keep the Pesto Sauce for up to a week (if you keep air out and keep a layer of oil on the top).  The oil will also help to prevent molds/moulds from growing too soon on top!

*Store sealed in a glass jar in the fridge.

Raw Sweet Potato Pesto Pasta


Print Recipe
Raw Sweet Potato Pesto Pasta
You will need: Blender. Medium size glass jar (with lid). To thinly slice Sweet Potato you can use either a Spiralizer or if you don’t have one of these you can use a vegetable peeler to peel thin slices for the ‘pasta’.
Prep Time 15 minutes
Cook Time 0
Passive Time 0
Servings
servings
Ingredients
Prep Time 15 minutes
Cook Time 0
Passive Time 0
Servings
servings
Ingredients
Instructions
  1. Pesto Sauce: Crush or chop the garlic finely.
  2. Pesto Sauce: Put all the ingredients together except the tomatoes and bread in a blender, and pulse well enough, while still leaving a little 'coarseness' to the Basil leaves (otherwise Pesto becomes a puree/paste which is not as nice).
  3. Chop the Sun-dried Tomatoes and spiralize or use a vegetable peeler to peel slices of the Sweet Potato to use as the ‘pasta’.
  4. Add the Sun-dried Tomatoes and Sweet Potato to a large mixing bowl. Add 2 tablespoons of Pesto Sauce per serving and use a little Olive Oil to help everything mix together.
  5. Serve with a splash of Olive Oil, and Sea Salt & Pepper on top.
Recipe Notes

*Sprinkle some Vegan Parmesan Cashew Cheese on top to serve.

*You can use a large mouthed jar and an immersion blender, and pulse the Pesto sauce quickly right in the jar.

*Storing tip: use a glass jar with lid just big enough to hold the Pesto sauce (too much air makes sauce go off faster). Use a little Olive Oil to coat the entire inside of jar before adding the Pesto Sauce, then cover the top with a thin layer of Olive Oil before sealing with a lid.

Always top again with Olive Oil when you've used some out of the jar each time. The oil will naturally 'preserve' the Pesto by preventing the sauce from being exposed to air which helps keep the Pesto Sauce for up to a week (if you keep air out and keep a layer of oil on the top).  The oil will also help to prevent molds/moulds from growing too soon on top!

*Store sealed in a glass jar in the fridge.

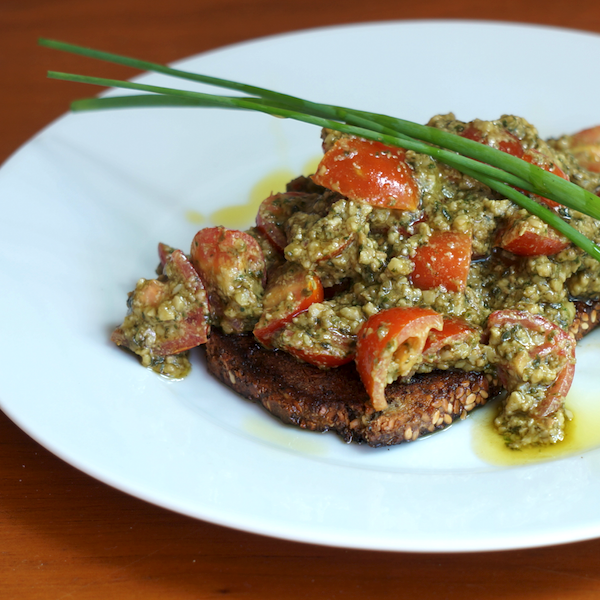
Pesto & Tomato Bruschetta


Print Recipe
Pesto & Tomato Bruschetta
You will need: blender; chopping board & knife; medium size glass jar (with lid). NOTE: Pinenuts have become extremely expensive in recent years, and can often be difficult to find. I have been making my Pesto with a mix of Cashew Nuts & Sunflower Seeds (sometimes other nuts/seeds) for quite some time and I actually prefer the taste. Experiment and see which ones/combination you like.
Prep Time 10-15 minutes
Cook Time 0
Passive Time 0
Servings
servings
Ingredients
Prep Time 10-15 minutes
Cook Time 0
Passive Time 0
Servings
servings
Ingredients
Instructions
  1. Crush or chop the garlic finely.
  2. Put all the ingredients together except the tomatoes and bread in a blender, and pulse well enough, while still leaving a little 'coarseness' to the Basil leaves (otherwise Pesto becomes a puree/paste which is not as nice).
  3. Chop the Baby Tomatoes and mix in a couple tablespoons of the Pesto Sauce. Add a little Olive Oil to help it mix together.
  4. Toast the bread. Optional - use an extra clove of Garlic to rub onto the surface of the toasted bread.
  5. Add a little Olive Oil onto the toasted bread before generously spooning the Tomato Pesto mixture onto the top of the bread. Serve with a splash of Olive Oil, and Sea Salt & Pepper on top.
Recipe Notes

*Make your own Gluten-free/Wheat-free Clean Multiseed Bread.

*You can use a large mouthed jar and an immersion blender, and pulse this sauce quickly right in the jar.

*Storing tip: use a glass jar with lid just big enough to hold the Pesto sauce (too much air makes sauce go off faster). Use a little Olive Oil to coat the entire inside of jar before adding the Pesto Sauce, then cover the top with a thin layer of Olive Oil before sealing with a lid.

Always top again with Olive Oil when you've used some out of the jar each time. The oil will naturally 'preserve' the Pesto by preventing the sauce from being exposed to air which helps keep the Pesto Sauce for up to a week (if you keep air out and keep a layer of oil on the top).  The oil will also help to prevent molds/moulds from growing too soon on top!

*Store sealed in the fridge.

*Tomatoes are on the EWG - Environmental Working Group’s ‘Dirty Dozen’ list which makes them highly sprayed with pesticides. Use organic/spray-free Tomatoes or if you really can’t find any, give the Tomatoes a bath in White Vinegar water (¼ cup White Vinegar mixed with 2-3 cups of water) to help remove as much pesticide residue as possible.

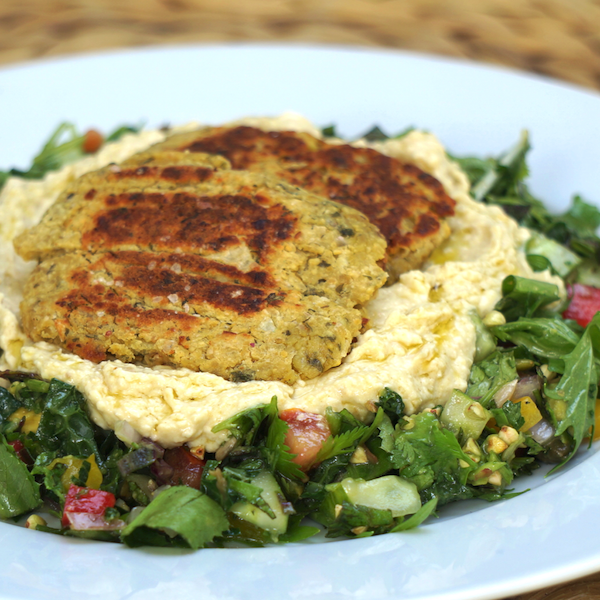
Falafel Salad Plate

This is one of those awesome make-in-bulk-and-freeze kinda recipes. This is something I make big batches of, portion and then store sealed in smaller containers in the freezer for those all too familiar week day evenings when you are stretched for time or don’t feel like preparing something from scratch. There are so many ways to enjoy this Falafel mix. Make into balls or smaller ‘bites’ and serve with a dip or sauce for lunch boxes, social get togethers, or as a healthy filling little snack in between meals. You can create burger size patties and serve with salad or on toasted Clean Multiseed Bread. Perhaps you prefer to serve them between lettuce leaves instead of a burger bun. Or in between sliced and toasted Coconut Buckwheat Flatbreads, (or your choice of locally sourced gluten-free buns).

This recipe is: Gluten-free (GF), Wheat-free (WF), Dairy-free (DF), refined Sugar-free (SF), Plant-based/Vegan (PB), Vegetarian (V)

Print Recipe
Falafel Salad Plate
You will need: food processor or blender NOTE: You can pre-make this mixture a day or few hours before using, for flavours and dough to 'develop' - this is not necessary though of course. If making homemade Hummus, this recipe will take 15 minutes longer to make.
Prep Time 15 minutes
Cook Time 10-15 minutes
Passive Time 0
Servings
servings
Ingredients
Falafel Mix
Creamy Hummus
Salad (per person portion)
Prep Time 15 minutes
Cook Time 10-15 minutes
Passive Time 0
Servings
servings
Ingredients
Falafel Mix
Creamy Hummus
Salad (per person portion)
Instructions
  1. Preheat oven to 350°F or 180°C. You can skip this and cook on stove top in a pan.
  2. Falafel Patties: Combine everything except Chickpea Flour and Baking Powder in a food processor.
  3. Falafel Patties: Pulse to create a rough, but well combined mixture - don't pulse/blend for too long or else you will make a puree/paste.
  4. Falafel Patties: Pulse in the Baking Powder and half the Chickpea Flour. Only add enough flour to make dough slightly firm to press into shapes.
  5. Falafel Patties: Line a baking tray (or cooking pan) with non-toxic parchment paper or silicon baking mats.
  6. Falafel Patties: Shape the mixture into your choice of either bites, balls or patties and space them out onto the baking tray (or cooking pan).
  7. Falafel Patties: Bake for 10-15 minutes on one side, turn over and bake for a further 10-15 minutes, or until golden brown. If cooking with a pan, cook on low heat for the same amount of time.
  8. Falafel Patties: Optional - You can brown the patties up in a little heated Coconut Oil in the pan to finish them off.
  9. Creamy Hummus: Blend Tahini and Lemon Juice together until smooth, fluffy and creamy - continually scrape sides using a spatula to combine well.
  10. Creamy Hummus: Add Garlic, Cumin, Salt, Olive Oil. Blend well.
  11. Creamy Hummus: Slowly add Chickpeas to the mix, blending in between.
  12. Creamy Hummus: Only add Water if need be to reach desired consistency.
  13. Combine your choice of Salad Ingredients on a plate, add 2-3 tablespoons of Hummus and add the patties to the Salad plate.
Recipe Notes

*Avoid baking/cooking on aluminium and non-stick surfaces - they will bake/leach toxic substances into your food. Cook with stainless steel and ceramic where possible. Or use bleach-free, non-toxic baking paper and food-grade silicon mats to line baking trays or pots and pans when baking, and cooking on stove top. Use a little Coconut Oil in a stainless steel pan if you prefer not to bake.

*As mentioned, this recipe can be made in bulk, portioned into smaller containers, sealed and stored in the fridge or freezer.

*If you can, choose organic Chickpeas canned in BPA-free cans. I use an organic brand called Eden (available in Australia & USA). Haven't yet found a brand in South Africa - please share in our Fresh Life Community Facebook page if you do find one.

*See Creamy Hummus Dip recipe to see how to activate and prepare Chickpeas from scratch.

Serving suggestions:

* Make Falafel burgers, by putting them between two sides of a toasted Coconut Buckwheat Flatbread, served with Hummus and salad ingredients.

* Made into balls they are great for lunch boxes or served with a dip as a pre-dinner snack
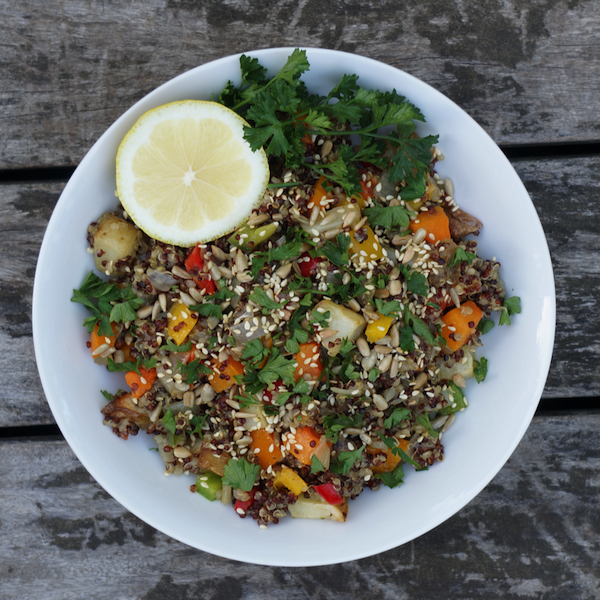
Sunflower & Sesame Warm Quinoa Salad


Print Recipe
Sunflower & Sesame Warm Quinoa Salad
You will need: Baking tray; large pan; pot; cooking utensils
Prep Time 10-15 minutes
Cook Time 30 minutes
Passive Time 0
Servings
servings
Ingredients
Optional
Prep Time 10-15 minutes
Cook Time 30 minutes
Passive Time 0
Servings
servings
Ingredients
Optional
Instructions
  1. Preheat oven to 180°C / 350°F
  2. Chop Potatoes into 1 inch cubes. Add 1 tbsp of Oil to baking tray and bake until soft (approx. 15-20 min)
  3. Chop Butternut Squash into 1 inch cubes, add to the tray and cook for a further 10-15min until squats is soft and potatoes are a little crispy.
  4. While veg are baking, add Quinoa and water to a pot and bring to a boil. Stir frequently until all water is absorbed and Quinoa has expanded and has a translucent middle. Add stock and cook on medium heat, stirring frequently until all moisture is absorbed.
  5. Chop Onion and add to a pan with 1 tbsp of Oil on high heat. Stir frequently and cook until onions are browned. Remove from heat.
  6. Chop and add the Zucchini and Capsicums/Bell Peppers to the pan and cook on medium heat for 2-3 minutes (keep veggies crunchy).
  7. Add the Quinoa and Garlic to the pan and cook on medium heat for 1-2 minutes.
  8. Serve Quinoa dish with roasted veggies on the side or mixed through.
  9. Top with a squeeze of fresh Lemon / Lime, chopped Parsley and toasted Nuts & Seeds.
  10. Optional - add shavings of Broccoli flowers and a little crumbed Goat Cheese Feta.
Recipe Notes

Clean Eating Tips to remember:

*Stainless Steel and Ceramic or Glass Cookware are the safest materials to cook in with the least amount of leaching into food when heat is applied. A high quality set of cookware is essential and will last a lifetime - and a longer lifetime at that because of it.

*Stainless Steel, Food-grade Silicon or Wooden Cooking Utensils are the safest materials to cook with with the least amount of leaching into food when heat is applied.

*My ½ Toasted / ½ Raw Philosophy for Nuts & Seeds:
Toasted - for flavour
Raw - for nutritional value

*Olive Oil - it’s best not to cook with Olive Oil, always consume raw. Best to drizzle Olive Oil over food just before serving. It’s better to avoid cooking with Olive Oil as it is a delicate oil and is damaged and becomes harmful to ingest when heated.

*Better oils for cooking with have a higher smoke point/less free radical forming when heated— Coconut Oil, Macadamia Oil and Grapeseed Oil

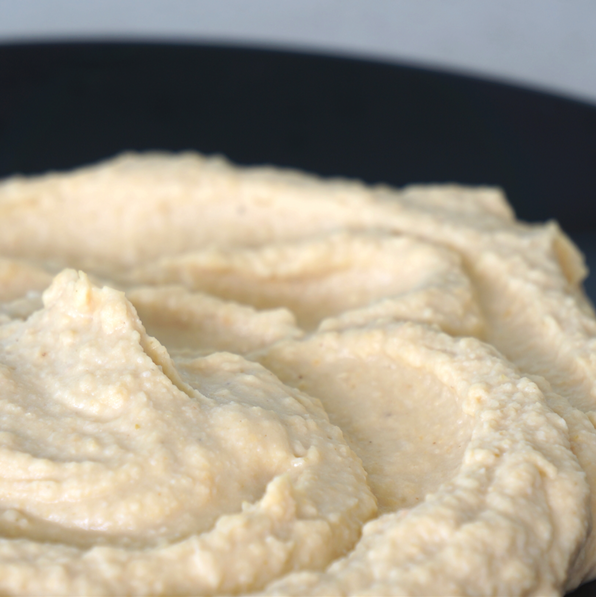
Creamy Hummus Dip


You’ll love the creaminess of this Hummus, and there is a trick you’ll learn in this recipe that ensures it comes out with a beautiful smooth consistency. A good Hummus is hard to beat, and can be added to salads, sandwiches and wraps or be enjoyed straight out of the jar. I regularly make and keep a jar of Hummus on hand in our fridge for every kind of occasion.

This recipe is: Gluten-free (GF), Wheat-free (WF), Dairy-free (DF), refined Sugar-free (SF), Plant-based/Vegan (PB), Vegetarian (V)

Print Recipe
Creamy Hummus Dip
You will need: food processor or blender
Prep Time 10-15 minutes
Servings
servings
Ingredients
Prep Time 10-15 minutes
Servings
servings
Ingredients
Instructions
  1. Blend Tahini and Lemon Juice together until smooth, fluffy and creamy - continually scrape sides using a spatula to combine well.
  2. Add Garlic, Cumin, Salt, Olive Oil. Blend well.
  3. Slowly add Chickpeas to the mix, blending in between.
  4. Only add Water if need be to reach desired consistency.
Recipe Notes

Serving suggestion:

* Garnish with a few Kalamata Olives, a drizzle of Olive Oil and a sprinkle of Paprika.

* Serve with fresh slices of Carrot, Cucumber, Capsicum/Bell Peppers or any other veg you like, or Flaxseed Crackers or any preferred choice of gluten-free crackers.

Other Notes:

*If you can, choose organic Chickpeas canned in BPA-free cans. I use an organic brand called Eden (available in Australia & USA). Haven't yet found a brand in South Africa - please share in our Fresh Life Community Facebook page if you do find one.

*I like the above mentioned brand because they prepare their beans with Kombu seaweed, which helps break down the oligosaccharides in beans which can hinder or upset the digestion process (acting as an enzyme inhibitor).

This is good if you don't usually do very well with beans and legumes. Bean’s and Legume’s enzyme inhibitors can cause slightly upset tummies which is why they are joked about as ‘causing gas’. 

You can buy your own Kombu seaweed from an Asian supermarket and activate/remove enzyme inhibitors by boiling store bought Chickpeas for 15-20 minutes with hot water and Kombu Seaweed,

*Or you can make your own Chickpeas from scratch:
It's not as hard as it seems, I've recently been doing this and it just takes a little planning/time management.

Day 1 PM - Soak Chickpeas in water (add few extra inches water above Chickpeas - keep covered), with 1 tsp of Sea Salt per litre/gallon.

Day 2 AM - Change water (using same formula as above).

Day 2 PM - Boil Chickpeas until soft. This usually takes a couple hours, so plan to do this while you’re watching a documentary in the evening. Drain and let cool. Store in fridge before bed.

Day 3 anytime - follow recipe above to make your from-scratch Hummus!
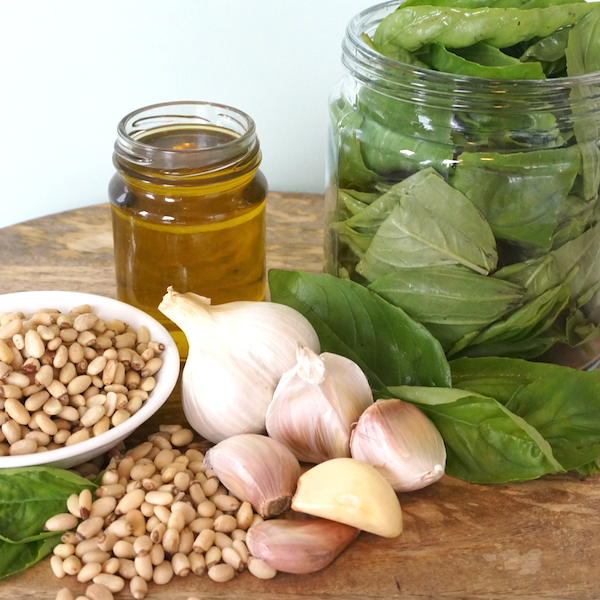
Plant-based Pesto Sauce

I just love finding ways to enjoy favourite foods, choosing to use only the ‘cleanest’ combinations of ingredients possible. This Plant-based Pesto Sauce still packs a tasty punch. All one really needs to do is leave out the traditionally added parmesan cheese and your Pesto will still taste like, well… Pesto! I make this recipe so often and use Pesto in many delicious ways in my own kitchen.

This recipe is: Gluten-free (GF), Wheat-free (WF), Dairy-free (DF), refined Sugar-free (SF), Plant-based/Vegan (PB), Vegetarian (V)

Print Recipe
Plant-based Pesto Sauce
You will need: food processor or blender
Prep Time 10-15 minutes
Servings
servings
Ingredients
Prep Time 10-15 minutes
Servings
servings
Ingredients
Instructions
  1. Crush or chop the garlic finely.
  2. Put all the ingredients together in a blender, and pulse well enough, while still leaving a little 'coarseness' to the Basil leaves (otherwise sauce becomes a Pesto puree/paste which is not as nice).
Recipe Notes

*You can use a large mouthed jar and an immersion blender, and pulse this sauce quickly right in the jar.

*Storing tip: use a glass jar with lid just big enough to hold sauce (too much air makes sauce go off faster). Use a little Olive Oil to coat the entire inside of jar before adding the Pesto Sauce, then cover the top with a thin layer of Olive Oil before sealing with a lid.

Always top again with Olive Oil when you've used some out of the jar each time. The oil will naturally 'preserve' the Pesto by preventing the sauce from being exposed to air which helps keep the Pesto Sauce for up to a week (if you keep air out and keep a layer of oil on the top).  The oil will also help to prevent molds/moulds from growing too soon on top!

*Store sealed in the fridge.

Serving suggestions:
* Thinly shave fresh zucchini using a potato peeler or other peeler/spiraliser, and toss with fresh or sun-dried or cooked tomatoes.
*Mix into cooked Rice Noodles and cooked Tomatoes for a quick Pesto Pasta dish.
* Add a little to mayonnaise to make a Pesto Mayo, or just use as is, and add to sandwiches, wraps and burgers.
* Combine with fresh chopped baby tomatoes to top some freshly toasted Clean Multiseed Bread. Finish with a drizzle of Olive Oil on top.
* Add a layer of Pesto Sauce to freshly toasted bread (as linked above) and add grilled veggies, such as capsicum, eggplant, zucchini to make a delicious Mediterranean stack. Finish with a drizzle of Olive Oil on top.